Add a CodeBuild test action to a pipeline (CodePipeline console)
-
Sign in to the Amazon Web Services Management Console by using:
-
Your Amazon root account. This is not recommended. For more information, see The account root user in the user Guide.
-
An administrator user in your Amazon account. For more information, see Creating your first Amazon Web Services account root user and group in the user Guide.
-
An user in your Amazon account with permission to perform the following minimum set of actions:
codepipeline:*
iam:ListRoles
iam:PassRole
s3:CreateBucket
s3:GetBucketPolicy
s3:GetObject
s3:ListAllMyBuckets
s3:ListBucket
s3:PutBucketPolicy
codecommit:ListBranches
codecommit:ListRepositories
codedeploy:GetApplication
codedeploy:GetDeploymentGroup
codedeploy:ListApplications
codedeploy:ListDeploymentGroups
elasticbeanstalk:DescribeApplications
elasticbeanstalk:DescribeEnvironments
lambda:GetFunctionConfiguration
lambda:ListFunctions
opsworks:DescribeStacks
opsworks:DescribeApps
opsworks:DescribeLayers
-
-
Open the CodePipeline console at https://console.amazonaws.cn/codesuite/codepipeline/home
. -
In the Amazon region selector, choose the Amazon Region where your pipeline is located. This must be an Amazon Region where CodeBuild is supported. For more information, see Amazon CodeBuild in the Amazon Web Services General Reference.
-
On the Pipelines page, choose the name of the pipeline.
-
On the pipeline details page, in the Source action, choose the tooltip. Make a note of the value for Output artifact (for example, MyApp).
Note
This procedure shows you how to add a test action inside of a test stage between the Source and Beta stages. If you want to add the test action somewhere else, rest your mouse pointer on the action just before, and make a note of the value for Output artifact.
-
Choose Edit.
-
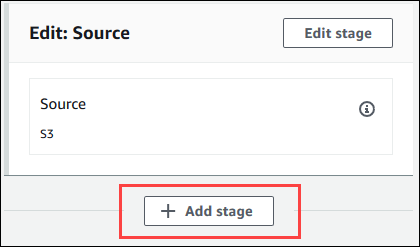
Immediately after the Source stage, choose Add stage.
Note
This procedure shows you how to add a test stage immediately after the Source stage to your pipeline. To add a test action to an existing stage, choose Edit stage in the stage, and then skip to step 8 of this procedure. To add the test stage somewhere else, choose Add stage in the desired place.
-
For Stage name, enter the name of the test stage (for example,
Test). If you choose a different name, use it throughout this procedure. -
In the selected stage, choose Add action.
Note
This procedure shows you how to add the test action in a test stage. To add the test action somewhere else, choose Add action in the desired place. You might first need to choose Edit in the existing stage where you want to add the test action.
-
In Edit action, for Action name, enter a name for the action (for example,
Test). If you choose a different name, use it throughout this procedure. -
For Action provider, under Test, choose CodeBuild.
-
If you already have a build project you want to use, for Project name, choose the name of the build project and skip to the next step in this procedure.
If you need to create a new CodeBuild build project, follow the instructions in Create a build project (console) and return to this procedure.
Important
If you enable webhooks for a CodeBuild project, and the project is used as a build step in CodePipeline, then two identical builds are created for each commit. One build is triggered through webhooks and one through CodePipeline. Because billing is on a per-build basis, you are billed for both builds. Therefore, if you are using CodePipeline, we recommend that you disable webhooks in CodeBuild. In the CodeBuild console, clear the Webhookbox. For more information, see Change a build project's settings (console)
-
For Input artifacts, select the value for Output artifact that you noted earlier in this procedure.
-
(Optional) If you want your test action to produce an output artifact, and you set up your buildspec accordingly, then for Output artifact, enter the value you want to assign to the output artifact.
-
Choose Save.
-
Choose Release change.
-
After the pipeline runs successfully, you can get the test results. In the Test stage of the pipeline, choose the CodeBuild hyperlink to open the related build project page in the CodeBuild console.
-
On the build project page, in Build history, choose the Build run hyperlink.
-
On the build run page, in Build logs, choose the View entire log hyperlink to open the build log in the Amazon CloudWatch console.
-
Scroll through the build log to view the test results.