Connecting to your Amazon RDS for Db2 DB instance with DBeaver
You can use third-party tools such as DBeaver to connect to Amazon RDS for Db2 DB
instances. To download this utility, see DBeaver Community
To connect to your RDS for Db2 DB instance, you need its DNS name and port number. For information about finding them, see Finding the endpoint. You also need to know the database name, master username, and master password that you defined when you created your RDS for Db2 DB instance. For more information about finding them, see Creating a DB instance.
To connect to an RDS for Db2 DB instance with DBeaver
-
Start DBeaver.
-
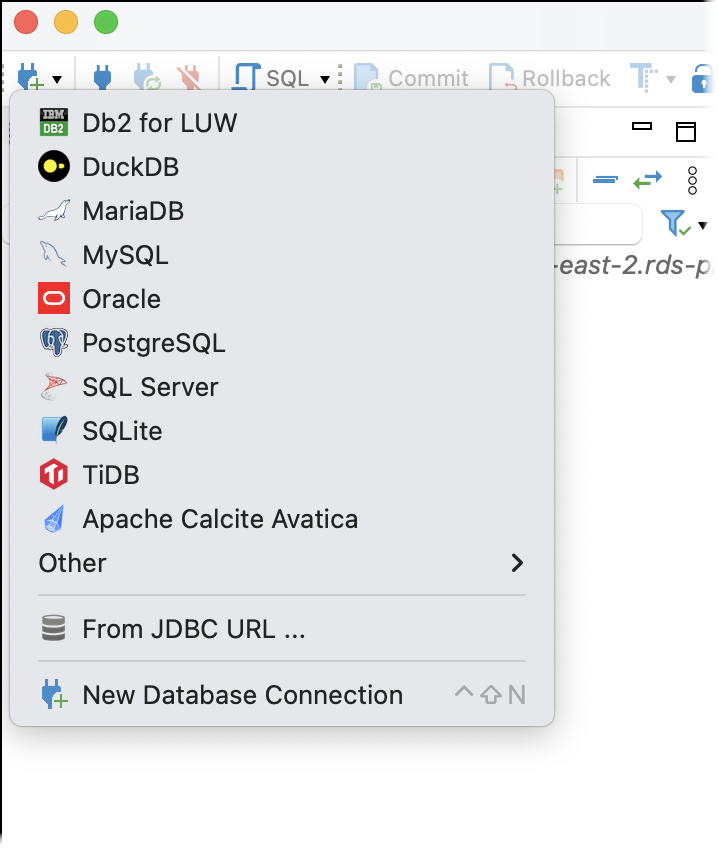
Choose the New Connection icon in the toolbar and then choose Db2 for LUW.

-
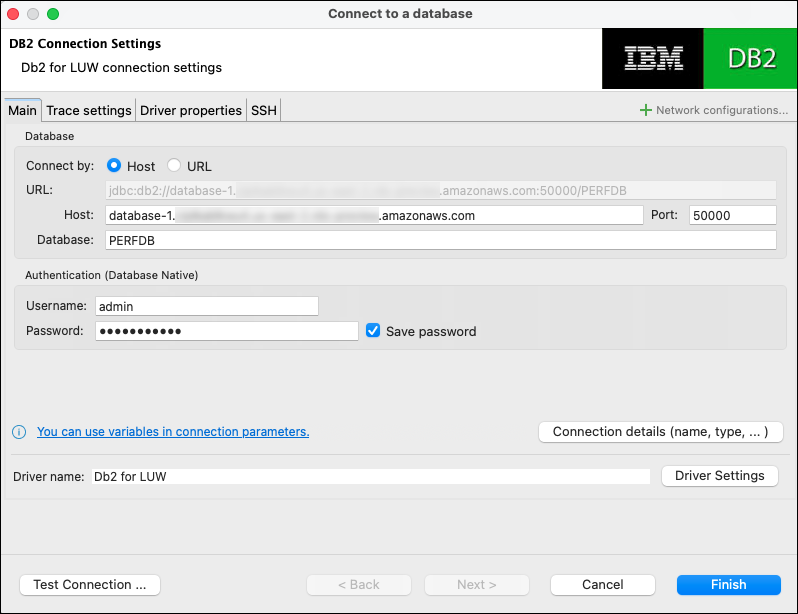
In the Connect to a database window, provide information for your RDS for Db2 DB instance.
-
Enter the following information:
-
For Host, enter the DNS name of the DB instance.
-
For Port, enter the port number for the DB instance.
-
For Database, enter the name of the database.
-
For Username, enter the name of the database administrator for the DB instance.
-
For Password, enter the password of the database administrator for the DB instance.
-
-
Select Save password.
-
Choose Driver Settings.

-
-
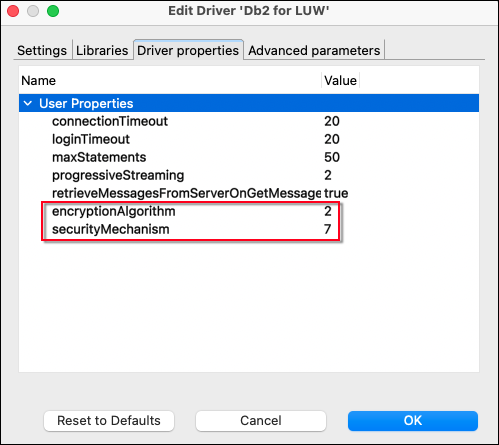
In the Edit Driver window, specify additional security properties.
-
Choose the Driver properties tab.
-
Add two User Properties.
-
Open the context (right-click) menu, and then choose Add new property.
-
For Property Name, add encryptionAlgorithm, and then choose OK.
-
With the encryptionAlgorithm row selected, choose the Value column and add 2.
-
Open the context (right-click) menu, and then choose Add new property.
-
For Property Name, add securityMechanism, and then choose OK.
-
With the securityMechanism row selected, choose the Value column and add 7.
-
-
Choose OK.

-
-
In the Connect to a database window, choose Test Connection. If you don't have a DB2 JBDC driver installed on your computer, then the driver automatically downloads.
-
Choose OK.
-
Choose Finish.
-
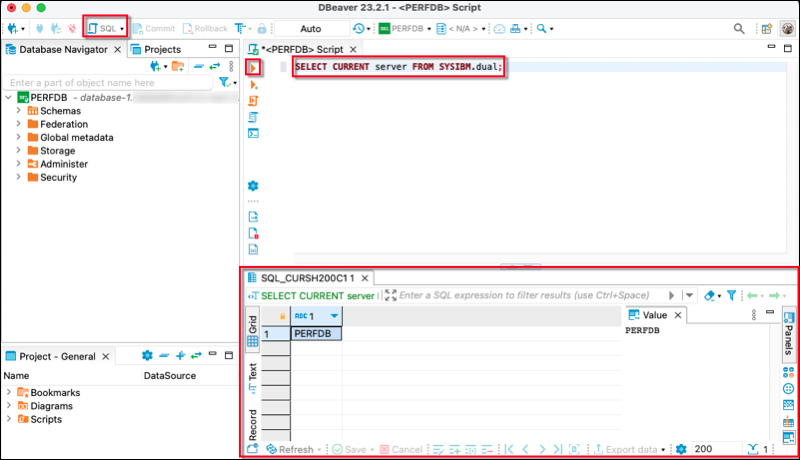
In the Database Navigation tab, choose the name of the database. You can now explore objects.
You are now ready to run SQL commands.
To run SQL commands and view the results
-
In the top menu, choose SQL. This opens a SQL script panel.
-
In the Script panel, enter a SQL command.
-
To run the command, choose the Execute SQL query button.
-
In the SQL results panel, view the results of your SQL queries.
