Configure SSO for ODBC using the Okta plugin and Okta Identity Provider
This page describes how to configure the Amazon Athena ODBC driver and Okta plugin to add single sign-on (SSO) capability using the Okta identity provider.
Prerequisites
Completing the steps in this tutorial requires the following:
-
Amazon Athena ODBC driver. For download links, see Connect to Amazon Athena with ODBC.
-
An IAM Role that you want to use with SAML. For more information, see Creating a role for SAML 2.0 federation in the IAM User Guide.
-
An Okta account. For information, visit Okta.com
.
Creating an app integration in Okta
First, use the Okta dashboard to create and configure a SAML 2.0 app for single sign-on to Athena. You can use an existing Redshift application in Okta to configure access to Athena.
To create an app integration in Okta
-
Log in to the admin page for your account on Okta.com
. -
In the navigation panel, choose Applications, Applications.
-
On the Applications page, choose Browse App Catalog.
-
On the Browse App Integration Catalog page, in the Use Case section, choose All Integrations.
-
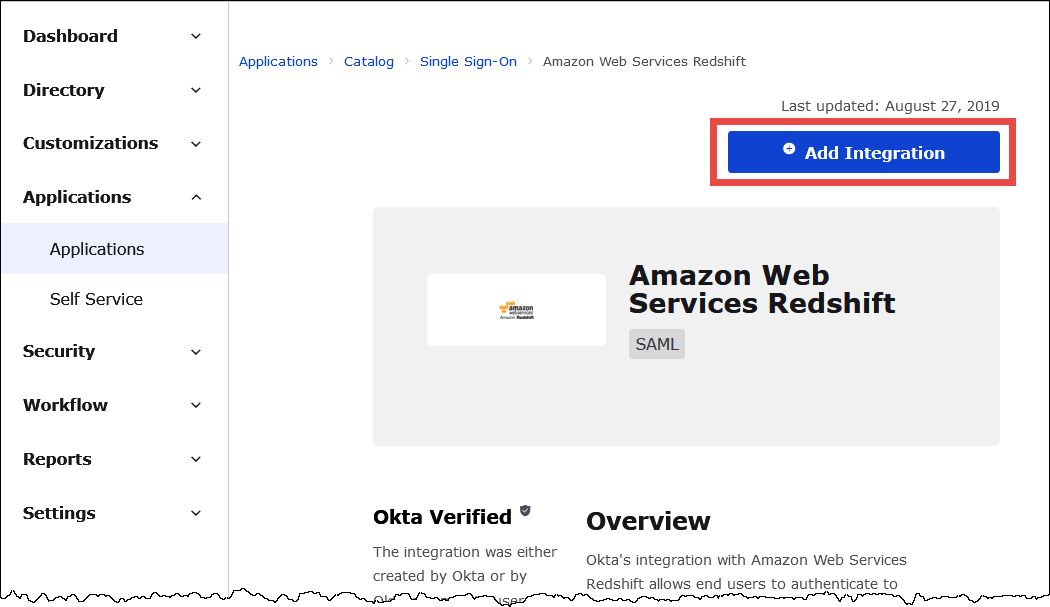
In the search box, enter Amazon Web Services Redshift, and then choose Amazon Web Services Redshift SAML.
-
Choose Add Integration.
-
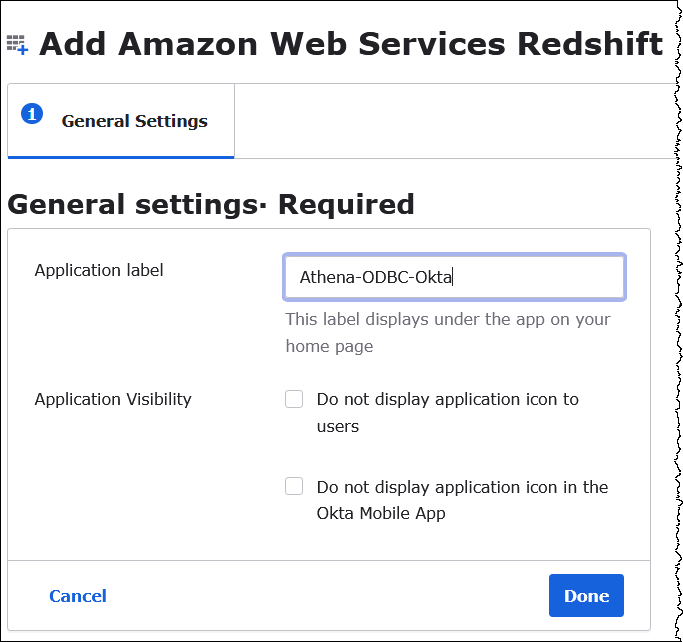
In the General Settings Required section, for Application label, enter a name for the application. This tutorial uses the name Athena-ODBC-Okta.
-
Choose Done.
-
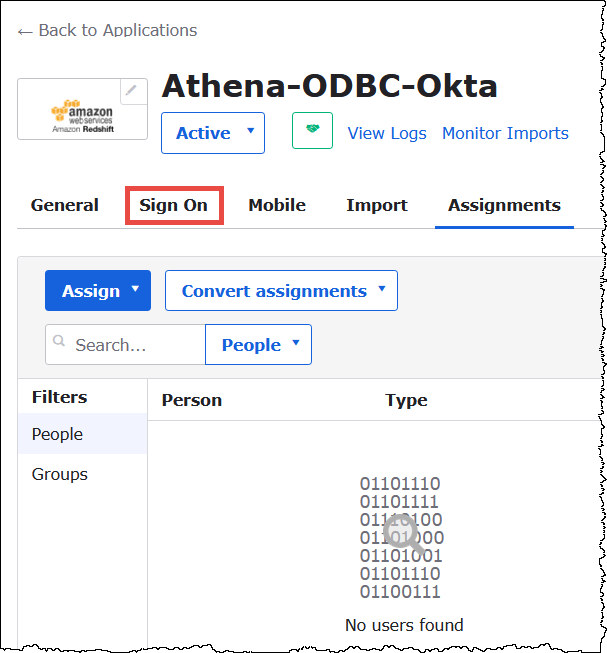
On the page for your Okta application (for example, Athena-ODBC-Okta), choose Sign On.
-
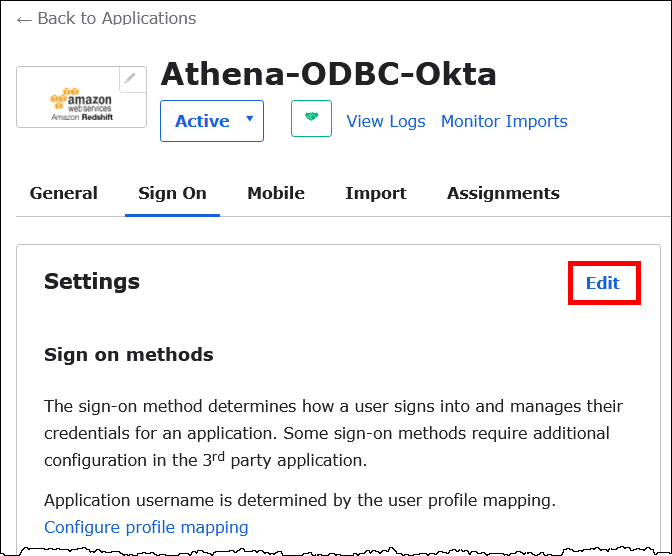
In the Settings section, choose Edit.
-
In the Advanced Sign-on Settings section, configure the following values.
-
For IdP ARN and Role ARN, enter your Amazon IDP ARN and Role ARN as comma-separated values. For information about the IAM role format, see Configuring SAML assertions for the authentication response in the IAM User Guide.
-
For Session Duration, enter a value between 900 and 43200 seconds. This tutorial uses the default of 3600 (1 hour).
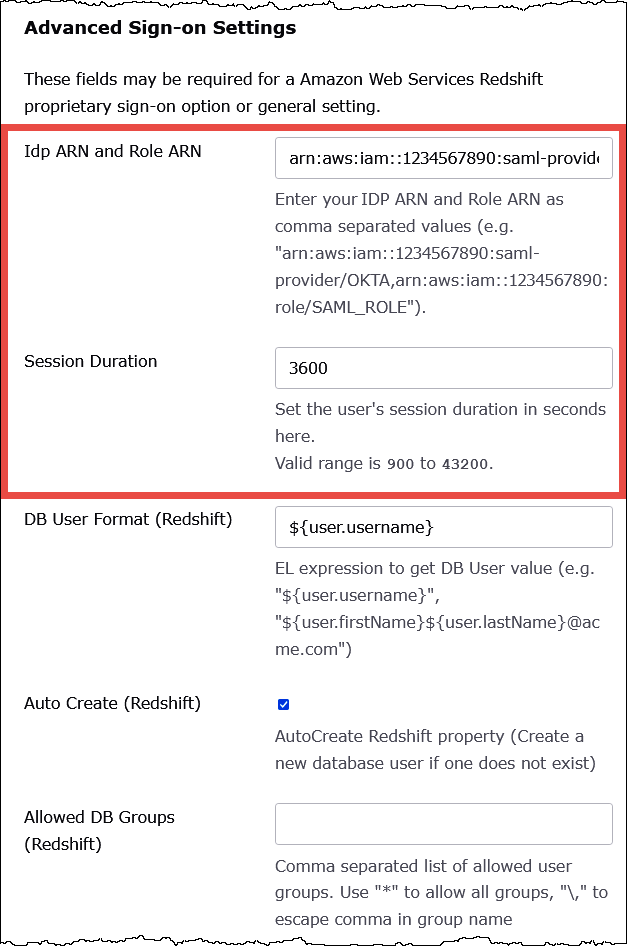
The DbUser Format, AutoCreate, and Allowed DBGroups settings aren't used by Athena. You don't have to configure them.
-
-
Choose Save.
Retrieve ODBC configuration information from Okta
Now that you created the Okta application, you're ready to retrieve the application's ID and IdP host URL. You will require these later when you configure ODBC for connection to Athena.
To retrieve configuration information for ODBC from Okta
-
Choose the General tab of your Okta application, and then scroll down to the App Embed Link section.
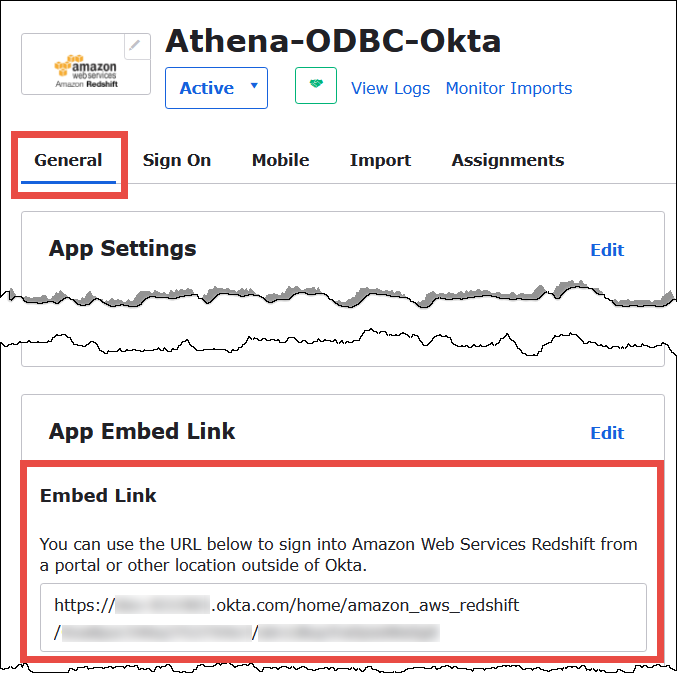
Your Embed Link URL is in the following format:
https://trial-1234567.okta.com/home/amazon_aws_redshift/Abc1de2fghi3J45kL678/abc1defghij2klmNo3p4 -
From your Embed Link URL, extract and save the following pieces:
-
The first segment after
https://, up to and includingokta.com(for example, trial-1234567.okta.com). This is your IdP host. -
The last two segments of the URL, including the forward slash in the middle. The segments are two 20-character strings with a mix of numbers and upper and lowercase letters (for example, Abc1de2fghi3J45kL678/abc1defghij2klmNo3p4). This is your application ID.
-
Add a user to the Okta application
Now you're ready to add a user to your Okta application.
To add a user to the Okta application
-
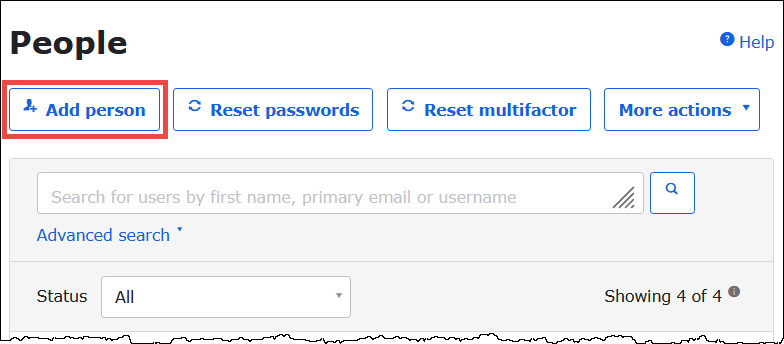
In the left navigation pane, choose Directory, and then choose People.
-
Choose Add person.
-
In the Add Person dialog box, enter the following information.
-
Enter values for First name and Last name. This tutorial uses
test
                            user
. -
Enter values for Username and Primary email. This tutorial uses
test@amazon.comfor both. Your security requirements for passwords might vary.
-
-
Choose Save.
Now you're ready to assign the user that you created to your application.
To assign the user to your application:
-
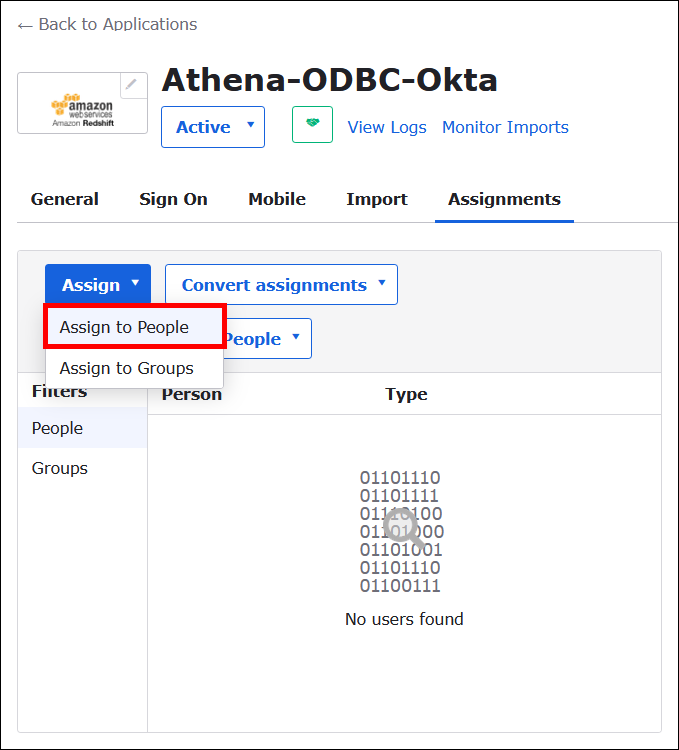
In the navigation pane, choose Applications, Applications, and then choose the name of your application (for example, Athena-ODBC-Okta).
-
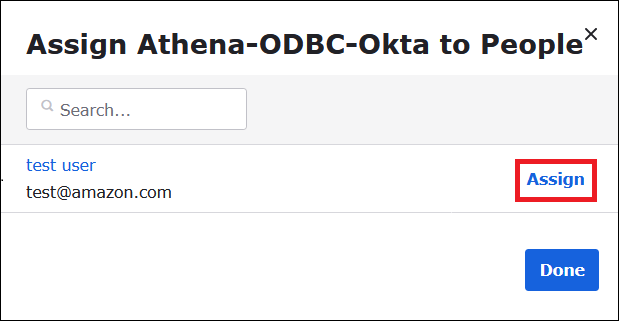
Choose Assign, and then choose Assign to People.
-
Choose the Assign option for your user, and then choose Done.
-
At the prompt, choose Save and Go Back. The dialog box shows the user's status as Assigned.
-
Choose Done.
-
Choose the Sign On tab.
-
Scroll down to the SAML Signing Certificates section.
-
Choose Actions.
-
Open the context (right-click) menu for View IdP metadata, and then choose the browser option to save the file.
-
Save the file with an
.xmlextension.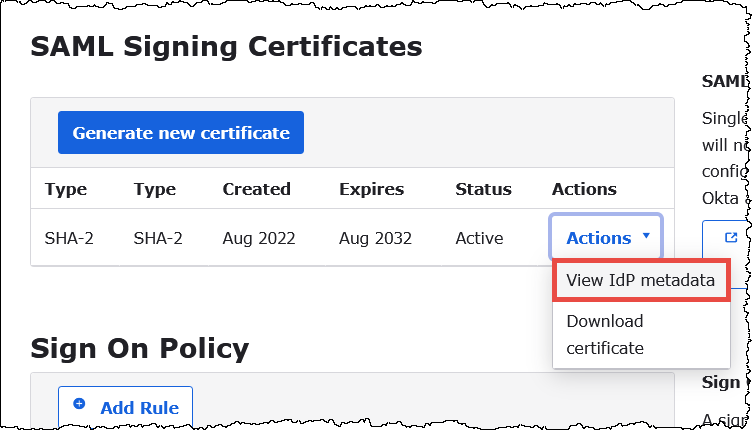
Create an Amazon SAML Identity Provider and Role
Now you are ready to upload the metadata XML file to the IAM console in Amazon. You will use this file to create an Amazon SAML identity provider and role. Use an Amazon Services administrator account to perform these steps.
To create a SAML identity provider and role in Amazon
-
Sign in to the Amazon Web Services Management Console and open the IAM console at https://console.aws.amazon.com/IAM/
. -
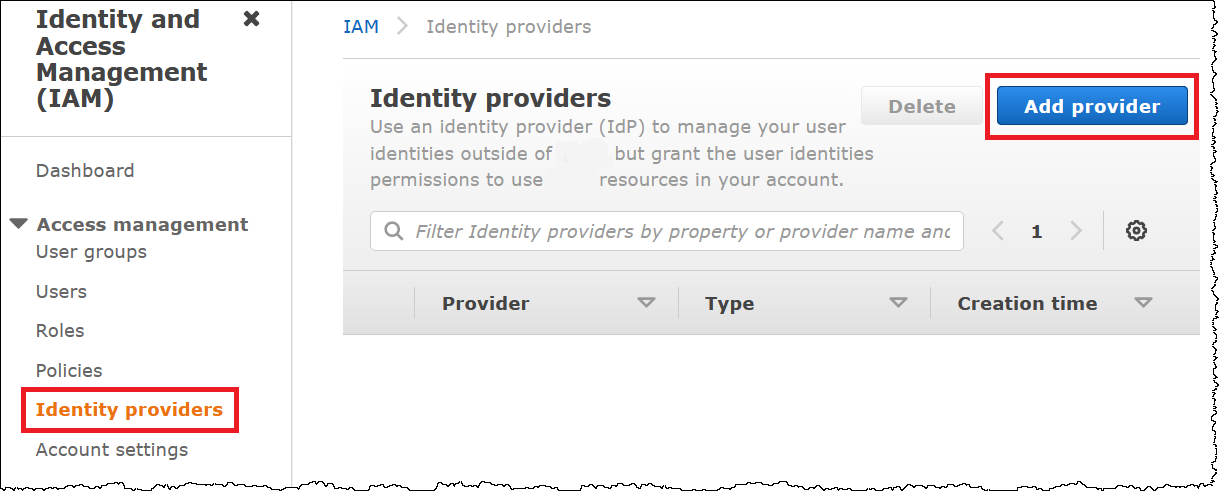
In the navigation pane, choose Identity providers, and then choose Add provider.
-
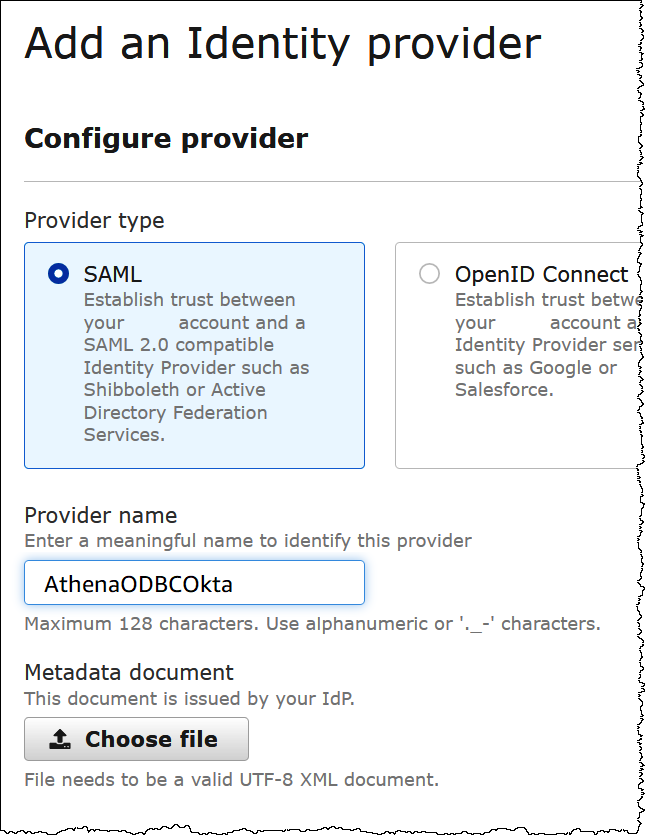
On the Add an Identity provider page, for Configure provider, enter the following information.
-
For Provider type, choose SAML.
-
For Provider name, enter a name for your provider (for example,
AthenaODBCOkta). -
For Metadata document, use the Choose file option to upload the identity provider (IdP) metadata XML file that you downloaded.
-
-
Choose Add provider.
Creating an IAM role for Athena and Amazon S3 access
Now you are ready to create an IAM role for Athena and Amazon S3 access. You will assign this role to your user. That way, you can provide the user with single sign-on access to Athena.
To create an IAM role for your user
-
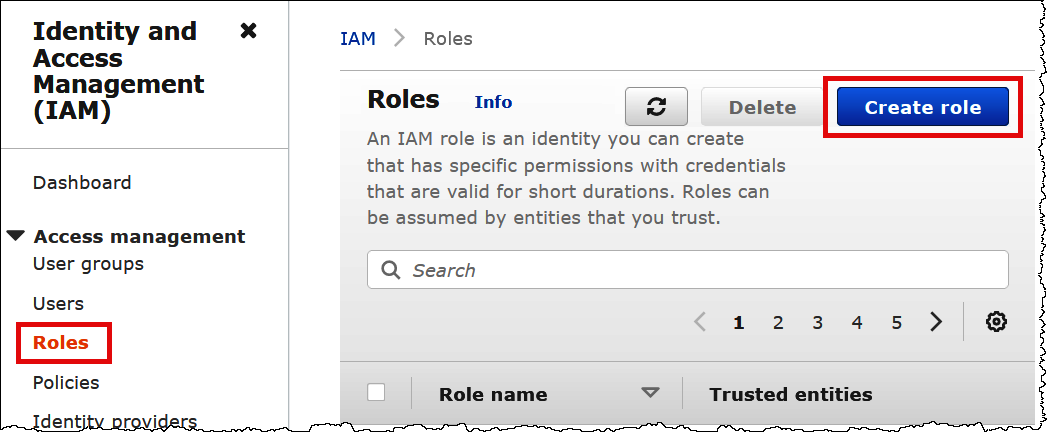
In the IAM console navigation pane, choose Roles, and then choose Create role.
-
On the Create role page, choose the following options:
-
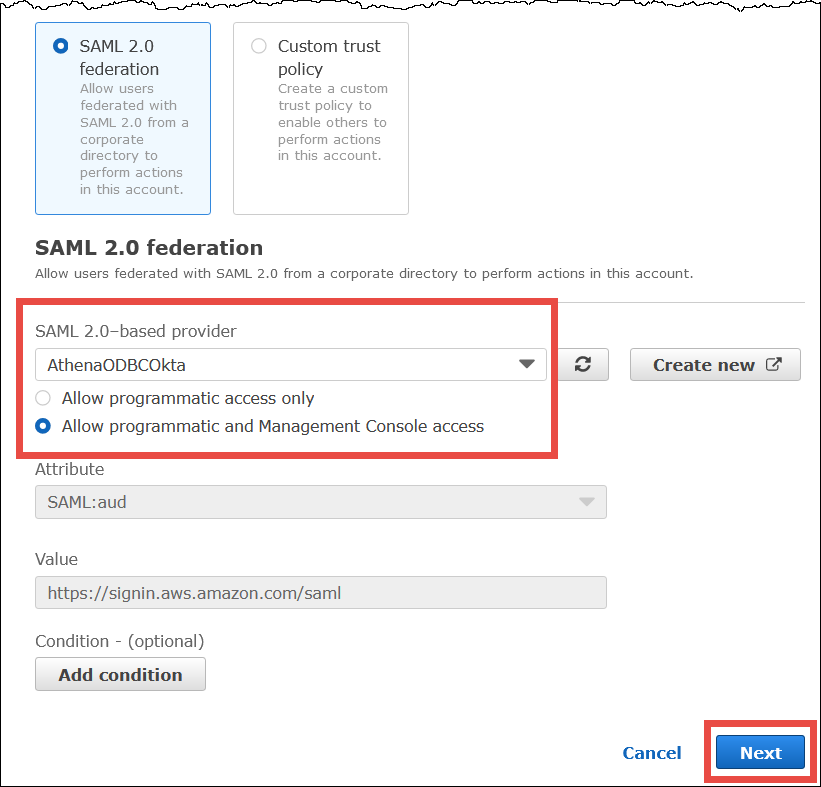
For Select type of trusted entity, choose SAML 2.0 Federation.
-
For SAML 2.0–based provider, choose the SAML identity provider that you created (for example, AthenaODBCOkta).
-
Select Allow programmatic and Amazon Web Services Management Console access.
-
-
Choose Next.
-
On the Add Permissions page, for Filter policies, enter
AthenaFull, and then press ENTER. -
Select the
AmazonAthenaFullAccessmanaged policy, and then choose Next.
-
On the Name, review, and create page, for Role name, enter a name for the role (for example,
Athena-ODBC-OktaRole), and then choose Create role.
Configuring the Okta ODBC connection to Athena
Now you're ready to configure the Okta ODBC connection to Athena using the ODBC Data Sources program in Windows.
To configure your Okta ODBC connection to Athena
-
In Windows, launch the ODBC Data Sources program.
-
In the ODBC Data Source Administrator program, choose Add.

-
Choose Simba Athena ODBC Driver, and then choose Finish.

-
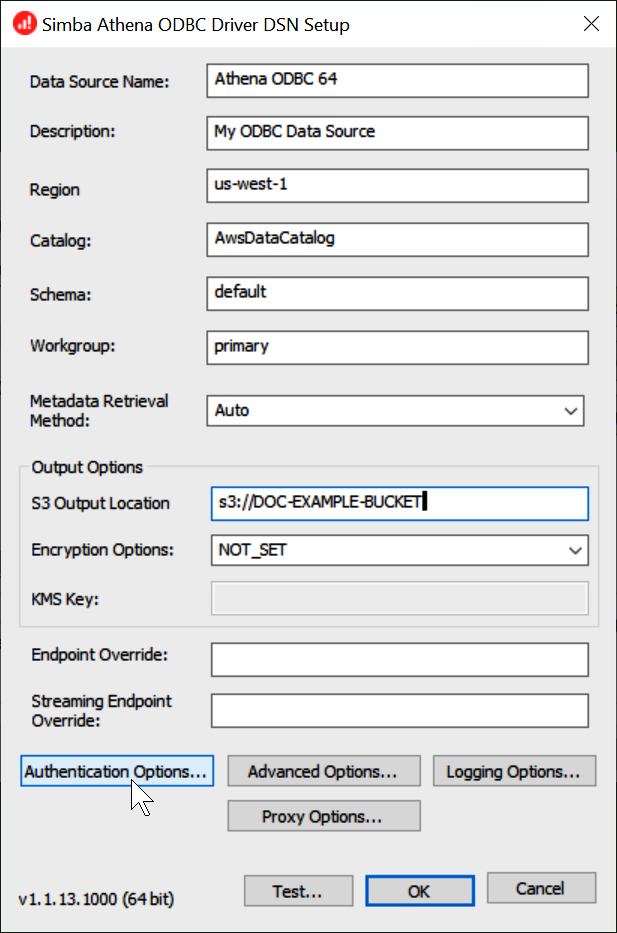
In the Simba Athena ODBC Driver DSN Setup dialog, enter the values described.
-
For Data Source Name, enter a name for your data source (for example,
Athena ODBC 64). -
For Description, enter a description for your data source.
-
For Amazon Web Services Region, enter the Amazon Web Services Region that you're using (for example,
us-west-1). -
For S3 Output Location, enter the Amazon S3 path where you want your output to be stored.
-
-
Choose Authentication Options.
-
In the Authentication Options dialog box, choose or enter the following values.
-
For Authentication Type, choose Okta.
-
For User, enter your Okta user name.
-
For Password, enter your Okta password.
-
For IdP Host, enter the value that you recorded earlier (for example,
trial-1234567.okta.com). -
For IdP Port, enter
443. -
For App ID, enter the value that you recorded earlier (the last two segments of your Okta embed link).
-
For Okta App Name, enter
amazon_aws_redshift.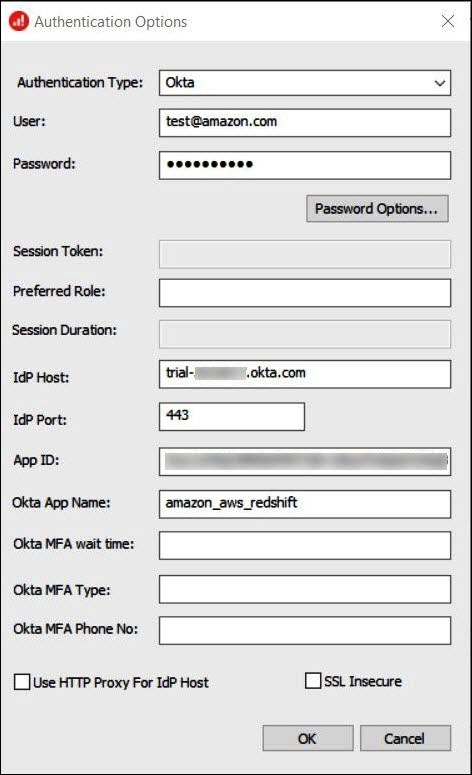
-
-
Choose OK.
-
Choose Test to test the connection or OK to finish.