Working with gateways
To back up and restore your virtual machines (VMs) using Amazon Backup, you must first install a Backup gateway. A gateway is software in the form of an OVF (Open Virtualization Format) template that connects Amazon Web Services Backup to your hypervisor, allowing it to automatically detect your virtual machines, and enables you to back up and restore them.
A single gateway can run up to 4 backup or restore jobs at once. To run more than 4 jobs at once, create more gateways and associate them with your hypervisor.
Creating a gateway
You can create a backup gateway using two approaches:
-
Console method (standard): Creates gateways through the Amazon Backup console with automatic activation
-
Manual method: Creates gateways using gateway VM's local console by obtaining activation keys and using Amazon CLI commands
Both methods require downloading and deploying the OVF template first (see Download VM software).
Both methods allow gateway to communicate over IPv6, which requires gateway appliance version 2.x+ and additional firewall configuration on dual-stack endpoints.
Important
IPv6 hypervisor requirement: If your gateway is activated through IPv6, you must create a hypervisor with an IPv6 address. For example, use 2607:fda8:1001:210::252 instead of 10.0.0.252. If you associate an IPv6 gateway with an IPv4 hypervisor, backup and restore jobs will likely fail.
Console method
To create a gateway:
Open the Amazon Backup console at https://console.amazonaws.cn/backup
. -
In the left navigation pane, under the External resources section, choose Gateways.
-
Choose Create gateway.
-
In the Set up gateway section, follow these instructions to download and deploy the OVF template.
Connecting the hypervisor
Gateways connect Amazon Backup to your hypervisor so you can create and
store backups of your virtual machines. To set up your gateway on
VMware ESXi, download the OVF template
After it is complete, proceed with the following steps:
-
Connect to your virtual machine hypervisor using VMware vSphere.
-
Right-click a parent object of a virtual machine and select Deploy OVF Template.

-
Choose Local file, and upload the aws-appliance-latest.ova file you downloaded.
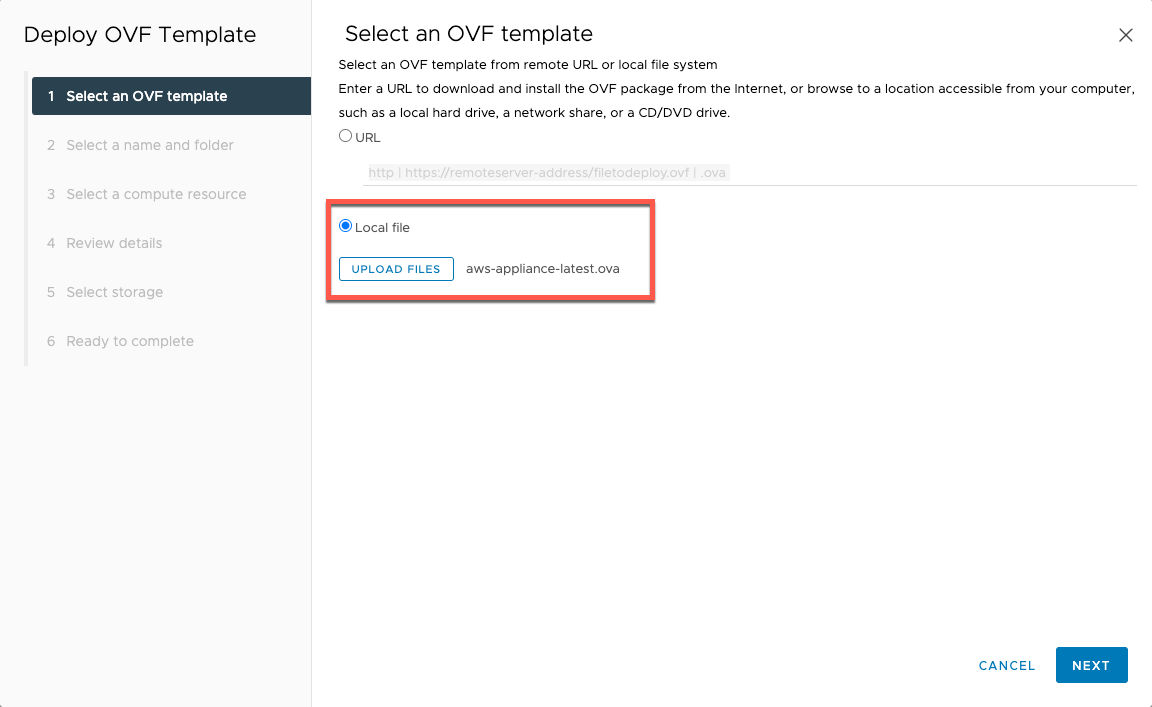
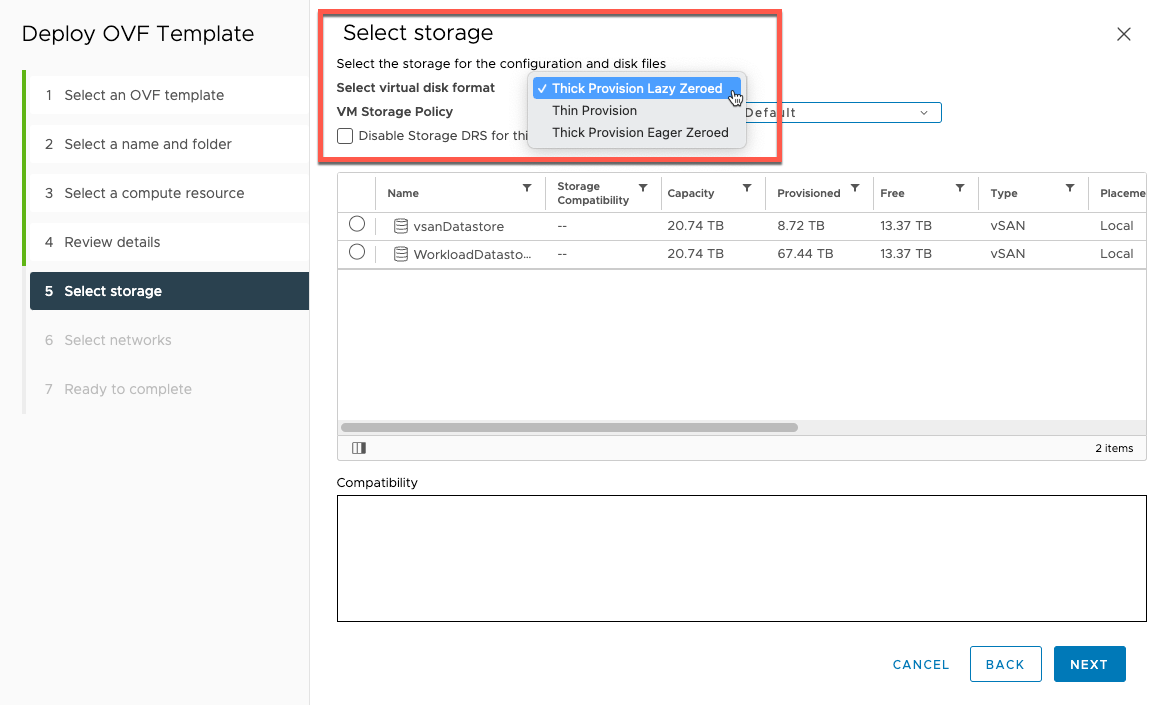
-
Follow the deployment wizard steps to deploy it. On the Select storage page, select virtual disk format Thick Provision Lazy Zeroed.
-
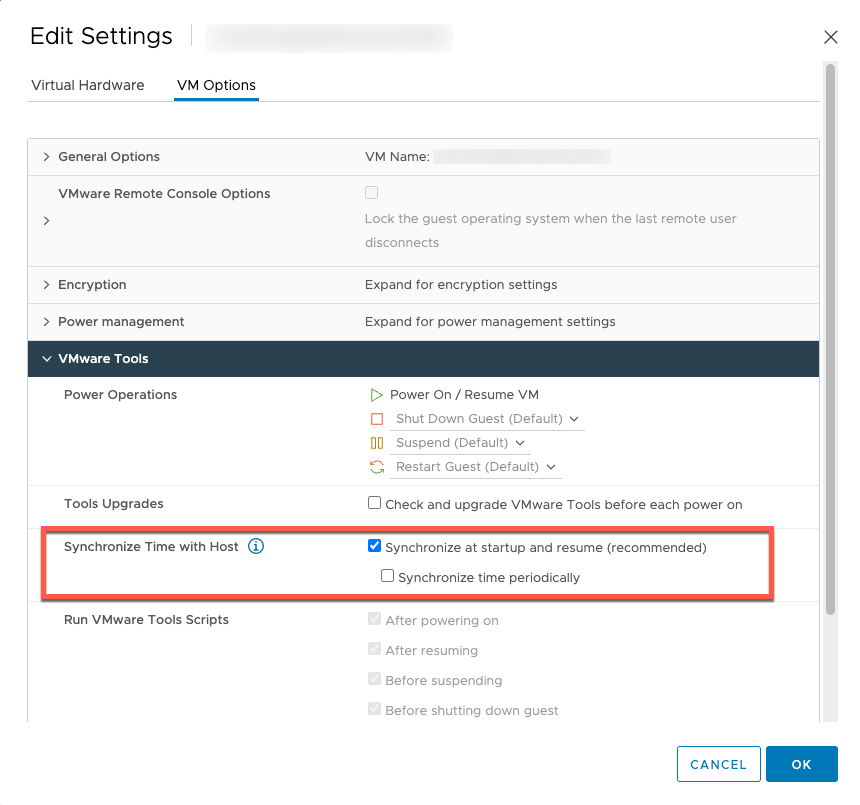
After deploying the OVF, right-click the gateway and choose Edit Settings.

Under VM Options, go to VM Tools.
Ensure that for Synchronize Time with Host, Synchronize at start up and resume is selected.
-
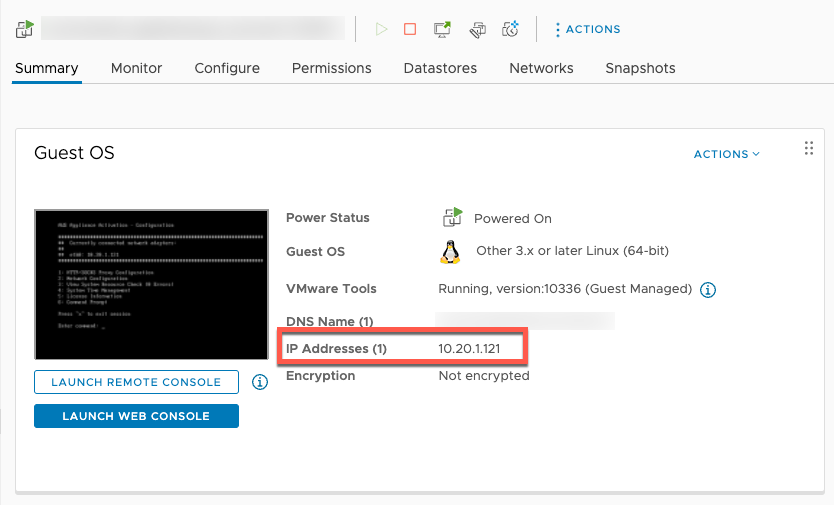
Turn on the virtual machine by selecting “Power On” from the Actions menu.

-
Copy the IP address from the VM summary and enter it below.
Once the VMWare software is downloaded, complete the following steps:
-
In the Gateway connection section, type in the IP address of the gateway.
To find this IP address, go to the vSphere Client.
Select your gateway under the Summary tab.
Copy the IP address and paste it in the Amazon Backup console text bar.
-
In the Gateway settings section,
Type in a Gateway name.
Verify the Amazon Region.
-
Choose whether the endpoint is publicly accessible or hosted with your virtual private cloud (VPC).
-
If publicly accessible is selected, choose the IP version (IPv4 or IPv6) for gateway connectivity.
-
If VPC is selected, enter the VPC endpoint DNS Name. For more information, see Create a VPC endpoint.
-
[Optional] In the Gateway tags section, you can assign tags by inputting the key and optional value. To add more than one tag, click Add another tag.
-
To complete the process, click Create gateway, which takes you to the gateway detail page.
Manual gateway creation
Getting an activation key
To receive an activation key for your gateway, make a web request to the gateway virtual machine (VM) or use the gateway local console. The gateway VM returns a response that contains the activation key, which is then passed as one of the parameters for the CreateGateway API to specify the configuration of your gateway.
Tip
Gateway activation keys expire in 30 minutes if unused.
Getting an activation key using web request
The following examples show you how to get an activation key using HTTP request. You can either use a web browser or Linux curl or equivalent command using the following URLs.
Note
Replace the highlighted variables with actual values for your gateway. Acceptable values are as follows:
-
gateway_ip_address- The IPv4 address of your gateway, for example172.31.29.201 -
region_code- The Region where you want to activate your gateway. See Regional endpoints in the Amazon General Reference Guide. If this parameter is not specified, or if the value provided is misspelled or doesn't match a valid region, the command will default to theus-east-1region.
Dual-stack endpoints (IPv6 support)
IPv4:
curl "http://gateway_ip_address/?activationRegion=region_code&gatewayType=BACKUP_VM&endpointType=DUALSTACK&ipVersion=ipv4&no_redirect"
IPv6:
curl "http://gateway_ip_address/?activationRegion=region_code&gatewayType=BACKUP_VM&endpointType=DUALSTACK&ipVersion=ipv6&no_redirect"
Getting an activation key using local console
The following examples show you how to get an activation key using gateway host's local console
-
Log in to your virtual machine console.
-
From the Amazon Appliance Activation - Configuration main menu, select
0to choose Get activation key -
Select
2Backup Gateway for gateway family option -
Enter the Amazon Region where you want to activate your gateway
-
For network type, enter
1for Public or2for VPC endpoint -
For endpoint type, enter
1for standard endpoint or2for dual-stack endpoint-
For dual-stack endpoint, select
1for IPv4 or2for IPv6
-
-
Activation key will be populated automatically
Creating the gateway
Use the Amazon CLI to create the gateway after obtaining an activation key:
-
Obtain activation key using curl commands or local console method
-
Create gateway using Amazon CLI, for more information, see CreateGateway in the Backup gateway API Reference.
aws backup-gateway create-gateway \ --regionregion_code\ --activation-keyactivation_key\ --gateway-display-namegateway_name\ --gateway-type BACKUP_VM -
Verify gateway appears in Amazon Backup console under External Resources → Gateways
Editing or deleting a gateway
To edit or delete a gateway:
-
In the left navigation pane, under the External resources section, choose Gateways.
-
In the Gateways section, choose a gateway by its Gateway name.
-
To edit the gateway name, choose Edit.
-
To delete the gateway, choose Delete, then choose Delete gateway.
You cannot reactivate a deleted gateway. If you want to connect to the hypervisor again, follow the procedure in Creating a gateway .
-
To connect to a hypervisor, in the Connected hypervisor section, choose Connect.
Each gateway connects to a single hypervisor. However, you can connect multiple gateways to the same hypervisor to increase the bandwidth between them beyond that of the first gateway.
-
To assign, edit, or manage tags, in the Tags section, choose Manage tags.
Backup gateway Bandwidth Throttling
Note
This feature will be available on new gateways deployed after
December 15, 2022. For existing gateways, this new capability will be available through
an automatic software update on or before January 30, 2023. To update the gateway
to the latest version manually, use Amazon CLI command
UpdateGatewaySoftwareNow.
You can limit the upload throughput from your gateway to Amazon Backup to control the amount of network bandwidth the gateway uses. By default, an activated gateway has no rate limits.
You can configure a bandwidth rate-limit schedule using the Amazon Backup Console or using
API through the Amazon CLI
(PutBandwidthRateLimitSchedule). When you use a bandwidth rate
limit schedule, you can configure limits to change automatically throughout the day or
week.
Bandwidth rate limiting works by balancing the throughput of all data being uploaded, averaged over each second. While it is possible for uploads to cross the bandwidth rate limit briefly for any given micro- or millisecond, this does not typically result in large spikes over longer periods of time.
You can add up to a maximum of 20 intervals. The maximum value for the upload rate is 8,000,000 Mbps.
View and edit the bandwidth rate-limit schedule for your gateway using the Amazon Backup console.
This section describes how to view and edit the bandwidth rate limit schedule for your gateway.
To view and edit the bandwidth rate limit schedule
Open the Amazon Backup console at https://console.amazonaws.cn/backup
. In the left navigation pane, choose Gateways. In the Gateways pane, gateways are displayed by name. Click the radio button adjacent to the gateway name you want to manage.
Once you select a radio button, the drop-down menu Action is available to click. Click Actions, then click Edit bandwidth rate limit schedule. The current schedule is displayed. By default, a new or unedited gateway has no defined bandwidth rate limits.
Note
You can also click Manage schedule in the gateway details page to navigate to the Edit bandwidth page.
(Optional) Choose Add interval to add a new configurable interval to the schedule. For each interval, input the following information:
Days of week — Select the recurring day or days on which you want the interval to apply. When chosen, the days will display below the drop-down menu. You can remove them by clicking the X next to the day.
Start time — Enter the start time for the bandwidth interval, using the HH:MM 24-hour format. Time is rendered in Universal Coordinated Time (UTC).
Note: Your bandwidth-rate-limit interval begins at the start of the specified minute.
End time — Enter the end time for the bandwidth interval, using the HH:MM 24-hour format. Time is rendered in Universal Coordinated Time (UTC).
Important
The bandwidth-rate-limit interval ends at the end of the minute specified. To schedule an interval that ends at the end of an hour, enter
59. To schedule consecutive continuous intervals, transitioning at the start of the hour, with no interruption between the intervals, enter59for the end minute of the first interval. Enter00for the start minute of the succeeding interval.Upload rate — Enter the upload rate limit, in megabits per second (Mbps). The minimum value is 102 megabytes per second (Mbps).
(Optional) Repeat the previous step as desired until your bandwidth rate-limit schedule is complete. If you need to delete an interval from your schedule, choose Remove.
Important
Bandwidth rate-limit intervals cannot overlap. The start time of an interval must occur after the end time of a preceding interval and before the start time of a following interval; its end time must occur before the start time of the following interval.
When you are finished, click the Save changes button.
View and edit the bandwidth rate-limit schedule for your gateway using Amazon CLI.
The
GetBandwidthRateLimitSchedule action can be used to view the
bandwidth throttle schedule for a specified gateway. If there is no schedule set, the
schedule will be an empty list of intervals. Here is an example using the Amazon CLI to fetch
the bandwidth schedule of a gateway:
aws backup-gateway get-bandwidth-rate-limit-schedule --gateway-arn "arn:aws:backup-gateway:region:account-id:gateway/bgw-gw id"
To edit a gateway’s bandwidth throttle schedule, you can use the
PutBandwidthRateLimitSchedule action. Note
that you can only update a gateway’s schedule as a whole, rather than modifying,
adding, or removing individual intervals. Calling this action will overwrite the
gateway’s previous bandwidth throttle schedule.
aws backup-gateway put-bandwidth-rate-limit-schedule --gateway-arn "arn:aws:backup-gateway:region:account-id:gateway/gw-id" --bandwidth-rate-limit-intervals ...