Prerequisites for AgentCore payments
Complete the prerequisites on this page before you use AgentCore payments.
Tip
You can automate the steps on this page with the AgentCore Payments skill in the Amazon agent toolkit. The skill is part of the aws-agents plugin and lets an AI coding agent create your Payment Manager, connector, credential provider, payment instrument, and session using the agentcore CLI, and add a process payment tool to your agent. For details, see the quickstart and the Amazon agent toolkit on GitHub
Amazon account and credentials
You need an Amazon account with credentials configured. To configure credentials, install and use the Amazon Command Line Interface by following the steps at Getting started with the Amazon CLI.
# Verify installation
aws --version  # Should show version 2.x
Python and Amazon SDK
To access your Amazon credentials and configure them for use with SDKs, follow the steps at Using IAM Identity Center to authenticate Amazon SDK and Tools. If you plan to use the Amazon Python SDK (Boto3) to interact with AgentCore payments programmatically:
-
Install Python 3.10+.
-
Install the Amazon SDK:
pip install boto3 -
Verify your credentials are configured:
aws sts get-caller-identity
For more information on how to set up and use the Amazon SDK, see Amazon Builder Tools
Payment provider credentials
AgentCore payments connects to external payment providers for cryptocurrency wallet operations. You must obtain credentials from at least one supported provider before creating a PaymentConnector.
Coinbase CDP credentials
If you plan to use Coinbase CDP as your payment provider for developer-managed wallets, obtain the following credentials from the Coinbase Developer Platform
Note
Obtaining the credentials in this section applies to the Coinbase manual flow and to Stripe (Privy). If you use Coinbase Quick create, which is the recommended default for Coinbase, you can skip obtaining and generating Coinbase API keys. With Quick create, you authorize through Coinbase, and the service provisions the credential provider for you.
Note
To use Coinbase as a payment provider, you must also subscribe to the Coinbase Wallets for AgentCore Payments listing in Amazon Marketplace. This subscription is required for Coinbase regardless of whether you use Quick create or the manual flow. This requires the Amazon managed policy AWSMarketplaceManageSubscriptions. With this subscription, your Coinbase wallet usage charges are consolidated into your monthly Amazon bill based on Coinbase’s pricing
-
Log in to the Coinbase Developer Platform
and create or log in to your account. Select a project. -
Navigate to your API Keys
dashboard, choose Create secret API Key, and note the following values. Go back to your project. Credential Description API Key IDThe public identifier for your CDP project
API Key SecretThe private secret used to sign API requests to the CDP control plane

-
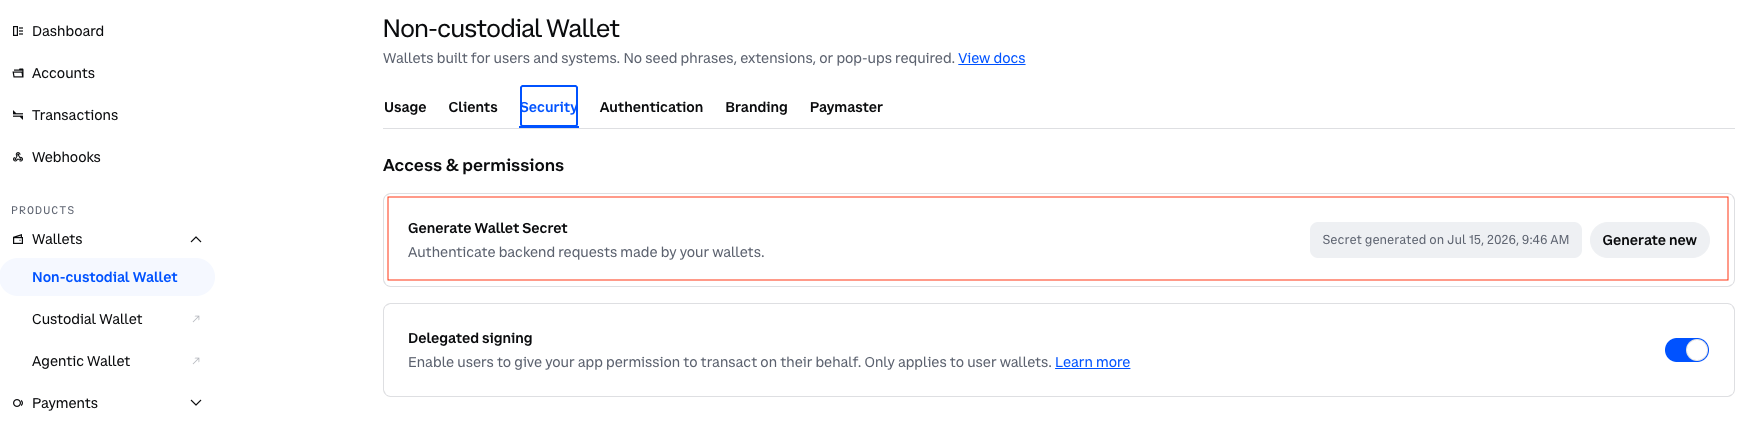
Under Products > Wallets > Non-custodial Wallet > Security, choose Generate new under Generate Wallet secret and note the following value:
Credential Description Wallet SecretA specialized secret for cryptographic wallet operations such as deriving addresses and signing transactions
-
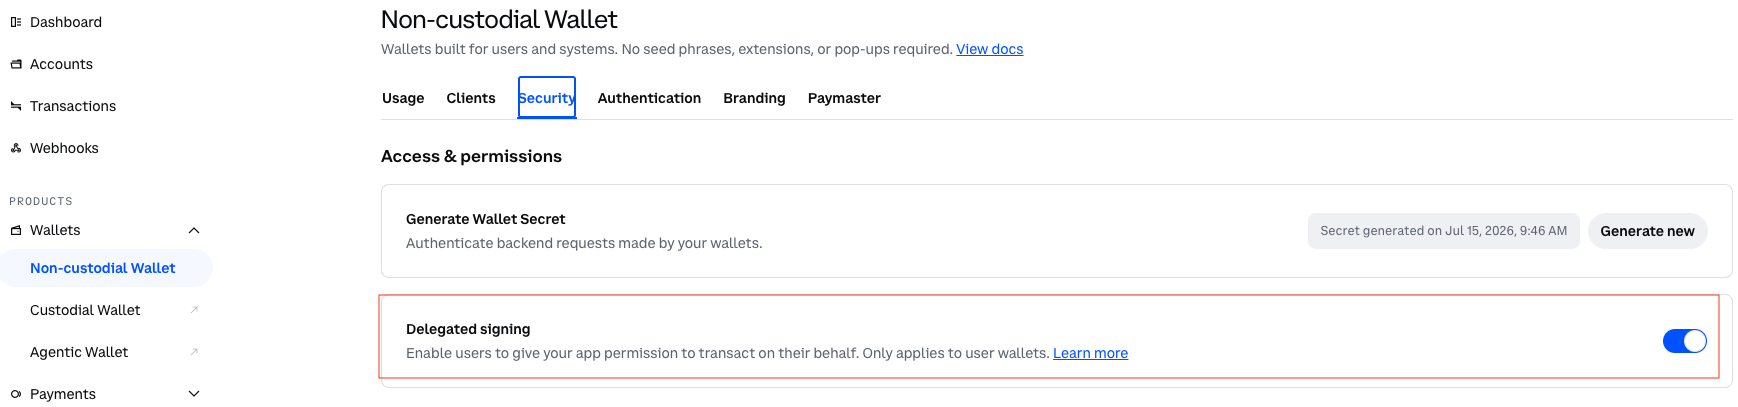
Under Products > Wallets > Non-custodial Wallet > Security, enable Delegated signing.
Privy credentials
If you plan to use Privy for user-owned embedded wallet flows, obtain the following credentials from the Privy Dashboard
-
Create a dedicated Privy app for AgentCore operations at dashboard.privy.io
. Do not reuse Privy apps that serve other purposes. -
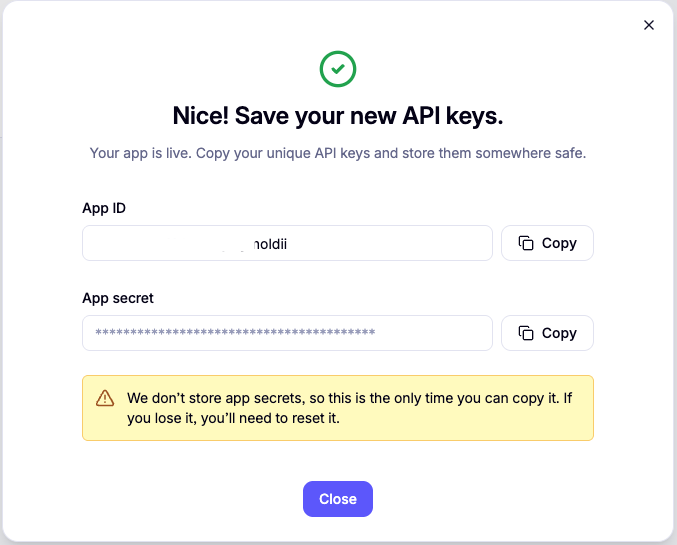
Copy the App ID and App Secret from your app settings.
-
In your Privy app, navigate to Wallet Infrastructure > Authorization and choose New Key to generate a P-256 key pair. Note the following values:
Credential Description App IDYour Privy application identifier, sent as the
privy-app-idheader on API callsApp SecretSecret credential paired with the App ID, used for server-to-server Basic Auth
Authorization ID(Signer ID)The public key identifier from the generated P-256 key pair
Authorization Private KeyThe private key from the generated P-256 key pair, used for signing wallet operations.
Security best practices for Privy credentials
Create a dedicated Privy app for AgentCore
Create a separate Privy app that is used exclusively for AgentCore payments. This reduces the scope of credentials and simplifies auditing of wallet operations.
Restrict secret access to AgentCore services
When you store your Privy App Secret in AgentCore Identity as a PaymentCredentialProvider, ensure that only the AgentCore payments service role can retrieve the secret. Do not grant access to the underlying secret in Amazon Secrets Manager to any other IAM principals. The following resource policy on the secret restricts access to the AgentCore service role:
{
    "Version": "2012-10-17",
    "Statement": [
        {
            "Effect": "Deny",
            "Principal": "*",
            "Action": "secretsmanager:GetSecretValue",
            "Resource": "*",
            "Condition": {
                "StringNotEquals": {
                    "aws:PrincipalArn": "arn:aws:iam::111122223333:role/AgentCorePaymentsResourceRetrievalRole"
                }
            }
        }
    ]
}
Warning
If Privy secrets are accessible to principals beyond the AgentCore service role, a compromised IAM identity could retrieve the secrets and execute unauthorized wallet operations outside of AgentCore’s budget enforcement and audit controls.
Rotate secrets regularly
Rotate your Privy credentials on a regular schedule to reduce the window of exposure for any compromised secret.
| Credential | Recommended rotation frequency |
|---|---|
|
|
Every 90 days |
|
|
Every 90 days |
|
|
Does not require rotation (public identifier) |
|
|
Rotates automatically when you generate a new key pair |
To rotate credentials:
-
Generate a new key pair or App Secret in the Privy Dashboard.
-
Update the PaymentCredentialProvider in AgentCore Identity with the new values.
-
Verify that payment operations succeed with the new credentials.
-
Revoke the old credentials in the Privy Dashboard.
Note
Plan for a brief overlap period where both old and new credentials are active. This prevents downtime during rotation.
After you obtain credentials from your provider, you store them in AgentCore Identity as a PaymentCredentialProvider. For instructions, see Configure payment credential providers. For the complete request and response schema, see CreatePaymentCredentialProvider in the API Reference.
(Optional) Identity provider for JWT authorization
If you plan to use JWT authorization for inbound access to your Payment Manager (to enable consumers to access the Payment Manager using non-IAM identities), set up Amazon Cognito or your own identity provider before creating the Payment Manager:
-
Create a Cognito User Pool (or use your existing identity provider).
-
Register an App Client and note the Client ID.
-
Create a test user with a username and password.
Alternatively, you can choose Quick create configurations with Cognito during Payment Manager creation, and AgentCore payments creates the authorization configurations on your behalf.
For detailed instructions, see Configure inbound JWT authorizer.