Setting up the Amazon DocumentDB ODBC driver in Windows
Use the following procedure to set up the Amazon DocumentDB ODBC driver in Windows:
-
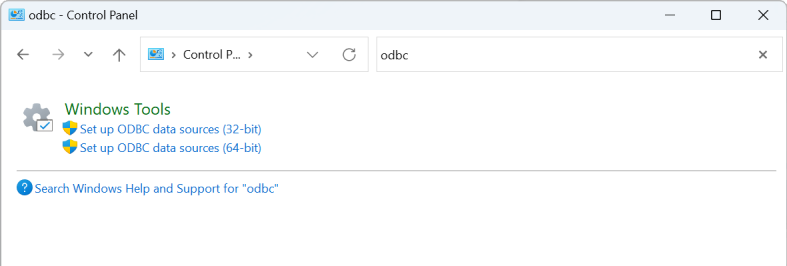
Open Control Panel in Windows and search for ODBC (or in the menu, select Windows Tools > ODBC Data Sources (32-bit) or ODBC Data Sources (64-bit)):
-
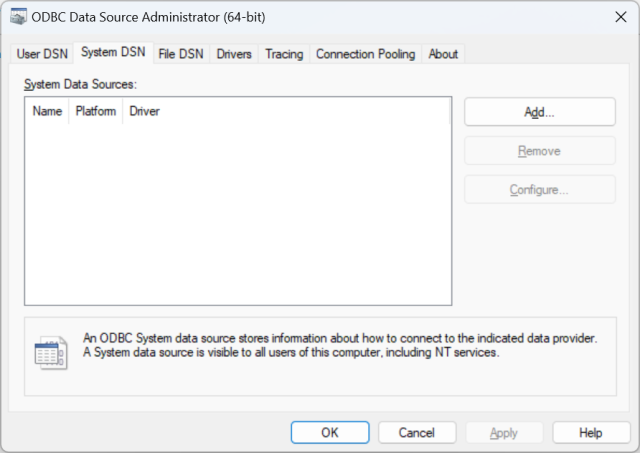
Select the appropriate ODBC Driver Data Source Administrator: opt for the 32-bit version if it is installed, otherwise, choose the 64-bit version.
-
Select the Sytem DSN tab and then click Add... to add a new DSN:
-
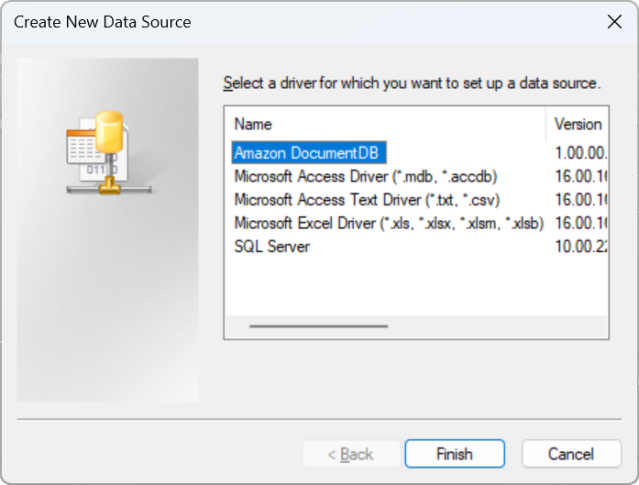
Choose Amazon DocumentDB from the data source driver list:
-
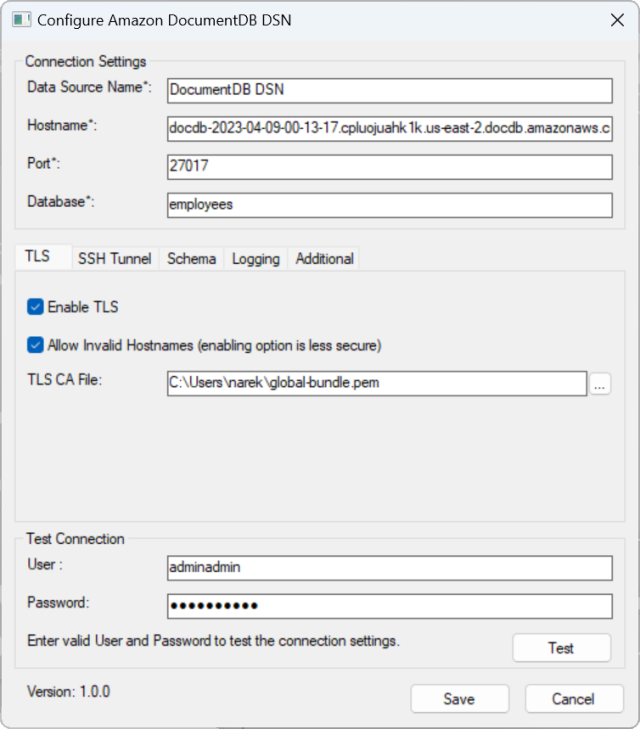
In the Configure Amazon DocumentDB DSN dialog, complete the Connection Settings, TLS tab, and Test Connection fields, then click Save:
-
Ensure you complete the Windows form accurately, as connection details will differ depending on your chosen SSH tunneling method to the EC2 instance. See SSH tunneling methods here
. See Connection String Syntax and Options for more information about each property. 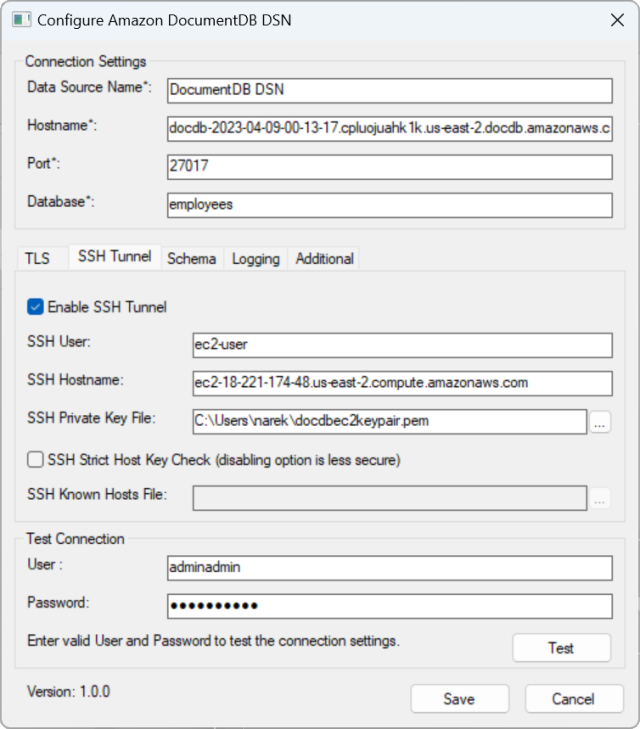
For more information about configuring the Amazon DocumentDB ODBC Driver on Windows, click here