Using interactive sessions with Microsoft Visual Studio Code
Prerequisites
-
Install Amazon Glue interactive sessions and verify it works with Jupyter Notebook.
-
Download and install Visual Studio Code with Jupyter. For details, see Jupyter Notebook in VS Code
.
To get started with interactive sessions with VSCode
-
Disable Jupyter AutoStart in VS Code.
In Visual Studio Code, Jupyter kernels will auto-start which will prevent your magics from taking effect as the session will already be started. To disable Auto Start on Windows, go to File > Preferences > Extensions > Jupyter > right-click on Jupyter then choose Extension Settings.
On MacOS, go to Code > Settings > Extensions > Jupyter > right-click on Jupyter then choose Extension Settings.
Scroll down until you see Jupyter: Disable Jupyter Auto Start. Check the box "When true, disables Jupyter from being automatically started for you. You must instead run a cell to start Jupyter."

-
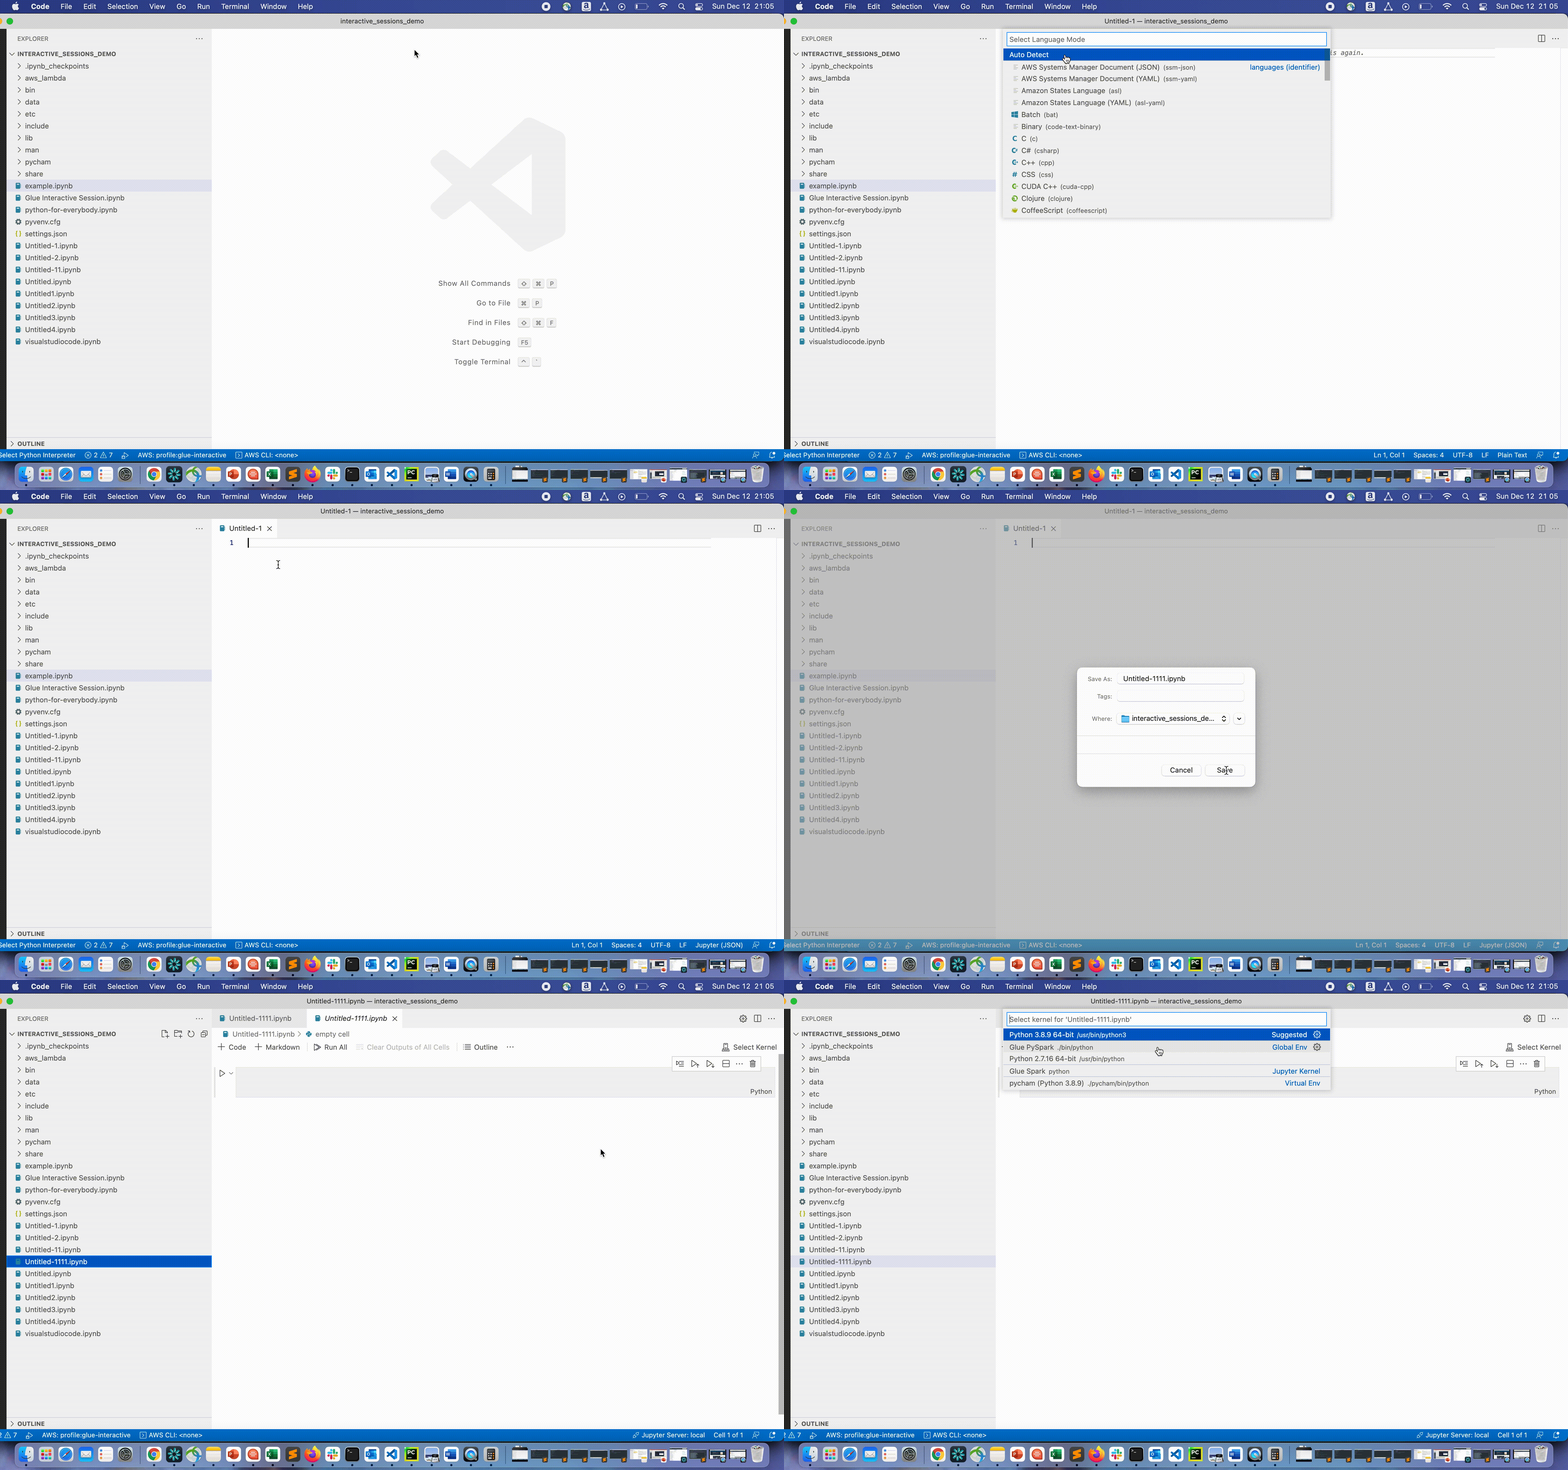
Go to File > New File > Save to save this file with name of your choice as an
.ipynbextension or select jupyter under select a language and save the file.
-
Double-click on the file. The Jupyter shell will display and a notebook will be opened.

-
On Windows, when you first create a file, by default no kernel is selected. Click on Select Kernel and a list of available kernels is displayed. Choose Glue PySpark.
On MacOS, If you do not see the Glue PySpark kernel, try the following steps:
-
Run a local Jupyter session to obtain the URL.
For example, run the following command to launch Jupyter Notebook.
jupyter notebookWhen the notebook first runs, you will see a URL that looks like
http://localhost:8888/?token=3398XXXXXXXXXXXXXXXX.Copy the URL.
-
In VS Code, click the current kernel, then Select Another Kernel..., then select Existing Jupyter Server.... Paste the URL you copied from the step above.
If you receive an error message, see the VS Code Jupyter wiki
. -
If successful, this will set the kernel to Glue PySpark.

Choose the Glue PySpark or Glue Spark kernel (for Python and Scala respectively).

If you don't see Amazon Glue PySpark and Amazon Glue Spark kernels in the drop-down list, please ensure you have installed the Amazon Glue kernel in the step above, or that your
python.defaultInterpreterPathsetting in Visual Studio Code is correct. For more information, see python.defaultInterpreterPath setting description. -
-
Create an Amazon Glue Interactive Session. Proceed to create a session in the same manner as you did in Jupyter Notebook. Specify any magics at the top of your first cell and run a statement of code.