Tutorial: Build your first streaming workload using Amazon Glue Studio
In this tutorial, you are going to learn how to create a streaming job using Amazon Glue Studio. Amazon Glue Studio is a visual interface to create Amazon Glue jobs.
You can create streaming extract, transform, and load (ETL) jobs that run continuously and consume data from streaming sources in Amazon Kinesis Data Streams, Apache Kafka, and Amazon Managed Streaming for Apache Kafka (Amazon MSK).
Prerequisites
To follow this tutorial you'll need a user with Amazon console permissions to use Amazon Glue, Amazon Kinesis, Amazon S3, Amazon Athena, Amazon CloudFormation, Amazon Lambda and Amazon Cognito.
Consume streaming data from Amazon Kinesis
Topics
Generating mock data with Kinesis Data Generator
You can synthetically generate sample data in JSON format using the Kinesis Data Generator (KDG). You can find full instructions and details in the tool documentation
To get started, click

to run an Amazon CloudFormation template on your Amazon environment. Note
You may encounter a CloudFormation template failure because some resources, such as the Amazon Cognito user for Kinesis Data Generator already exist in your Amazon account. This could be because you already set that up from another tutorial or blog. To address this, you can either try the template in a new Amazon account for a fresh start, or explore a different Amazon Region. These options let you run the tutorial without conflicting with existing resources.
The template provisions a Kinesis data stream and a Kinesis Data Generator account for you. It also creates an Amazon S3 bucket to hold the data and a Glue Service Role with the required permission for this tutorial.
Enter a Username and Password that the KDG will use to authenticate. Note the username and password for further usage.
Select Next all the way to the last step. Acknowledge the creation of IAM resources. Check for any errors at the top of the screen, such as the password not meeting the minimum requirements, and deploy the template.
Navigate to the Outputs tab of the stack. Once the template is deployed, it will display the generated property KinesisDataGeneratorUrl. Click that URL.
Enter the Username and Password you noted down.
Select the Region you are using and select the Kinesis Stream
GlueStreamTest-{AWS::AccountId}Enter the following template:
{
    "ventilatorid": {{random.number(100)}},
    "eventtime": "{{date.now("YYYY-MM-DD HH:mm:ss")}}",
    "serialnumber": "{{random.uuid}}",
    "pressurecontrol": {{random.number(
        {
            "min":5,
            "max":30
        }
    )}},
    "o2stats": {{random.number(
        {
            "min":92,
            "max":98
        }
    )}},
    "minutevolume": {{random.number(
        {
            "min":5,
            "max":8
        }
    )}},
    "manufacturer": "{{random.arrayElement(
        ["3M", "GE","Vyaire", "Getinge"]
    )}}"
}
You can now view mock data with Test template and ingest the mock data to Kinesis with Send data.
Click Send data and generate 5-10K records to Kinesis.
Creating an Amazon Glue streaming job with Amazon Glue Studio
Navigate to Amazon Glue in the console on the same Region.
Select ETL jobs under the left side navigation bar under Data Integration and ETL.
Create an Amazon Glue Job via Visual with a blank canvas.

Navigate to the Job Details tab.
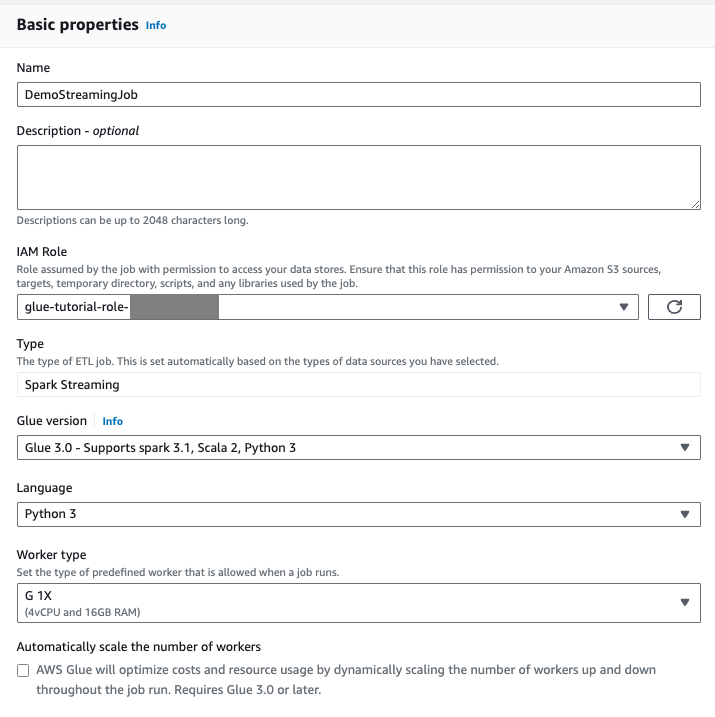
For the Amazon Glue job name, enter
DemoStreamingJob.For IAM Role, select the role provisioned by the CloudFormation template,
glue-tutorial-role-${Amazon::AccountId}.For Glue version, select Glue 3.0. Leave all other options as default.
Navigate to the Visual tab.
Click on the plus icon. Enter Kinesis in the search bar. Select the Amazon Kinesis data source.

Select Stream details for Amazon Kinesis Source under the tab Data source properties - Kinesis Stream.
Select Stream is located in my account for Location of data stream.
Select the Region you are using.
Select the
GlueStreamTest-{AWS::AccountId}stream.Keep all other settings as default.

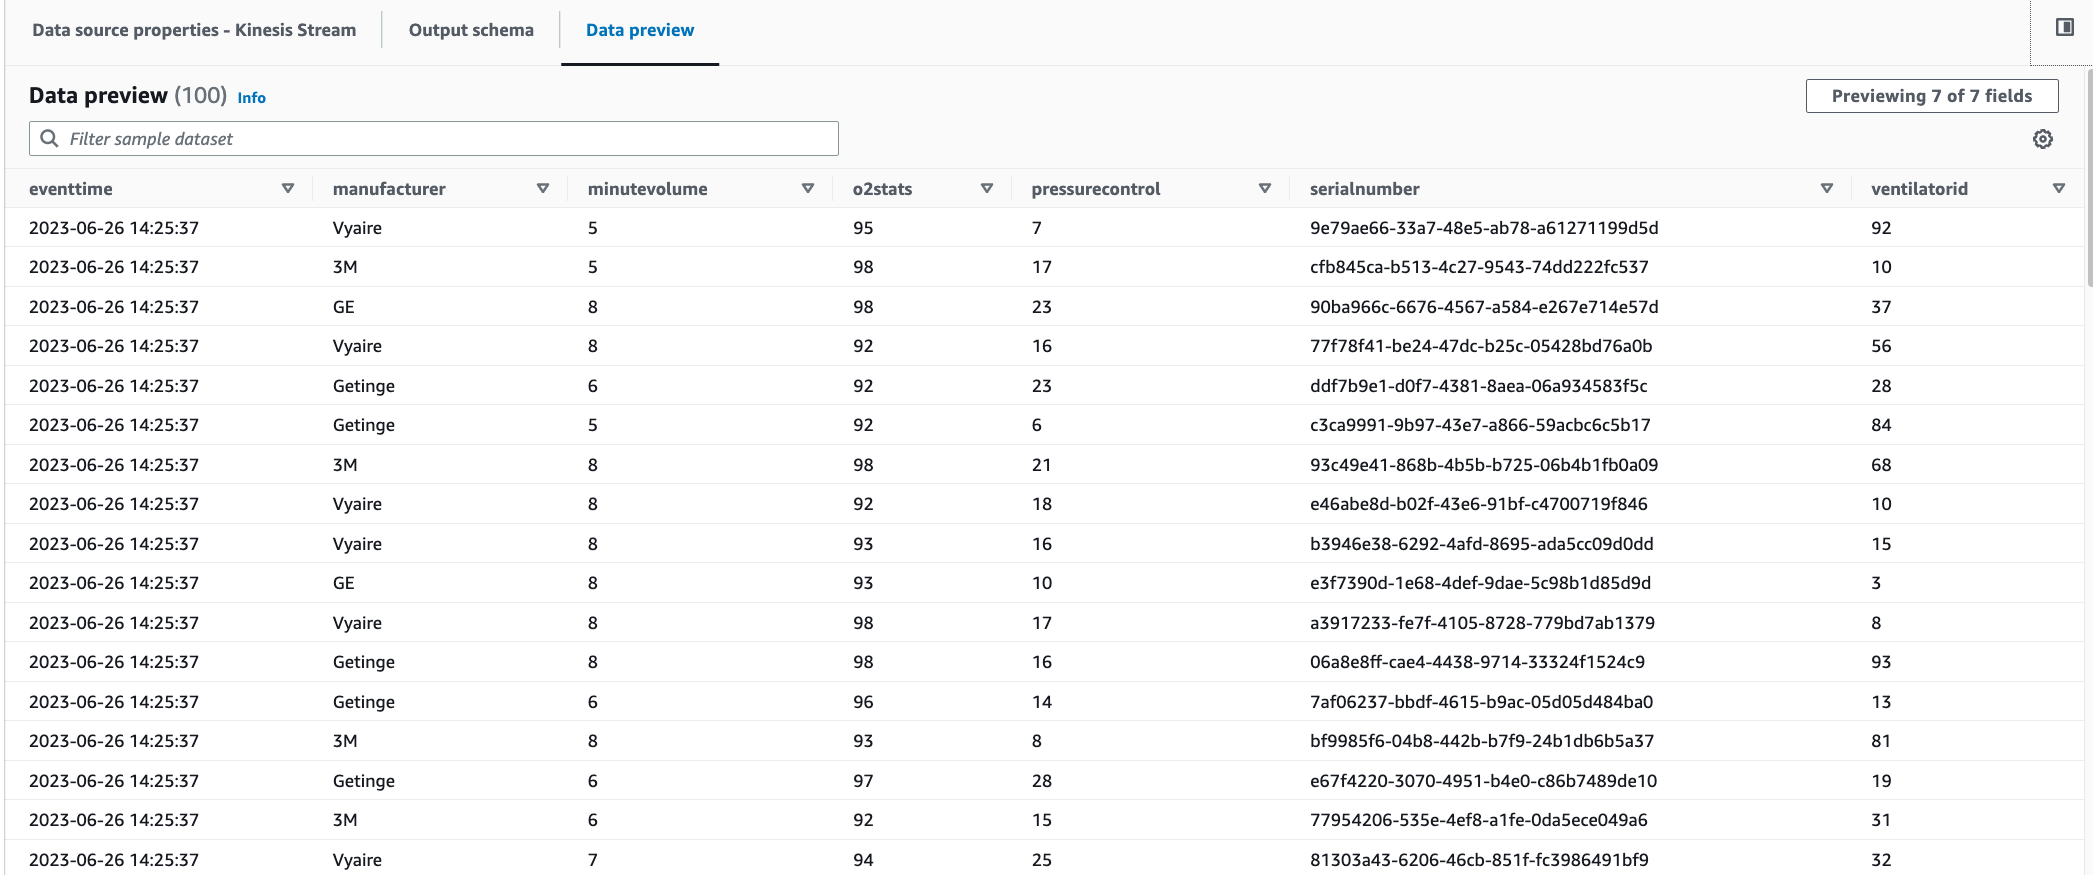
Navigate to the Data preview tab.
Click Start data preview session, which previews the mock data generated by KDG. Pick the Glue Service Role you previously created for the Amazon Glue Streaming job.
It takes 30-60 seconds for the preview data to show up. If it shows No data to display, click the gear icon and change the Number of rows to sample to
100.You can see the sample data as below:
You can also see the inferred schema in the Output schema tab.

Performing a transformation and storing the transformed result in Amazon S3
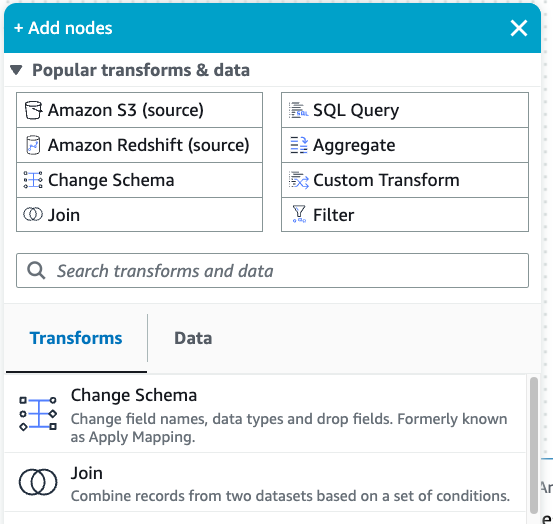
With the source node selected, click on the plus icon on the top left to add a Transforms step.
Select the Change Schema step.
You can rename fields and convert the data type of fields in this step. Rename the
o2statscolumn toOxygenSaturationand convert alllongdata type toint.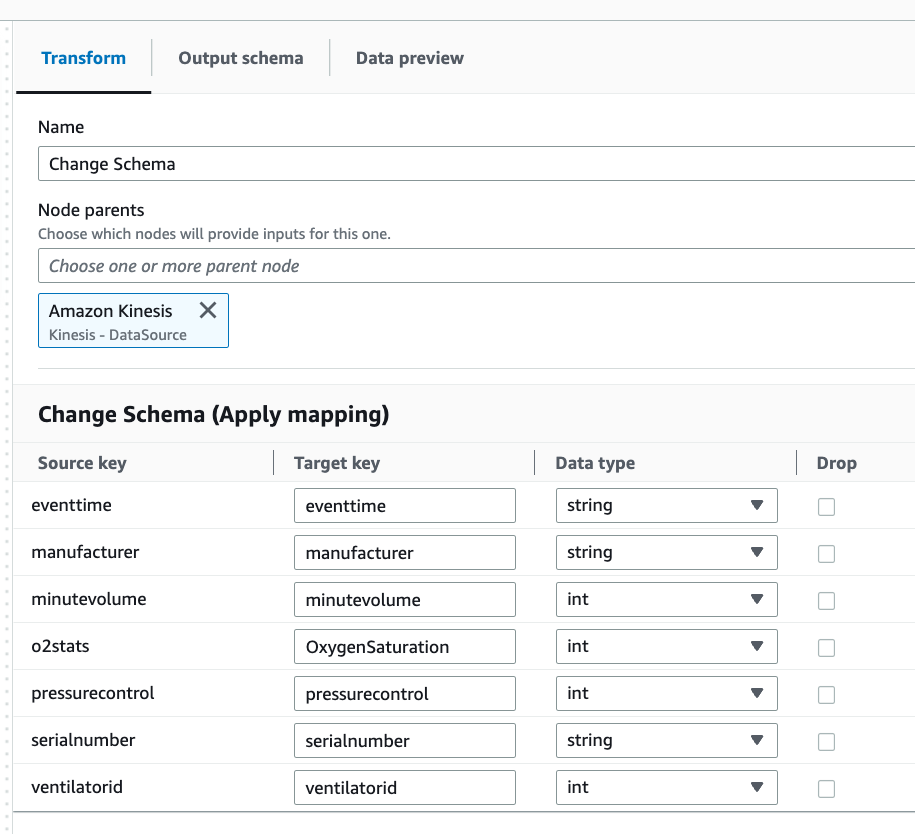
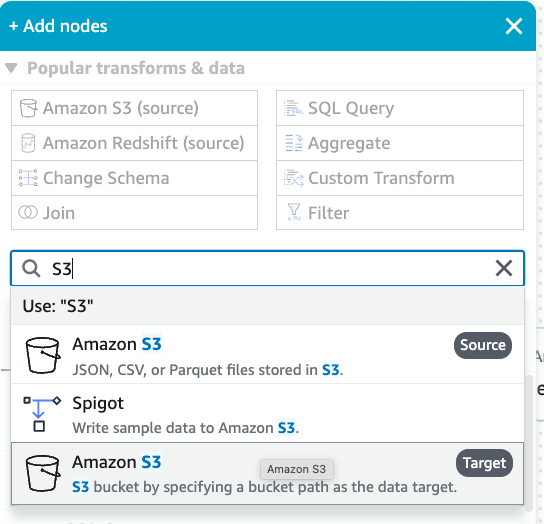
Click on the plus icon to add an Amazon S3 target. Enter S3 in the search box and select the Amazon S3 - Target transform step.
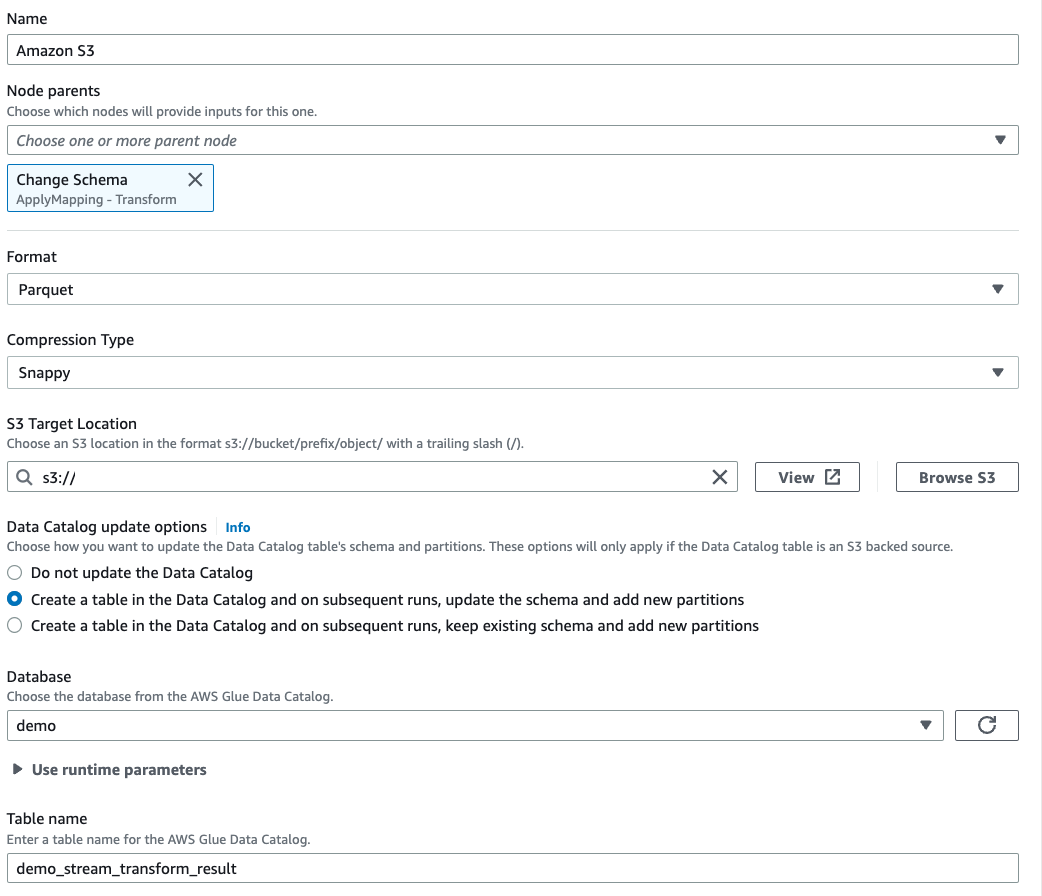
Select Parquet as the target file format.
Select Snappy as the compression type.
Enter an S3 Target Location created by the CloudFormation template,
streaming-tutorial-s3-target-{AWS::AccountId}.Select to Create a table in the Data Catalog and on subsequent runs, update the schema and add new partitions.
Enter the target Database and Table name to store the schema of the Amazon S3 target table.
Click on the Script tab to view the generated code.
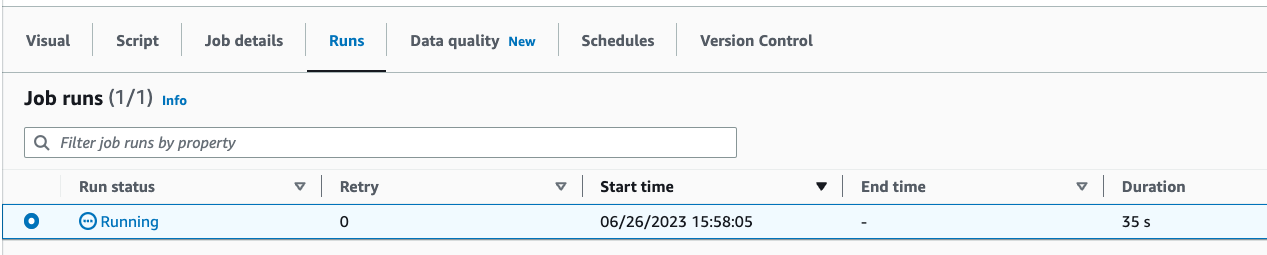
Click Save on the top right to save the ETL code and then click Run to kick-off the Amazon Glue streaming job.
You can find the Run status in the Runs tab. Let the job run for 3-5 minutes and then stop the job.
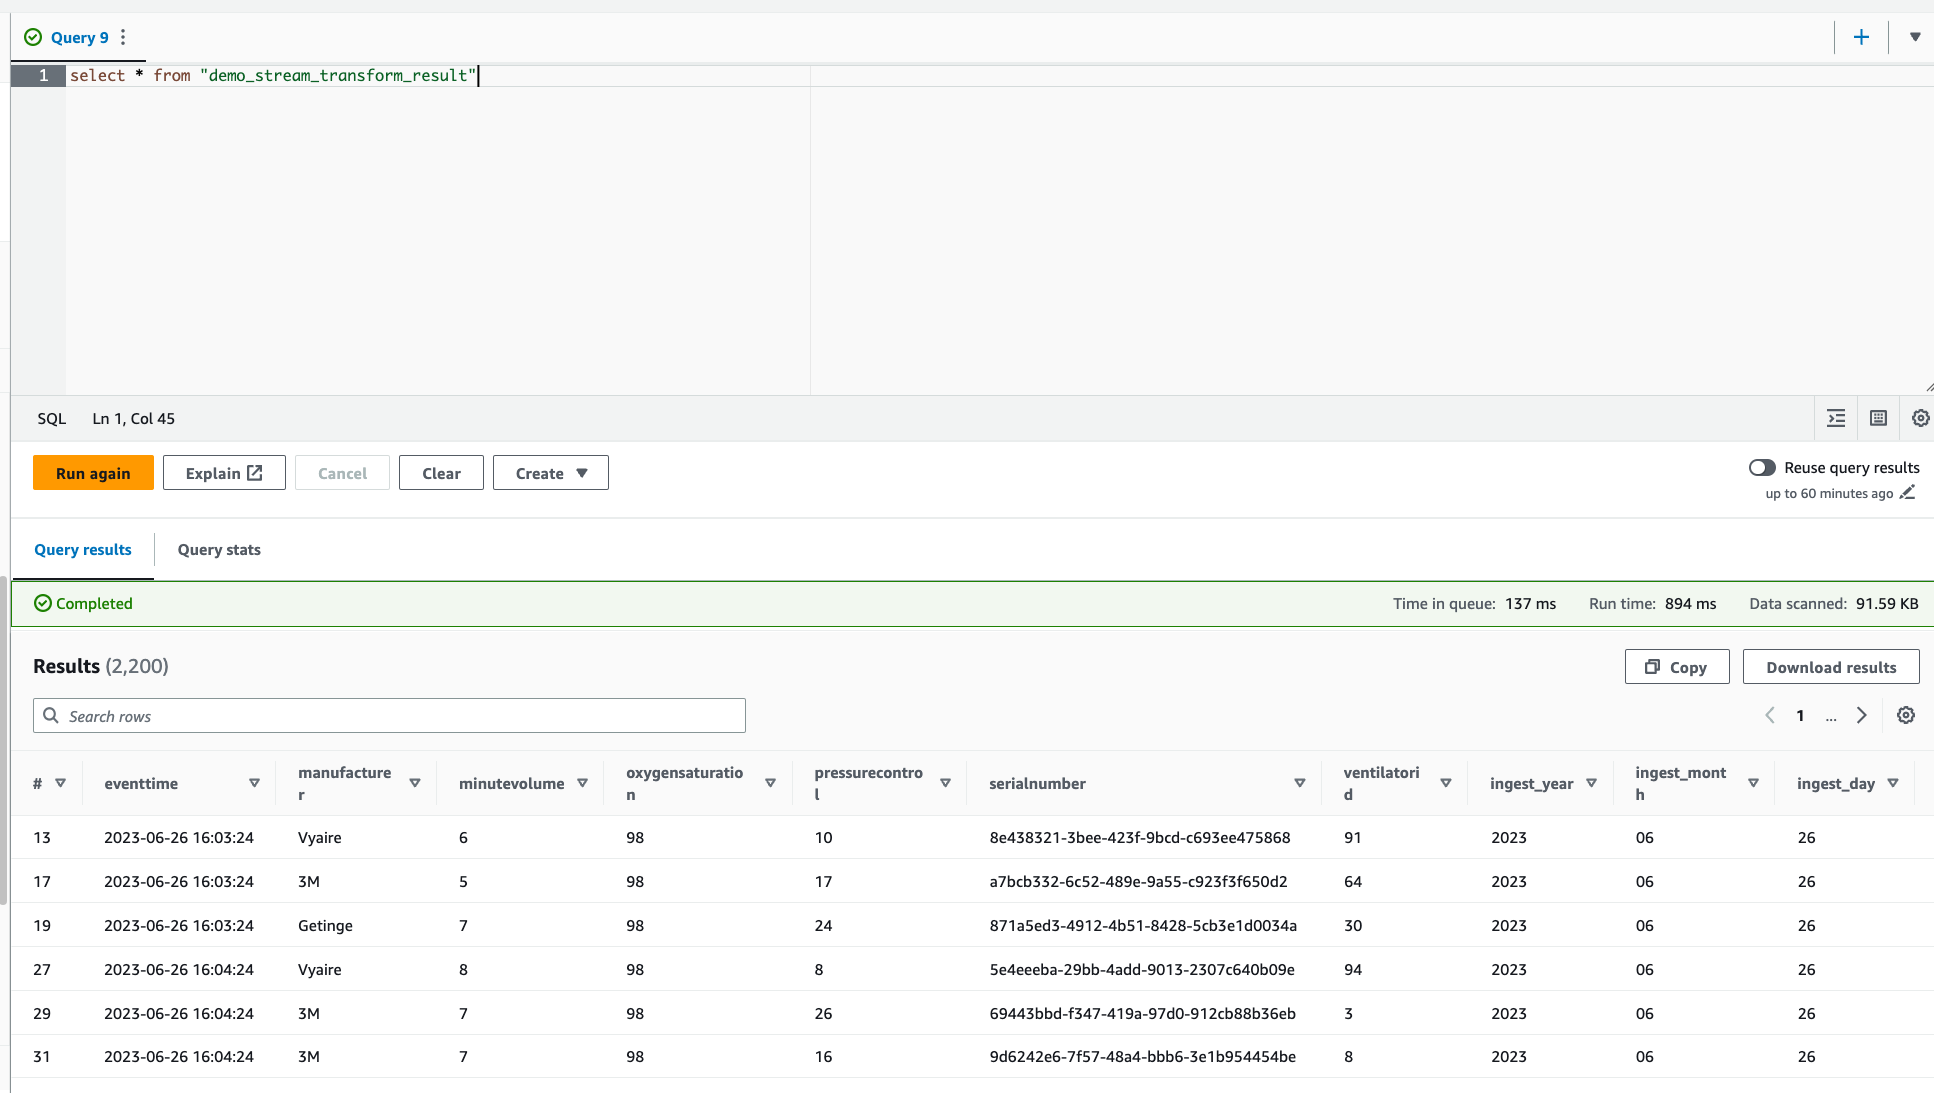
Verify the new table created in Amazon Athena.