Amazon IoT TwinMaker Matterport integration
Matterport provides a variety of capture options to scan real-world environments and create immersive 3D models, also known as Matterport digital twins. These models are called Matterport spaces. Amazon IoT TwinMaker supports Matterport integration, allowing you to import your Matterport digital twins into your Amazon IoT TwinMaker scenes. By pairing Matterport digital twins with Amazon IoT TwinMaker, you can visualize and monitor your digital twin system in a virtual environment.
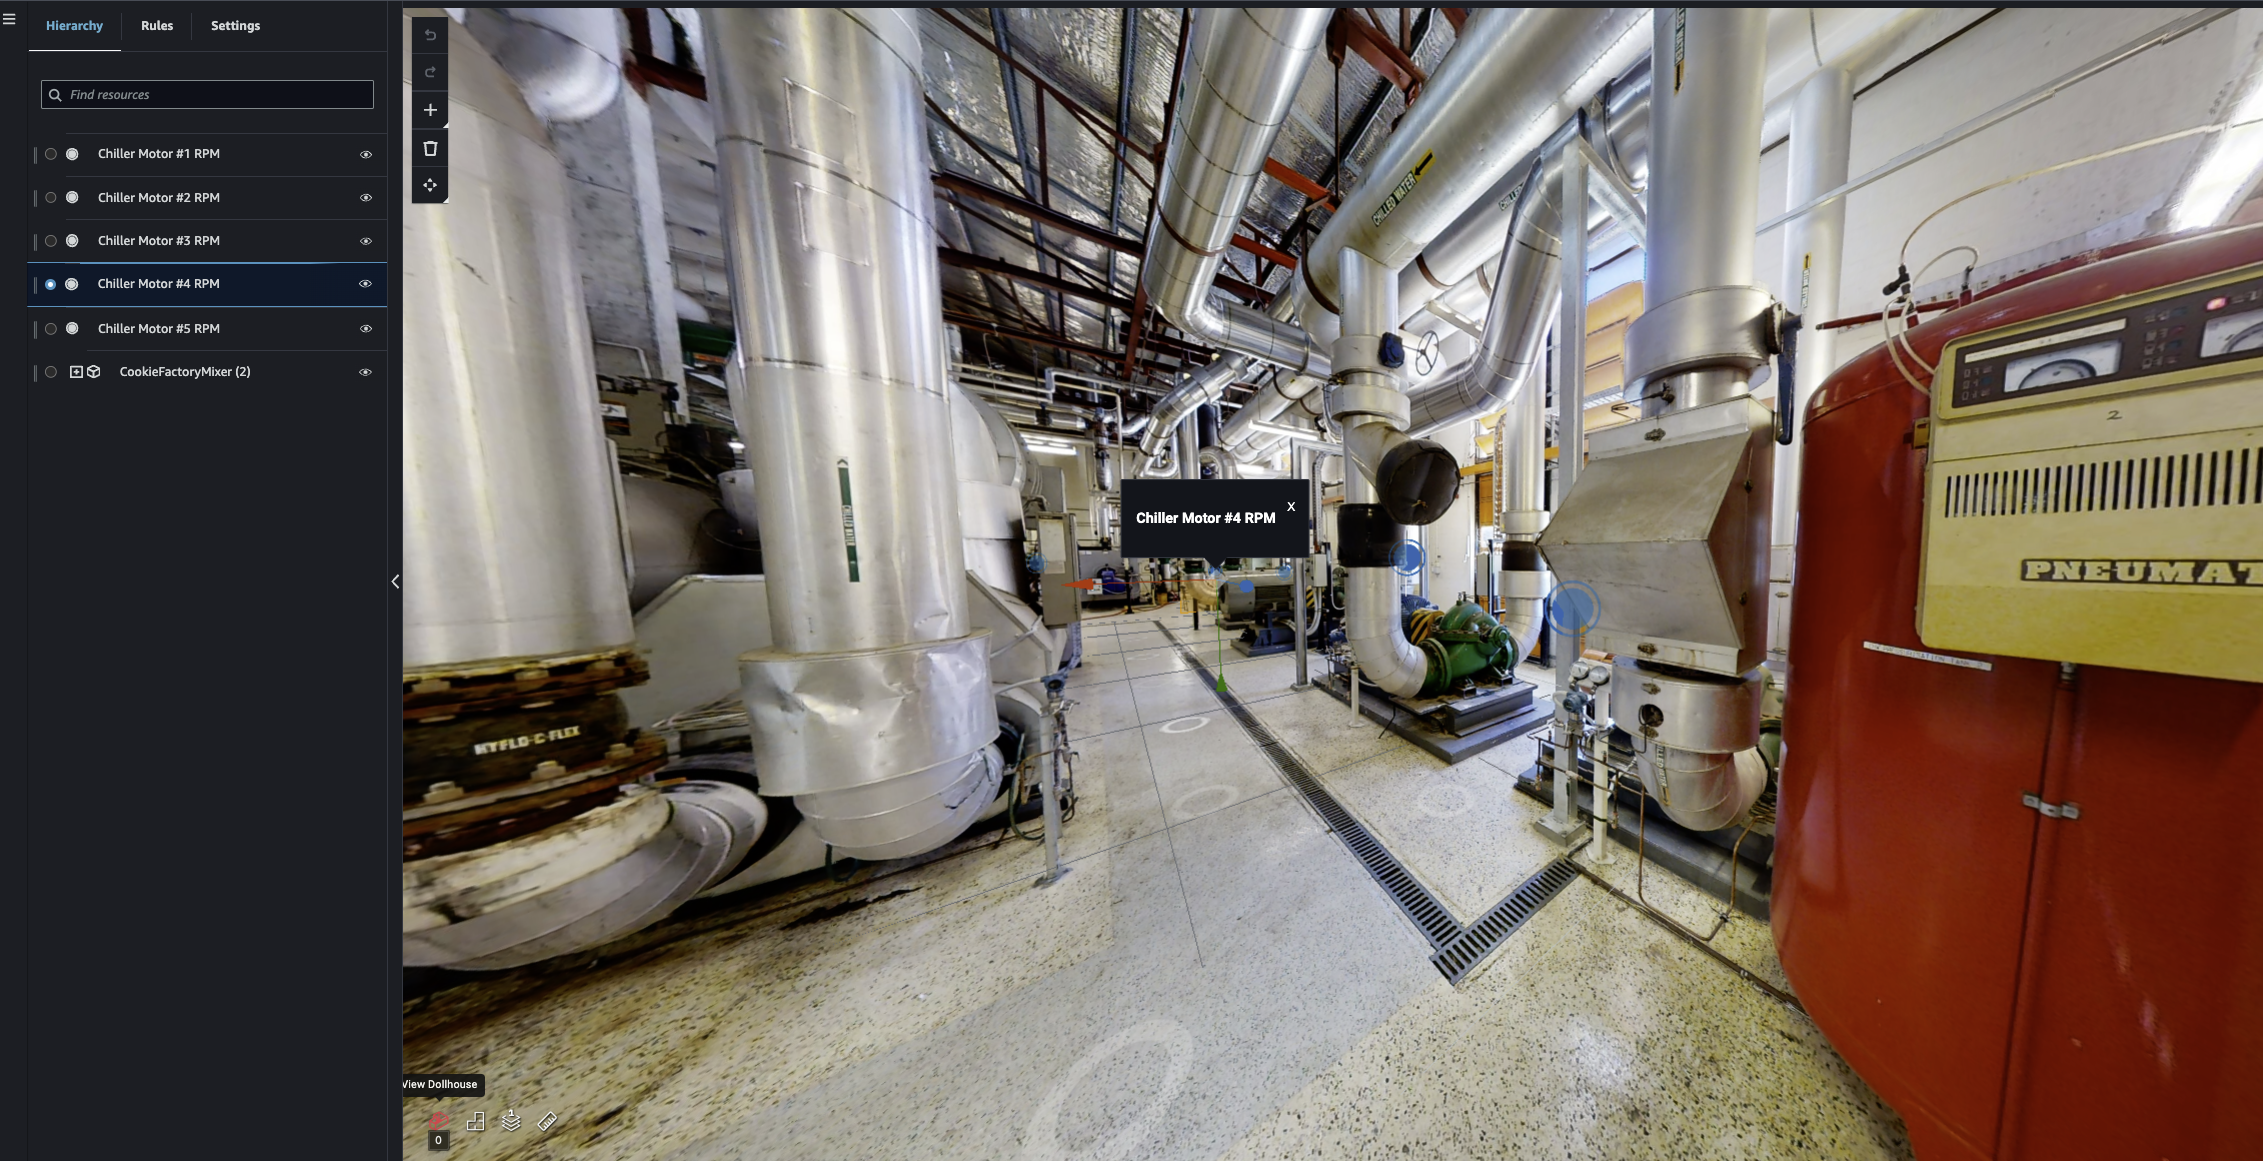
For more information about using Matterport, read Matterport's documentation on Amazon IoT TwinMaker and Matterport
Integration topics
Integration overview
This integration enables you to do the following:
Use your Matterport tags and spaces in the Amazon IoT TwinMaker app kit.
View your imported matterport data in your Amazon IoT TwinMaker Grafana dashboard. For more information on using Amazon IoT TwinMaker and Grafana, read the Grafana dashboard integration documentation.
Import your Matterport spaces into your Amazon IoT TwinMaker scenes.
Select and import your Matterport tags that you'd like to bind to data in your Amazon IoT TwinMaker scene.
Automatically surface your Matterport space and tag changes in your Amazon IoT TwinMaker scene and approve which to synchronize.
The integration process is comprised of 3 critical steps.
You start your integration in the Amazon IoT TwinMaker console
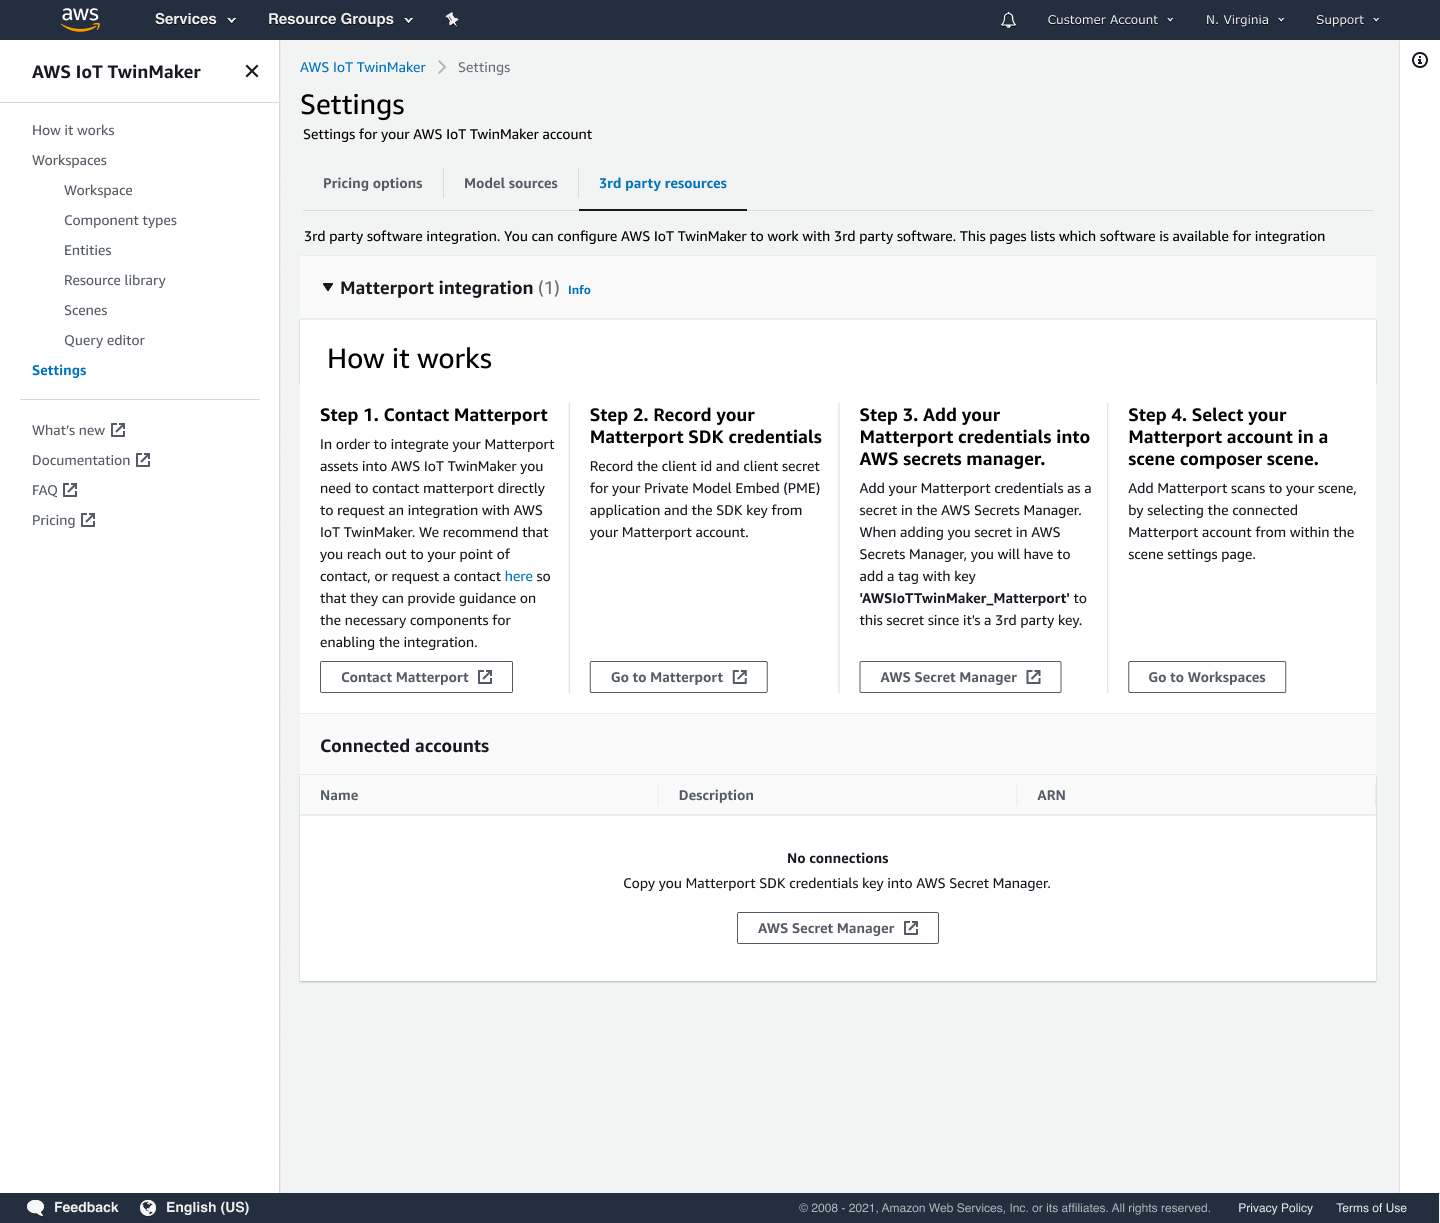
Matterport integration prerequisites
Before integrating Matterport with Amazon IoT TwinMaker please make sure you meet the following prerequisites:
You have purchased an Enterprise-level Matterport
account and the Matterport products necessary for the Amazon IoT TwinMaker integration. You have an Amazon IoT TwinMaker workspace. For more information, see Getting started with Amazon IoT TwinMaker.
You have updated your Amazon IoT TwinMaker workspace role. For more information on creating a workspace role, see Create and manage a service role for Amazon IoT TwinMaker.
Add the following to your workspace role:
{ "Effect": "Allow", "Action": "secretsmanager:GetSecretValue", "Resource": [ "AWS Secrets Manager secret ARN" ] }-
You must contact Matterport to configure the necessary licensing for enabling the integration. Matterport will also enable a Private Model Embed (PME) for the integration.
If you already have a Matterport account manager, contact them directly.
Use the following procedure to contact Matterport and request an integration if you don’t have a Matterport point of contact:
-
Open the Matterport and Amazon IoT TwinMaker
page. Press the Contact us button, to open the contact form.
-
Fill out the required information on the form.
-
When you're ready, choose SAY HELLO to send your request to Matterport.
Once you have requested integration, you can generate the required Matterport SDK and Private Model Embed (PME) credentials needed to continue the integration process.
Note
This may involve you incurring a fee for purchasing new products or services.
-
Generate and record your Matterport credentials
To integrate Matterport with Amazon IoT TwinMaker, you must provide Amazon Secrets Manager with Matterport credentials. Use the following procedure to generate the Matterport SDK credentials.
Log in to your Matterport account
. Navigate to your account settings page.
Once in the settings page, select the Developer tools option.
On the Developer tools page, go to the SDK Key Management section.
Once in the SDK Key Management section, select the option to add a new SDK key.
Once you have the Matterport SDK key, add domains to the key for Amazon IoT TwinMaker and your Grafana server. If you are using the Amazon IoT TwinMaker app kit, then make sure to add your custom domain as well.
Next, find the Application integration Management section, you should see your PME application listed. Record the following information:
The Client ID
The Client Secret
Note
Since the Client Secret is only presented to you once, we strongly recommend that you record your Client Secret. You must present your Client Secret in the Amazon Secrets Manager console to continue with the Matterport integration.
These credentials are automatically created when you have purchased the necessary components and the PME for your account has been enabled by Matterport. If these credentials do not appear, contact Matterport. To request contact, see the Matterport and Amazon IoT TwinMaker
contact form.
For more information on Matterport SDK credentials, see Matterport's official SDK documentation SDK Docs Overview
Store your Matterport credentials in Amazon Secrets Manager
Use the following procedure to store your Matterport credentials in Amazon Secrets Manager.
Note
You need the Client Secret created from the procedure in the Generate and record your Matterport credentials topic to continue with the Matterport integration.
Log in to the Amazon Secrets Manager console.
Navigate to the Secrets page and select Store a new secret.
For the Secret type, select Other type of secret.
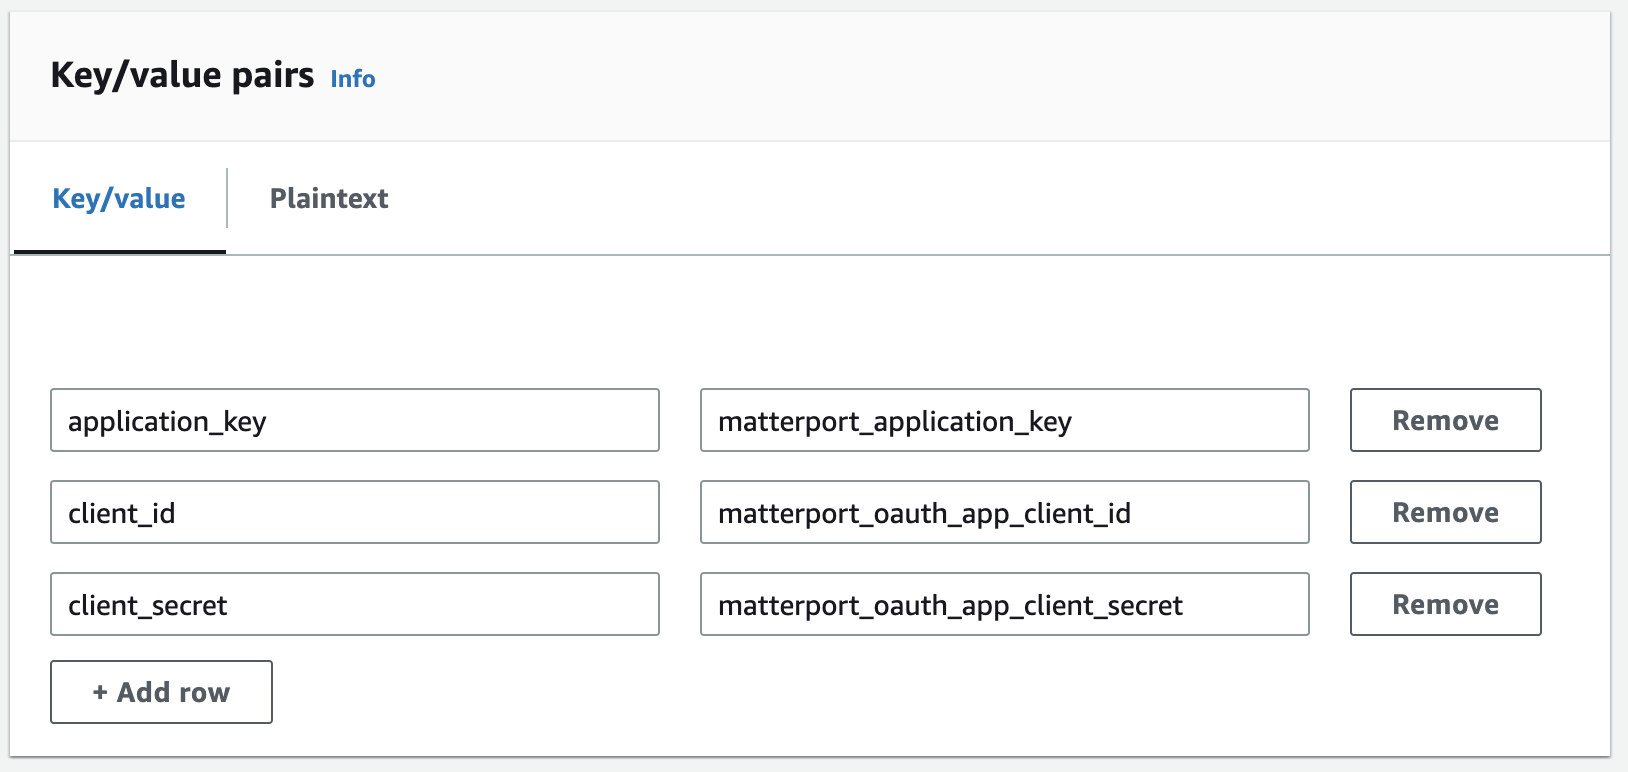
In the Key/value pairs section, add in the following key-value pairs, with your Matterport credentials as the values:
Create a key-value pair, with Key:
application_key, and Value:<your Matterport credentials>.Create a key-value pair, with Key:
client_id, and Value:<your Matterport credentials>.Create a key-value pair, with Key:
client_secret, and Value:<your Matterport credentials>.
When completed, you should have a configuration similar to the following example:
For the Encryption key, you can leave the default encryption key
aws/secretsmanagerselected.Choose Next to move on to the Configure secret page.
Fill out the field for Secret name and the Description.
Add a tag to this secret in the Tags section.
When creating the tag, assign the key as
AWSIoTTwinMaker_Matterportas shown in the following screenshot: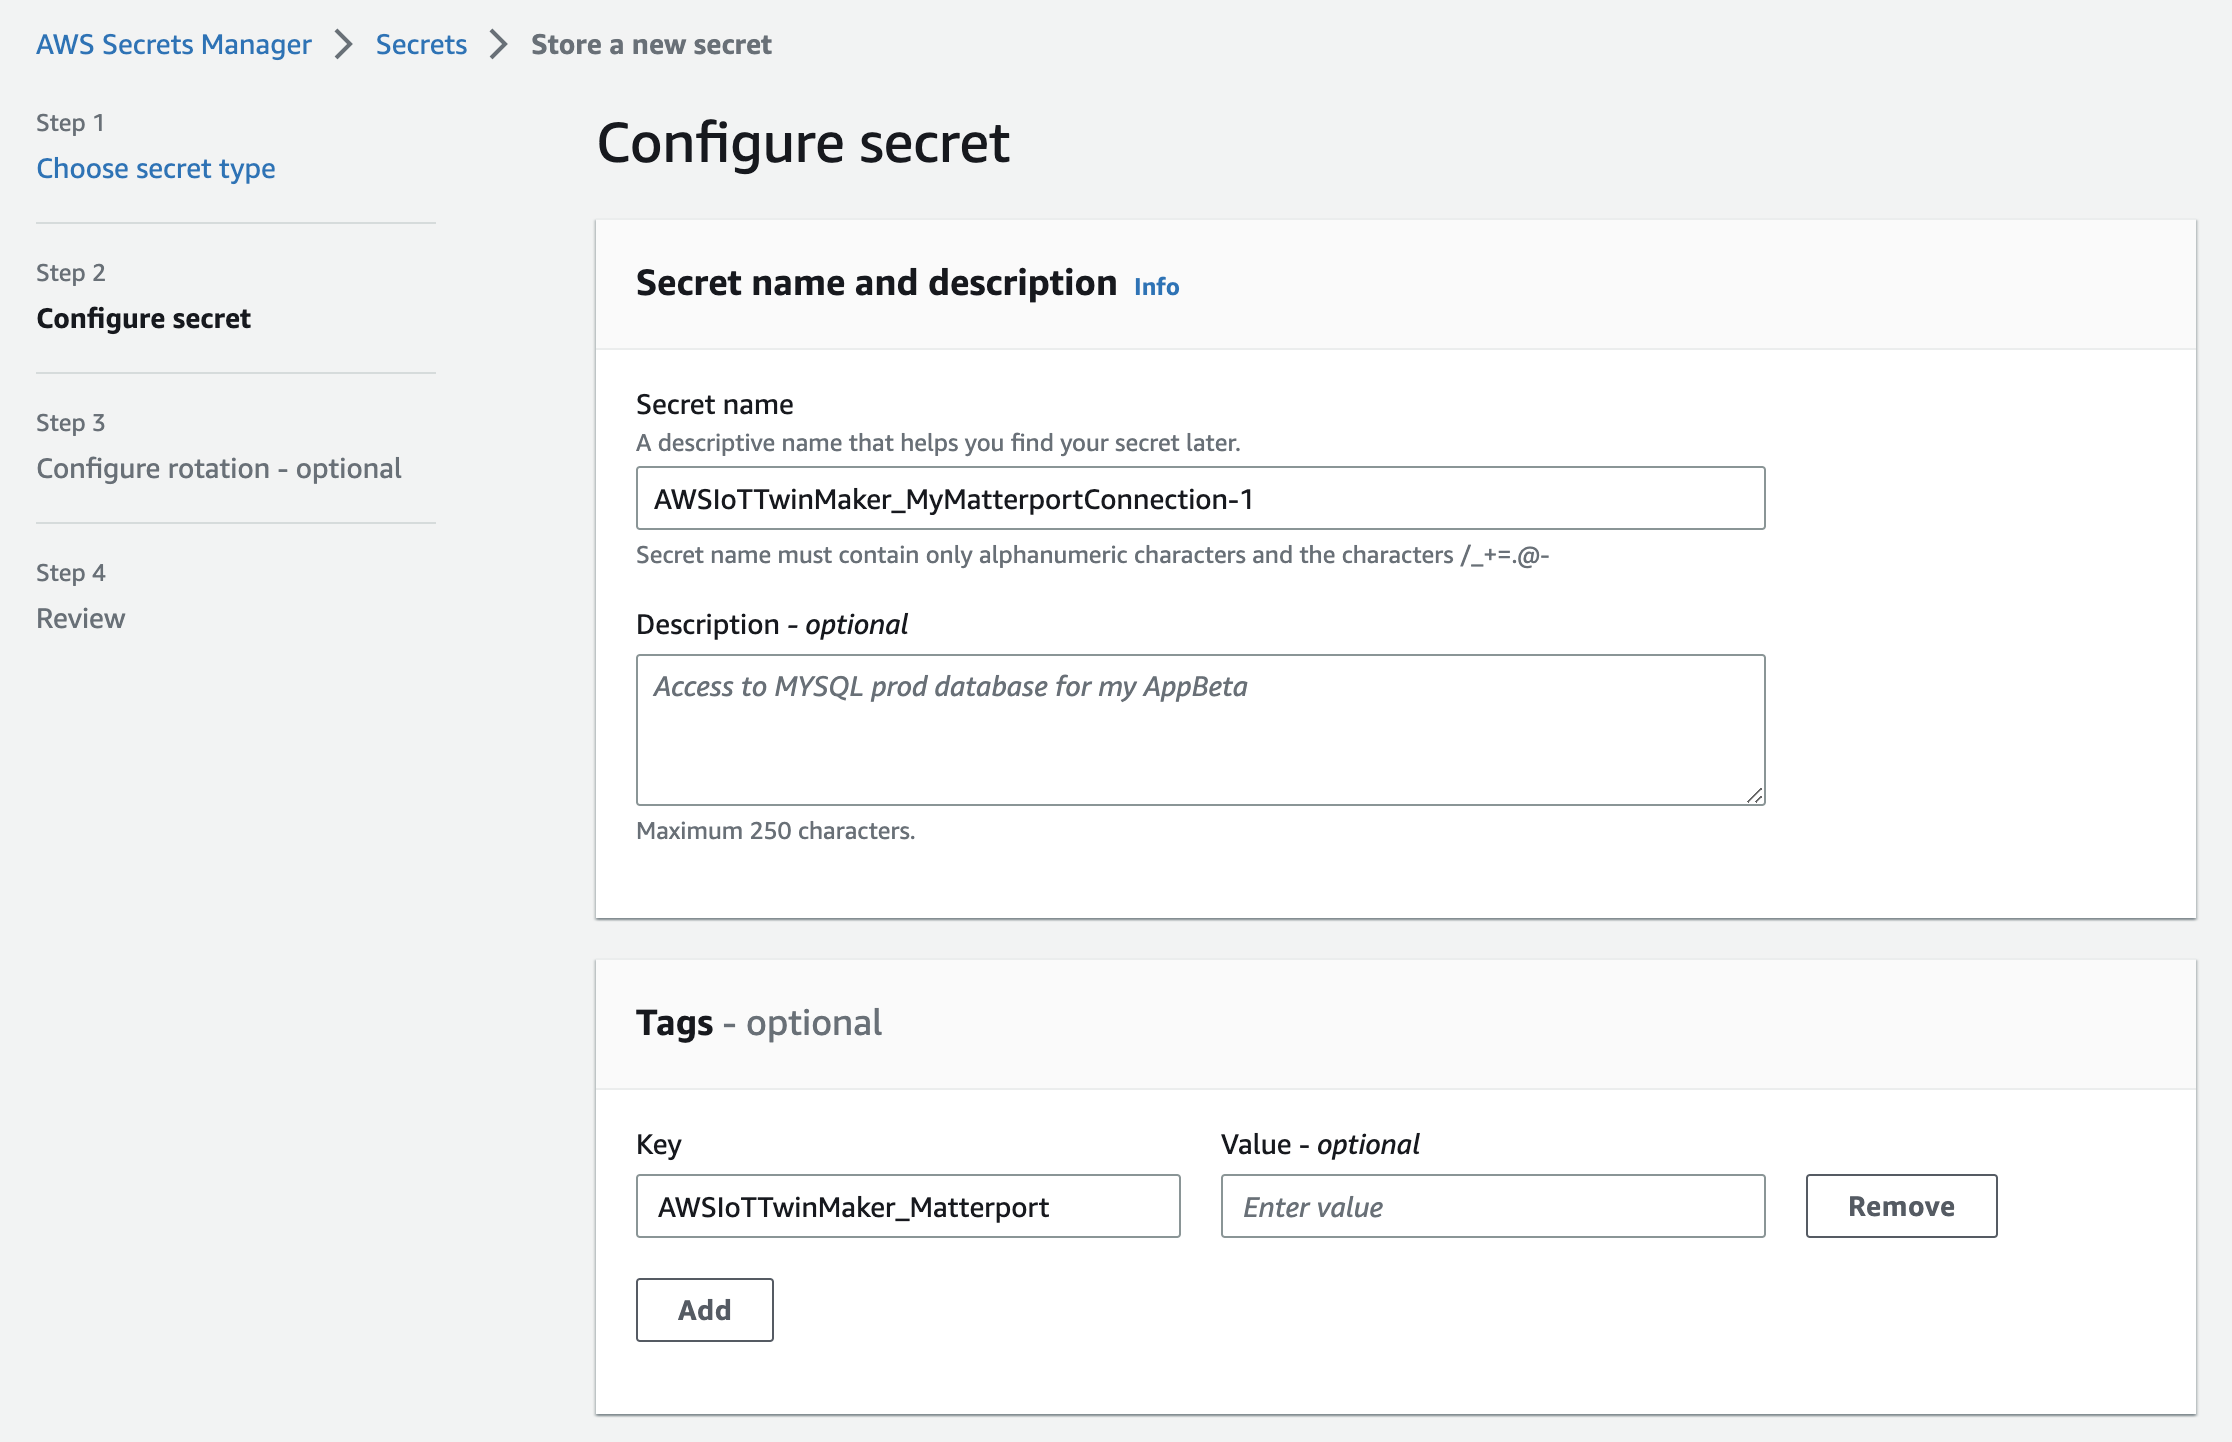
Note
You must add a tag. Tags are required when adding 3rd party secrets into Amazon Secrets Manager, despite Tags being listed as optional.
The Value field is optional. Once you have provided a Key, you can select Add to move on to the next step.
Choose Next to move on to the Configure rotation page. Setting up a secret rotation is optional. If you wish to finish adding your secret and don’t need a rotation, choose Next again. For more information on secret rotation, see Rotate Amazon Secrets Manager secrets.
Confirm your secret configuration on the Review page. Once you're ready to add your secret, choose Store.
For more information about using Amazon Secrets Manager, see the following Amazon Secrets Manager documentation:
Now you are ready to import your Matterport assets into Amazon IoT TwinMaker scenes. See the procedure in the following section, Import Matterport spaces into Amazon IoT TwinMaker scenes
Import Matterport spaces into Amazon IoT TwinMaker scenes
Add Matterport scans to your scene by selecting the connected Matterport account from within the scene settings page. Use the following procedure to import your Matterport scans and tags:
Log in to the Amazon IoT TwinMaker console
. Create or open an existing Amazon IoT TwinMaker scene in which you want to use a Matterport space.
Once the scene has opened, navigate to the Settings tab.
In Settings, under 3rd party resources, find the Connection name and enter the secret you created in the procedure from Store your Matterport credentials in Amazon Secrets Manager.
.png)
Note
If you see a message that states No connections, navigate to the Amazon IoT TwinMaker console
settings page to begin the process for Matterport integration. 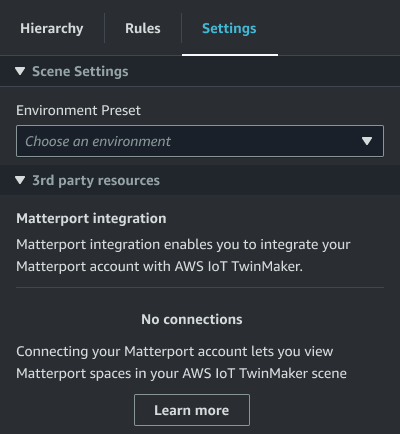
Next, choose the Matterport space you'd like to use in your scene by selecting it in the Matterport space drop-down.
.png)
After selecting a space, you can import your Matterport tags and convert them to Amazon IoT TwinMaker scene tags by pressing the Import tags button.
.png)
After you have imported Matterport tags, the button is replaced by an Update tags button. You can continually update your Matterport tags in Amazon IoT TwinMaker so that they always reflect the most recent changes in your Matterport account.
.png)
You have successfully integrated Amazon IoT TwinMaker with Matterport, and now your Amazon IoT TwinMaker scene has both your imported Matterport space and tags. You can work within this scene as you would with any other Amazon IoT TwinMaker scene.
For more information on working with Amazon IoT TwinMaker scenes, see Creating and editing Amazon IoT TwinMaker scenes.
Use Matterport spaces in your Amazon IoT TwinMaker Grafana dashboard
Once you have imported your Matterport space into an Amazon IoT TwinMaker scene, you can view that scene with the Matterport space in your Grafana dashboard. If you have already configured Grafana with Amazon IoT TwinMaker, then you can simply open the Grafana dashboard to view your scene with the imported Matterport space.
If you have not configured Amazon IoT TwinMaker with Grafana yet, complete the Grafana integration process first. You have two choices when integrating Amazon IoT TwinMaker with Grafana. You can use a self-managed Grafana instance or you can use Amazon Managed Grafana.
See the following documentation to learn more about the Grafana options and integration process:
Use Matterport spaces in your Amazon IoT TwinMaker web application
Once you have imported your Matterport space into an Amazon IoT TwinMaker scene, you can view that scene with the Matterport space in your Amazon IoT app kit web application.
See the following documentation to learn more about using the Amazon IoT application kit:
-
To learn more about using Amazon IoT TwinMaker with the Amazon IoT app kit, see Create a customized web application using Amazon IoT TwinMaker UI Components.
-
To learn more about using Amazon IoT application kit, please visit Amazon IoT Application kit Github
page. -
For instructions on how to start a new web application using Amazon IoT application kit, please visit the official IoT App Kit
documentation page.