After careful consideration, we have decided to discontinue Amazon Kinesis Data Analytics for SQL applications:
1. From September 1, 2025, we won't provide any bug fixes for Amazon Kinesis Data Analytics for SQL applications because we will have limited support for it, given the upcoming discontinuation.
2. From October 15, 2025, you will not be able to create new Kinesis Data Analytics for SQL applications.
3. We will delete your applications starting January 27, 2026. You will not be able to start or operate your Amazon Kinesis Data Analytics for SQL applications. Support will no longer be available for Amazon Kinesis Data Analytics for SQL from that time. For more information, see Amazon Kinesis Data Analytics for SQL Applications discontinuation.
Working with the Schema Editor
The schema for an Amazon Kinesis Data Analytics application's input stream defines how data from the stream is made available to SQL queries in the application.
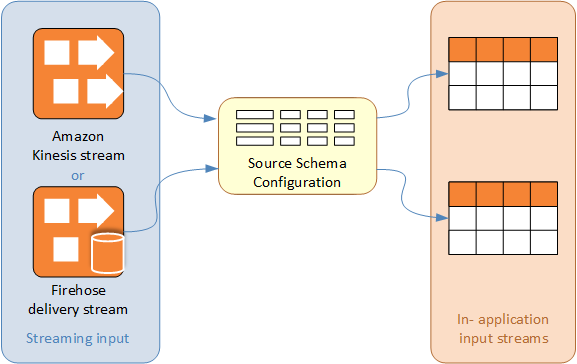
The schema contains selection criteria for determining what part of the streaming input is transformed into a data column in the in-application input stream. This input can be one of the following:
A JSONPath expression for JSON input streams. JSONPath is a tool for querying JSON data.
A column number for input streams in comma-separated values (CSV) format.
A column name and a SQL data type for presenting the data in the in-application data stream. The data type also contains a length for character or binary data.
The console attempts to generate the schema using DiscoverInputSchema. If schema discovery fails or returns an incorrect or incomplete schema, you must edit the schema manually by using the schema editor.
Schema Editor Main Screen
The following screenshot shows the main screen for the Schema Editor.
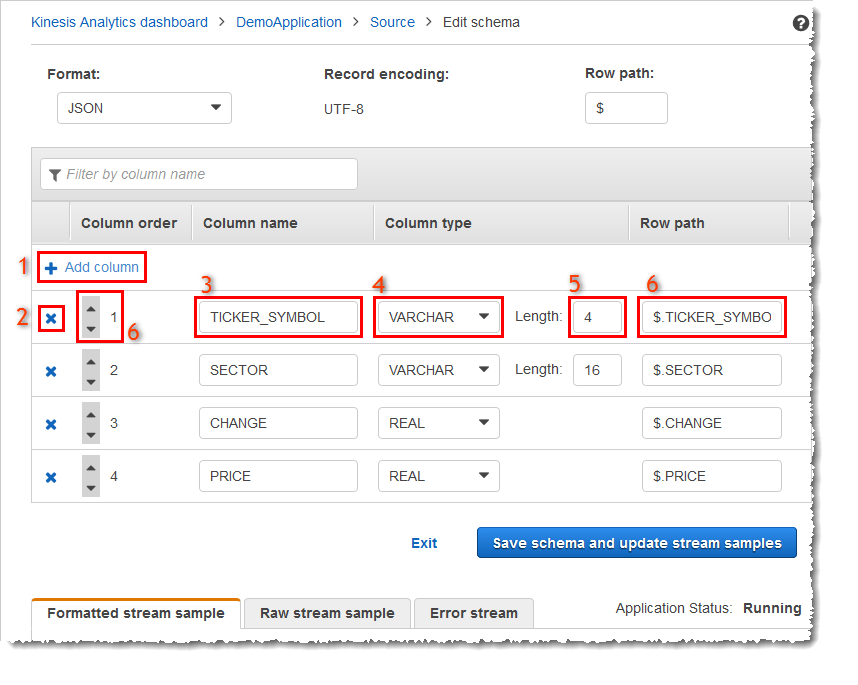
You can apply the following edits to the schema:
Add a column (1): You might need to add a data column if a data item is not detected automatically.
Delete a column (2): You can exclude data from the source stream if your application doesn't require it. This exclusion doesn't affect the data in the source stream. If data is excluded, that data simply isn't made available to the application.
Rename a column (3). A column name can't be blank, must be longer than a single character, and must not contain reserved SQL keywords. The name must also meet naming criteria for SQL ordinary identifiers: The name must start with a letter and contain only letters, underscore characters, and digits.
Change the data type (4) or length (5) of a column: You can specify a compatible data type for a column. If you specify an incompatible data type, the column is either populated with NULL or the in-application stream is not populated at all. In the latter case, errors are written to the error stream. If you specify a length for a column that is too small, the incoming data is truncated.
Change the selection criteria of a column (6): You can edit the JSONPath expression or CSV column order used to determine the source of the data in a column. To change the selection criteria for a JSON schema, enter a new value for the row path expression. A CSV schema uses the column order as selection criteria. To change the selection criteria for a CSV schema, change the order of the columns.
Editing the Schema for a Streaming Source
If you need to edit a schema for a streaming source, follow these steps.
To edit the schema for a streaming source
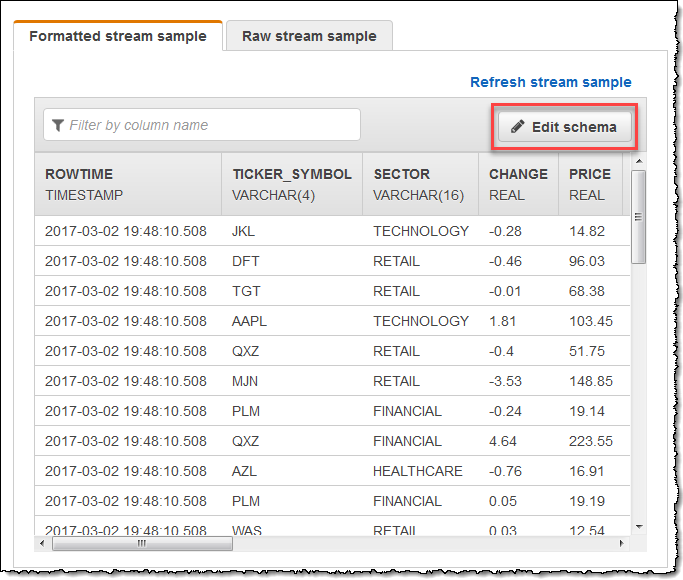
On the Source page, choose Edit schema.
On the Edit schema page, edit the source schema.
For Format, choose JSON or CSV. For JSON or CSV format, the supported encoding is ISO 8859-1.
For further information on editing the schema for JSON or CSV format, see the procedures in the next sections.
Editing a JSON Schema
You can edit a JSON schema by using the following steps.
To edit a JSON schema
In the schema editor, choose Add column to add a column.
A new column appears in the first column position. To change the column order, choose the up and down arrows next to the column name.
For a new column, provide the following information:
For Column name, type a name.
A column name cannot be blank, must be longer than a single character, and must not contain reserved SQL keywords. It must also meet naming criteria for SQL ordinary identifiers: It must start with a letter and contain only letters, underscore characters, and digits.
For Column type, type an SQL data type.
A column type can be any supported SQL data type. If the new data type is CHAR, VARBINARY, or VARCHAR, specify a data length for Length. For more information, see Data Types.
For Row path, provide a row path. A row path is a valid JSONPath expression that maps to a JSON element.
Note
The base Row path value is the path to the top-level parent that contains the data to be imported. This value is $ by default. For more information, see
RecordRowPathinJSONMappingParameters.
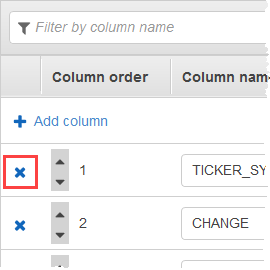
To delete a column, choose the x icon next to the column number.
To rename a column, enter a new name for Column name. The new column name cannot be blank, must be longer than a single character, and must not contain reserved SQL keywords. It must also meet naming criteria for SQL ordinary identifiers: It must start with a letter and contain only letters, underscore characters, and digits.
-
To change the data type of a column, choose a new data type for Column type. If the new data type is
CHAR,VARBINARY, orVARCHAR, specify a data length for Length. For more information, see Data Types. -
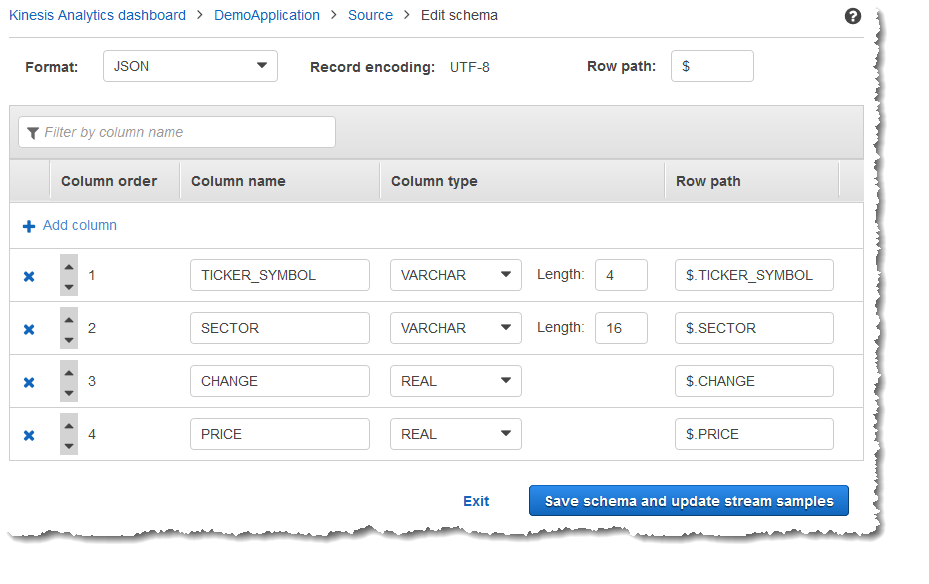
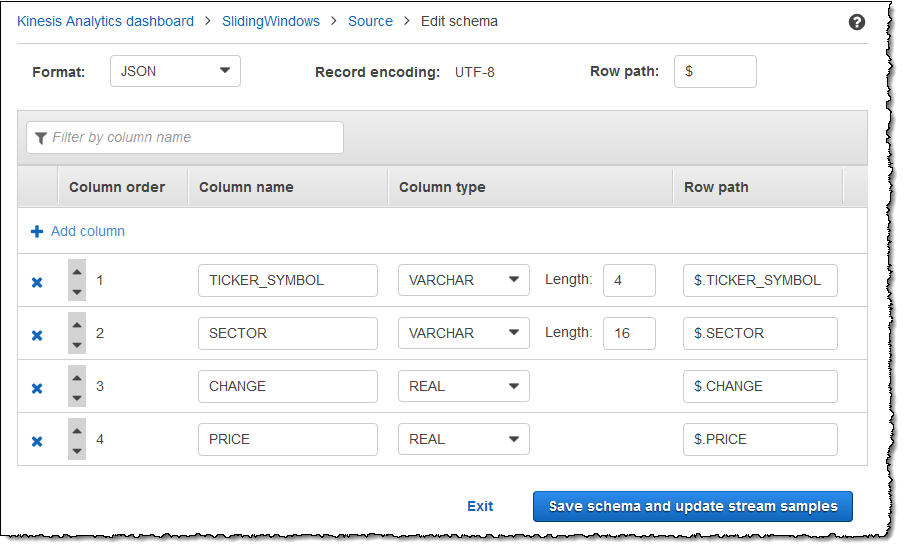
Choose Save schema and update stream to save your changes.
The modified schema appears in the editor and looks similar to the following.
If your schema has many rows, you can filter the rows using
Filter by column name. For example, to edit column
names that start with P, such as a Price column,
enter P in the Filter by column name
box.
Editing a CSV Schema
You can edit a CSV schema by using the following steps.
To edit a CSV schema
In the schema editor, for Row delimiter, choose the delimiter used by your incoming data stream. This is the delimiter between records of data in your stream, such as a newline character.
For Column delimiter, choose the delimiter used by your incoming data stream. This is the delimiter between fields of data in your stream, such as a comma.
To add a column, choose Add column.
A new column appears in the first column position. To change the column order, choose the up and down arrows next to the column name.
For a new column, provide the following information:
For Column name, enter a name.
A column name cannot be blank, must be longer than a single character, and must not contain reserved SQL keywords. It must also meet naming criteria for SQL ordinary identifiers: It must start with a letter and contain only letters, underscore characters, and digits.
For Column type, enter a SQL data type.
A column type can be any supported SQL data type. If the new data type is CHAR, VARBINARY, or VARCHAR, specify a data length for Length. For more information, see Data Types.
To delete a column, choose the x icon next to the column number.
To rename a column, enter a new name in Column name. The new column name cannot be blank, must be longer than a single character, and must not contain reserved SQL keywords. It must also meet naming criteria for SQL ordinary identifiers: It must start with a letter and contain only letters, underscore characters, and digits.
-
To change the data type of a column, choose a new data type for Column type. If the new data type is CHAR, VARBINARY, or VARCHAR, specify a data length for Length. For more information, see Data Types.
-
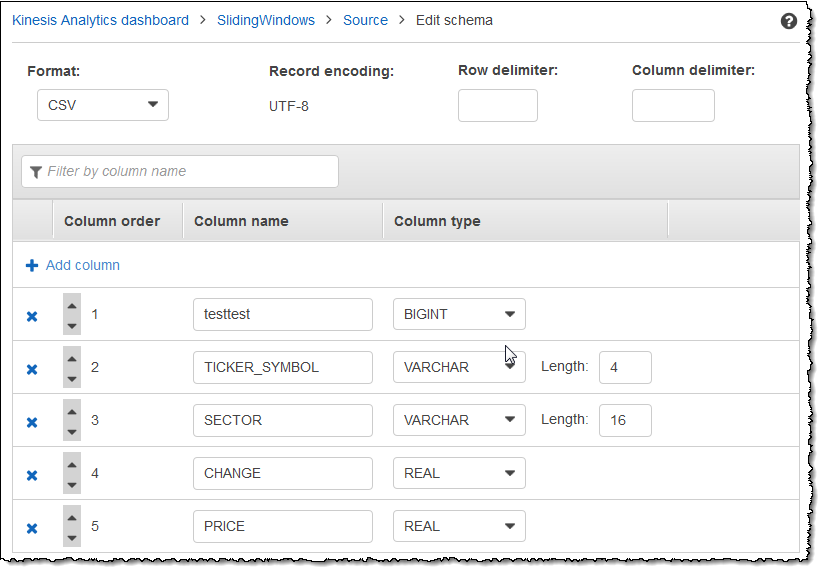
Choose Save schema and update stream to save your changes.
The modified schema appears in the editor and looks similar to the following.
If your schema has many rows, you can filter the rows using Filter
by column name. For example, to edit column names that start
with P, such as a Price column, enter
P in the Filter by column name
box.