Creating a data filter
You can create one or more data filters for each Data Catalog table.
To create a data filter for a Data Catalog table (console)
-
Open the Lake Formation console at https://console.amazonaws.cn/lakeformation/
. Sign as a data lake administrator, the target table owner, or a principal who has a Lake Formation permission on the target table.
-
In the navigation pane, under Data catalog, choose Data filters.
-
On the Data filters page, choose Create new filter.
-
In the Create data filter dialog box, enter the following information:
-
Data filter name
-
Target database – Specify the database that contains the table.
-
Target table
-
Column-level access – Leave this set to Access to all columns to specify row filtering only. Choose Include columns or Exclude columns to specify column or cell filtering, and then specify the columns to include or exclude.
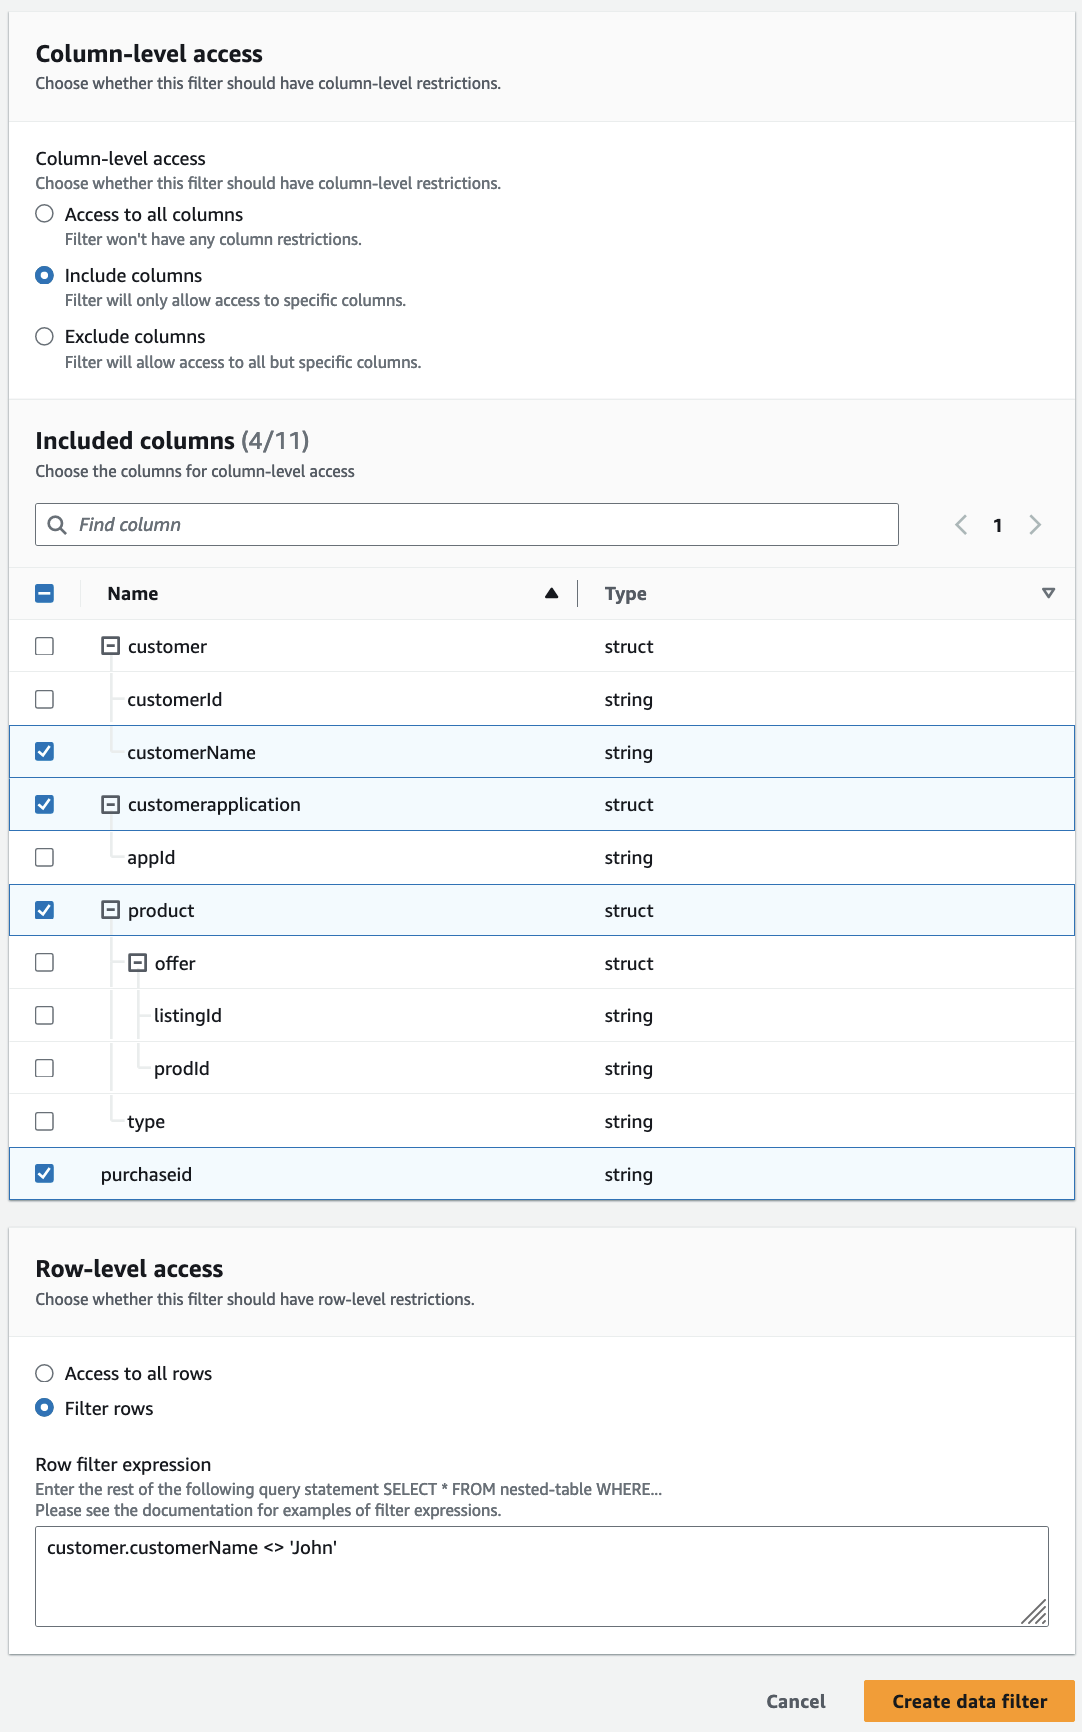
Nested columns – If you're applying the filter on a table that contains nested columns, you can explicitly specify sub-structures of the nested struct columns within a data filter.
When you grant SELECT permission to a principal on this filer, the principal executing the following query, will only see the data for
customer.customerNameand notcustomer.customerId.SELECT "customer" FROM "example_db"."example_table";
When you grant permissions to the
customercolumn, the principal receives the access to the column and the nested fields under the column (customerNameandcustomerID). -
Row filter expression – Enter a filter expression to specify row or cell filtering. For supported data types and operators, see PartiQL support in row filter expressions. Choose Access to all rows to grant access to all .
You can include partial column structs from nested columns in a row filter expression to filter rows that contain specific value.
When a principal is granted permissions to a table with a row filter expression
Select * from example_nestedtable where customer.customerName
                <>'John'
, and Column-level access is set to Access to all columns, the query results shows only rows wherecustomerName <>'John'evaluates to true.
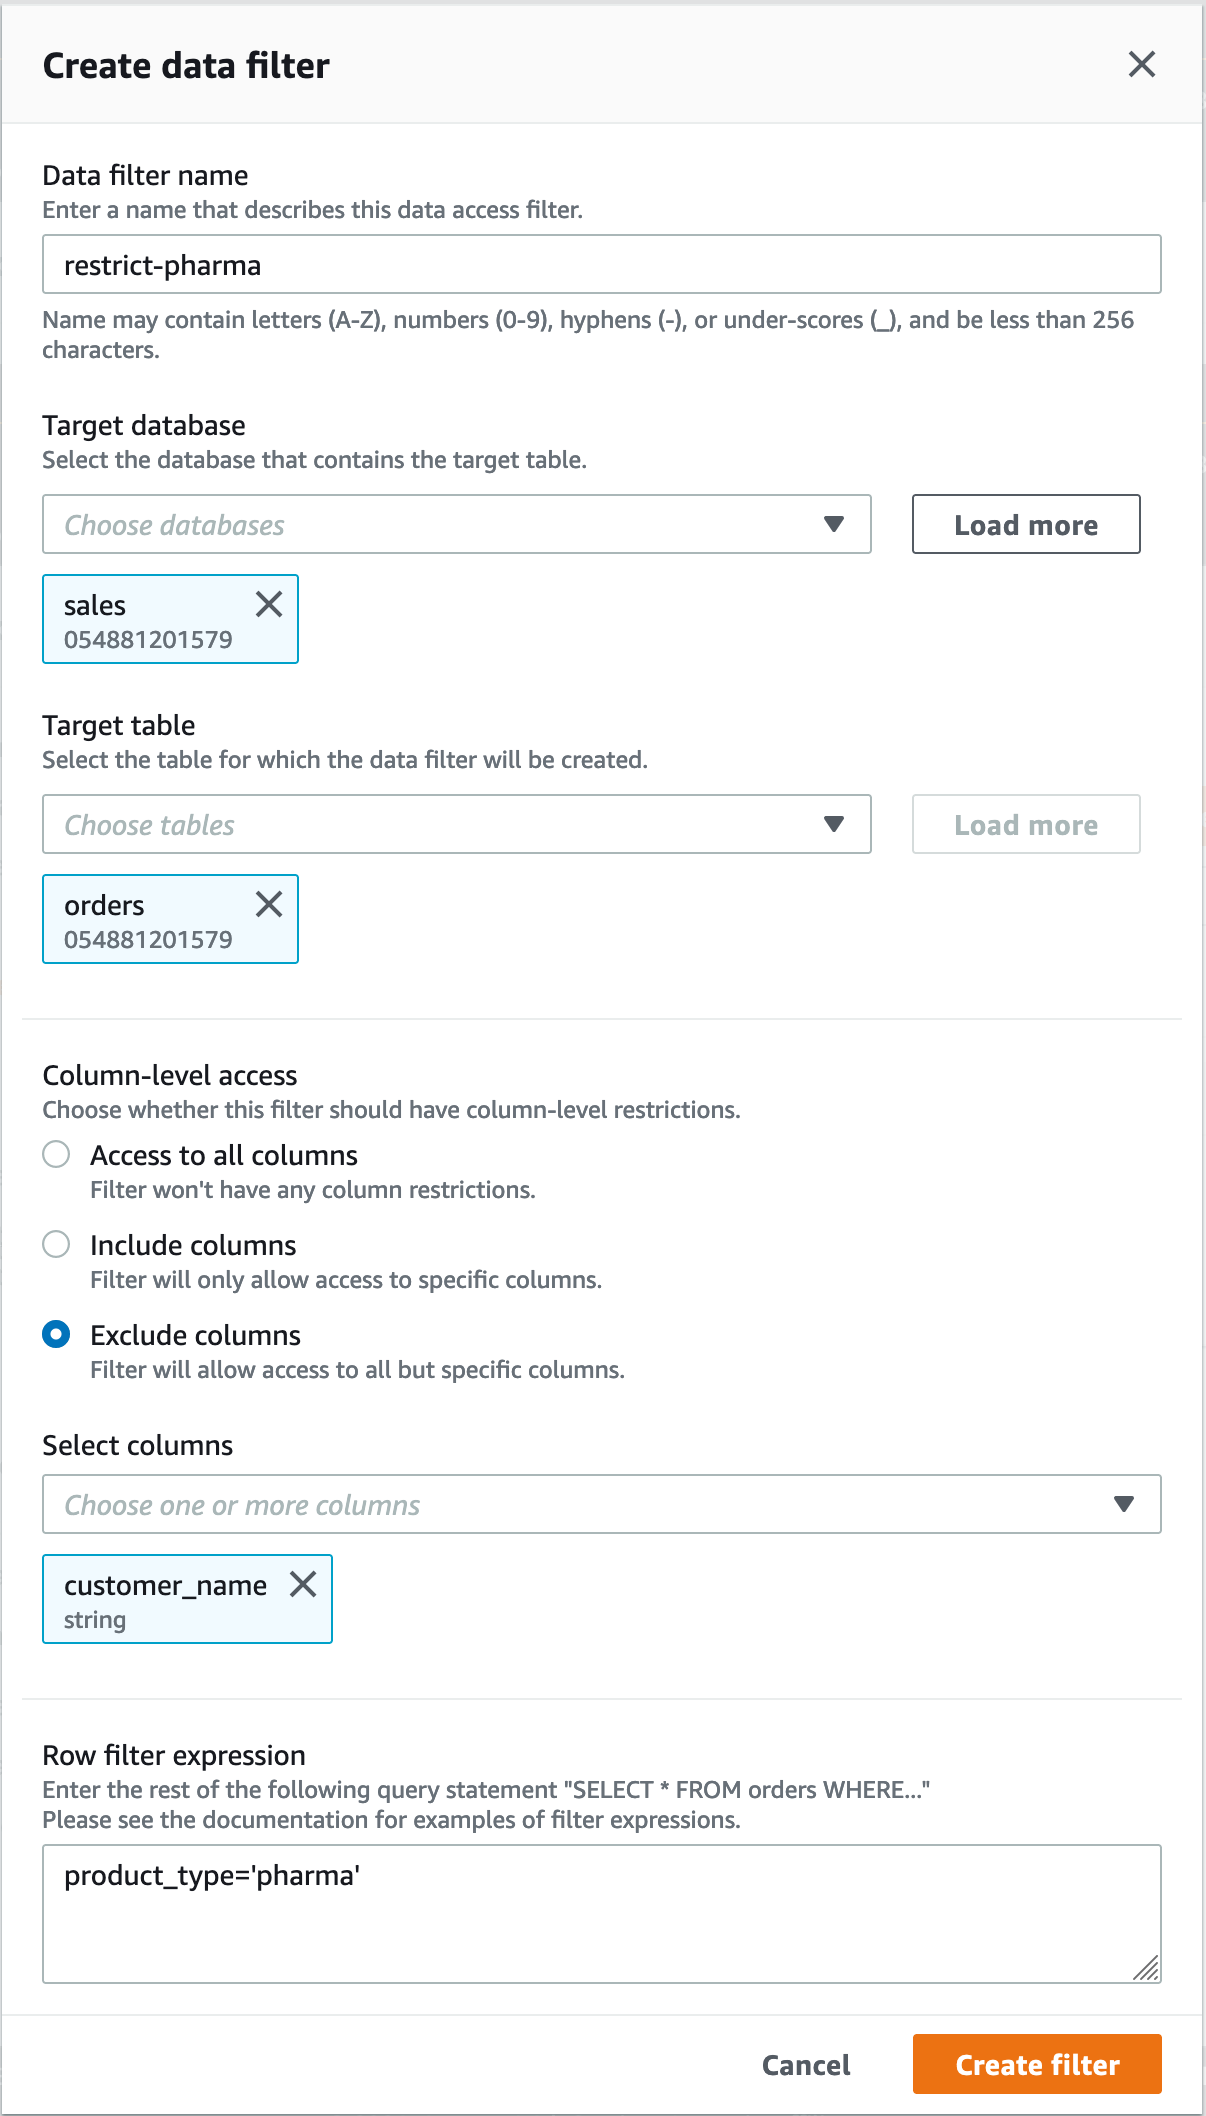
The following screenshot shows a data filter that implements cell filtering. In queries against the
orderstable, it denies access to thecustomer_namecolumn and shows only rows that have 'pharma' in theproduct_typecolumn.
-
-
Choose Create filter.
To create a data filter with cell-filter policies on a nested field
This section uses the following sample schema to show how to create a data cells filter:
[
    { name: "customer", type: "struct<customerId:string,customerName:string>" },
    { name: "customerApplication", type: "struct<appId:string>" },
    { name: "product", type: "struct<offer:struct<prodId:string,listingId:string>,type:string>" },
    { name: "purchaseId", type: "string" },
]
-
On the Create a data filter, page enter a name for the data filter.
-
Next, use the drop-down to choose a database name and table name.
-
In the Column-level access section, choose Included columns, and select a nested column (
customer.customerName). -
In the Row-level access section, choose the Access to all rows option.
-
Choose Create filter.
When you grant
SELECTpermission on this filter, the principal gets access to all rows in thecustomerNamecolumn. -
Next, define another data filter for the same database/table.
-
In the Column-level access section, choose Included columns, and select another nested column (
customer.customerid). -
In the Row-level access section, choose Filter rows, and enter a Row filter expression (
customer.customerid <> 5). -
Choose Create filter.
When you grant
SELECTpermission on this filter, the principal receives access to all rows in thecustomerName, andcustomerIdfields except the cell where the value is 5 in thecustomerIdcolumn.