Tutorial: Using Amazon Lambda with Amazon DocumentDB Streams
In this tutorial, you create a basic Lambda function that consumes events from an Amazon DocumentDB (with MongoDB compatibility) change stream. To complete this tutorial, you will go through the following stages:
-
Set up your Amazon DocumentDB cluster, connect to it, and activate change streams on it.
-
Create your Lambda function, and configure your Amazon DocumentDB cluster as an event source for your function.
-
Test the setup by inserting items into your Amazon DocumentDB database.
Create the Amazon DocumentDB cluster
-
Open the Amazon DocumentDB console
. Under Clusters, choose Create. -
Create a cluster with the following configuration:
-
For Cluster type, choose Instance-based cluster. This is the default option.
-
Under Cluster configuration, make sure that Engine version 5.0.0 is selected. This is the default option.
-
Under Instance configuration:
-
For DB instance class, select Memory optimized classes. This is the default option.
-
For Number of regular replica instances, choose 1.
-
For Instance class, use the default selection.
-
-
Under Authentication, enter a username for the primary user, and then choose Self managed. Enter a password, then confirm it.
-
Keep all other default settings.
-
-
Choose Create cluster.
Create the secret in Secrets Manager
While Amazon DocumentDB is creating your cluster, create an Amazon Secrets Manager secret to store your database credentials. You'll provide this secret when you create the Lambda event source mapping in a later step.
To create the secret in Secrets Manager
-
Open the Secrets Manager
console and choose Store a new secret. -
For Choose secret type, choose the following options:
-
Under Basic details:
-
Secret type: Credentials for your Amazon DocumentDB database
-
Under Credentials, enter the same username and password that you used to create your Amazon DocumentDB cluster.
-
Database: Choose your Amazon DocumentDB cluster.
-
Choose Next.
-
-
-
For Configure secret, choose the following options:
-
Secret name:
DocumentDBSecret -
Choose Next.
-
-
Choose Next.
-
Choose Store.
-
Refresh the console to verify that you successfully stored the
DocumentDBSecretsecret.
Note the Secret ARN. You’ll need it in a later step.
Connect to the cluster
Connect to your Amazon DocumentDB cluster using Amazon CloudShell
-
On the Amazon DocumentDB management console, under Clusters, locate the cluster you created. Choose your cluster by clicking the check box next to it.
-
Choose Connect to cluster. The CloudShell Run command screen appears.
-
In the New environment name field, enter a unique name, such as "test" and choose Create and run.
-
When prompted, enter your password. When the prompt becomes
rs0 [direct: primary] <env-name>>, you are successfully connected to your Amazon DocumentDB cluster.
Activate change streams
For this tutorial, you’ll track changes to the products collection of the docdbdemo database
in your Amazon DocumentDB cluster. You do this by activating change streams
To create a new database within your cluster
-
Run the following command to create a new database called
docdbdemo:use docdbdemo -
In the terminal window, use the following command to insert a record into
docdbdemo:db.products.insertOne({"hello":"world"})You should see an output like this:
{ acknowledged: true, insertedId: ObjectId('67f85066ca526410fd531d59') } -
Next, activate change streams on the
productscollection of thedocdbdemodatabase using the following command:db.adminCommand({modifyChangeStreams: 1, database: "docdbdemo", collection: "products", enable: true});You should see output that looks like this:
{ "ok" : 1, "operationTime" : Timestamp(1680126165, 1) }
Create interface VPC endpoints
Next, create interface VPC endpoints
To create interface VPC endpoints
-
Open the VPC console
. In the left menu, under Virtual private cloud, choose Endpoints. -
Choose Create endpoint. Create an endpoint with the following configuration:
-
For Name tag, enter
lambda-default-vpc. -
For Service category, choose Amazon services.
-
For Services, enter
lambdain the search box. Choose the service with formatcom.amazonaws.<region>.lambda. -
For VPC, choose the VPC that your Amazon DocumentDB cluster is in. This is typically the default VPC
. -
For Subnets, check the boxes next to each availability zone. Choose the correct subnet ID for each availability zone.
-
For IP address type, select IPv4.
-
For Security groups, choose the security group that your Amazon DocumentDB cluster uses. This is typically the
defaultsecurity group. -
Keep all other default settings.
-
Choose Create endpoint.
-
-
Again, choose Create endpoint. Create an endpoint with the following configuration:
-
For Name tag, enter
secretsmanager-default-vpc. -
For Service category, choose Amazon services.
-
For Services, enter
secretsmanagerin the search box. Choose the service with formatcom.amazonaws.<region>.secretsmanager. -
For VPC, choose the VPC that your Amazon DocumentDB cluster is in. This is typically the default VPC
. -
For Subnets, check the boxes next to each availability zone. Choose the correct subnet ID for each availability zone.
-
For IP address type, select IPv4.
-
For Security groups, choose the security group that your Amazon DocumentDB cluster uses. This is typically the
defaultsecurity group. -
Keep all other default settings.
-
Choose Create endpoint.
-
This completes the cluster setup portion of this tutorial.
Create the execution role
In the next set of steps, you’ll create your Lambda function. First, you need to create the execution role that gives your function permission to access your cluster. You do this by creating an IAM policy first, then attaching this policy to an IAM role.
To create IAM policy
-
Open the Policies page
in the IAM console and choose Create policy. -
Choose the JSON tab. In the following policy, replace the Secrets Manager resource ARN in the final line of the statement with your secret ARN from earlier, and copy the policy into the editor.
-
Choose Next: Tags, then choose Next: Review.
-
For Name, enter
AWSDocumentDBLambdaPolicy. -
Choose Create policy.
To create the IAM role
-
Open the Roles page
in the IAM console and choose Create role. -
For Select trusted entity, choose the following options:
-
Trusted entity type: Amazon service
-
Service or use case: Lambda
-
Choose Next.
-
-
For Add permissions, choose the
AWSDocumentDBLambdaPolicypolicy you just created, as well as theAWSLambdaBasicExecutionRoleto give your function permissions to write to Amazon CloudWatch Logs. -
Choose Next.
-
For Role name, enter
AWSDocumentDBLambdaExecutionRole. -
Choose Create role.
Create the Lambda function
This tutorial uses the Python 3.14 runtime, but we’ve also provided example code files for other runtimes. You can select the tab in the following box to see the code for the runtime you’re interested in.
The code receives an Amazon DocumentDB event input and processes the message that it contains.
To create the Lambda function
-
Open the Functions page
of the Lambda console. -
Choose Create function.
-
Choose Author from scratch
-
Under Basic information, do the following:
-
For Function name, enter
ProcessDocumentDBRecords -
For Runtime, choose Python 3.14.
-
For Architecture, choose x86_64.
-
-
In the Change default execution role tab, do the following:
-
Expand the tab, then choose Use an existing role.
-
Select the
AWSDocumentDBLambdaExecutionRoleyou created earlier.
-
-
Choose Create function.
To deploy the function code
-
Choose the Python tab in the following box and copy the code.
-
In the Code source pane on the Lambda console, paste the code into the code editor, replacing the code that Lambda created.
-
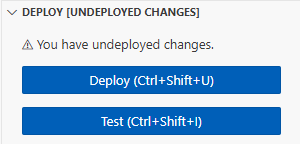
In the DEPLOY section, choose Deploy to update your function's code:
Create the Lambda event source mapping
Create the event source mapping that associates your Amazon DocumentDB change stream with your Lambda function. After you create this event source mapping, Amazon Lambda immediately starts polling the stream.
To create the event source mapping
-
Open the Functions page
in the Lambda console. -
Choose the
ProcessDocumentDBRecordsfunction you created earlier. -
Choose the Configurationtab, then choose Triggers in the left menu.
-
Choose Add trigger.
-
Under Trigger configuration, for the source, select Amazon DocumentDB.
-
Create the event source mapping with the following configuration:
-
Amazon DocumentDB cluster: Choose the cluster you created earlier.
-
Database name: docdbdemo
-
Collection name: products
-
Batch size: 1
-
Starting position: Latest
-
Authentication: BASIC_AUTH
-
Secrets Manager key: Choose the secret for your Amazon DocumentDB cluster. It will be called something like
rds!cluster-12345678-a6f0-52c0-b290-db4aga89274f. -
Batch window: 1
-
Full document configuration: UpdateLookup
-
-
Choose Add. Creating your event source mapping can take a few minutes.
Test your function
Wait for the event source mapping to reach the Enabled state. This can take several minutes. Then, test the end-to-end setup by inserting, updating, and deleting database records. Before you begin:
-
Reconnect to your Amazon DocumentDB cluster in your CloudShell environment.
-
Run the following command to ensure that you’re using the
docdbdemodatabase:use docdbdemo
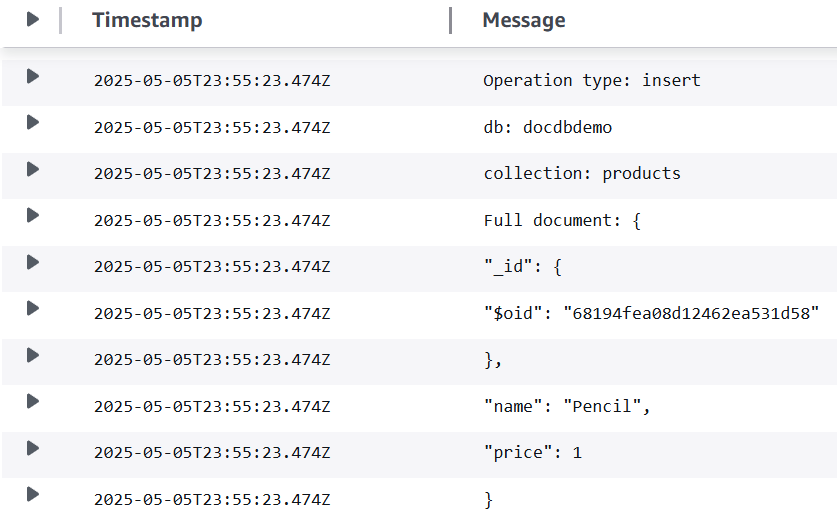
Insert a record into the products collection of the docdbdemo database:
db.products.insertOne({"name":"Pencil", "price": 1.00})
Verify that your function successfully processed this event by checking CloudWatch Logs. You should see a log entry like this:
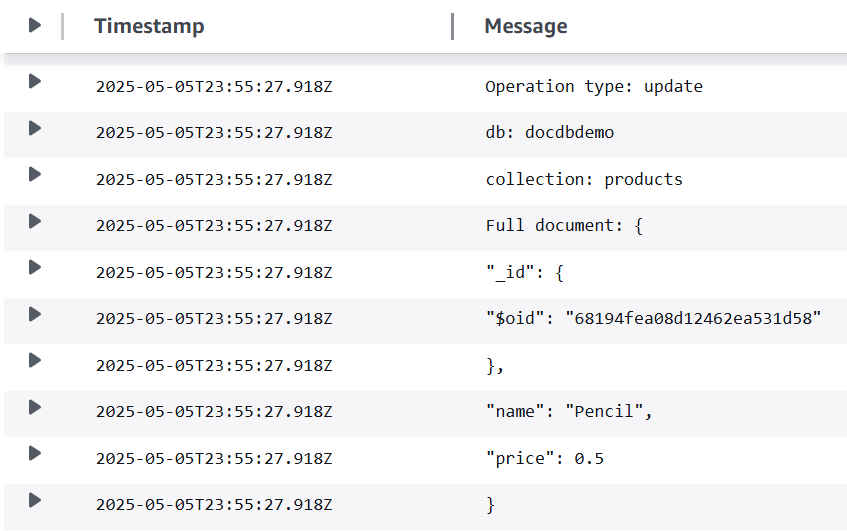
Update the record you just inserted with the following command:
db.products.updateOne(
    { "name": "Pencil" },
    { $set: { "price": 0.50 }}
)
Verify that your function successfully processed this event by checking CloudWatch Logs. You should see a log entry like this:
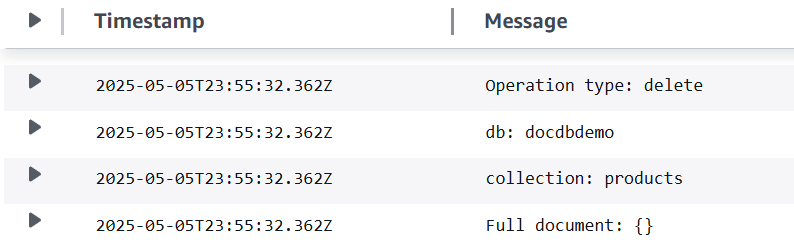
Delete the record that you just updated with the following command:
db.products.deleteOne( { "name": "Pencil" } )
Verify that your function successfully processed this event by checking CloudWatch Logs. You should see a log entry like this:
Troubleshooting
If you don't see any database events in your function's CloudWatch logs, check the following:
-
Make sure that the Lambda event source mapping (also known as a trigger) is in the Enabled state. Event source mappings can take several minutes to create.
-
If the event source mapping is Enabled but you still don't see database events in CloudWatch:
-
Make sure that the Database name in the event source mapping is set to
docdbdemo.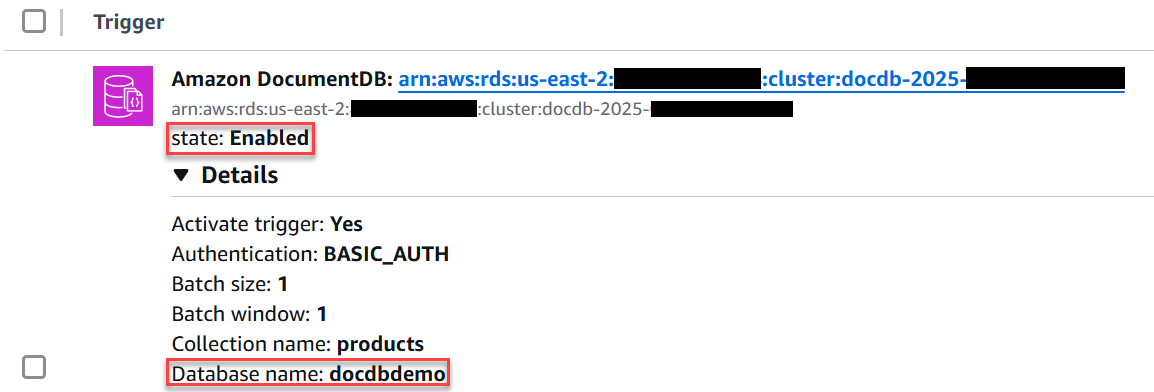
-
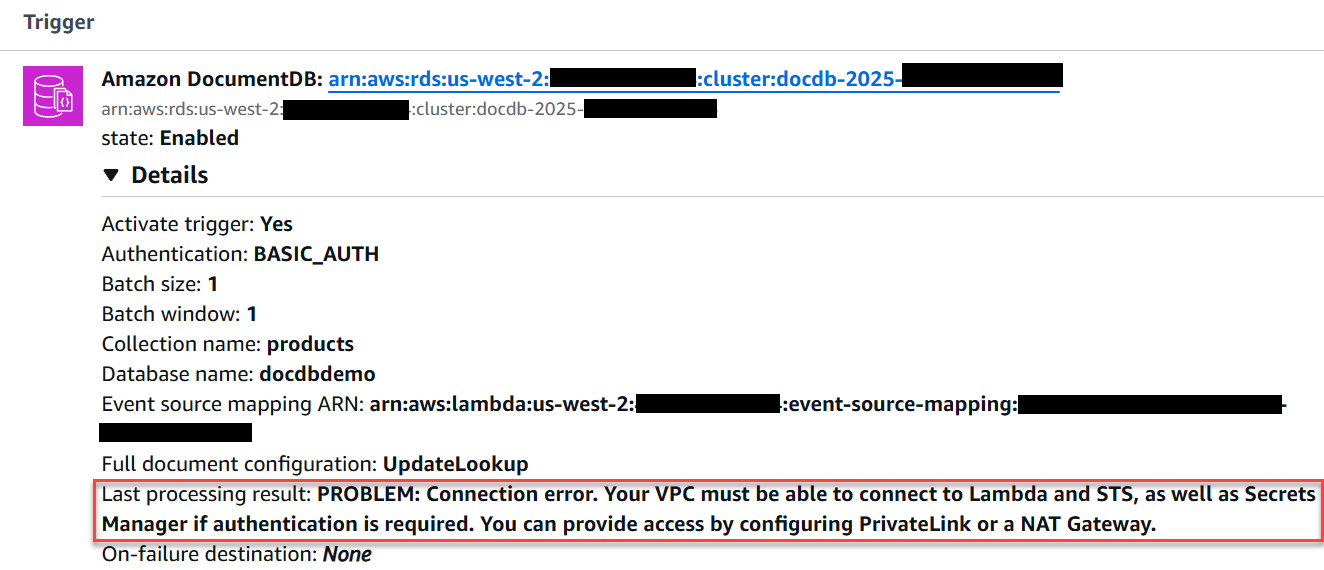
Check the event source mapping Last processing result field for the following message "PROBLEM: Connection error. Your VPC must be able to connect to Lambda and STS, as well as Secrets Manager if authentication is required." If you see this error, make sure that you created the Lambda and Secrets Manager VPC interface endpoints, and that the endpoints use the same VPC and subnets that your Amazon DocumentDB cluster uses.
-
Clean up your resources
You can now delete the resources that you created for this tutorial, unless you want to retain them. By deleting Amazon resources that you're no longer using, you prevent unnecessary charges to your Amazon Web Services account.
To delete the Lambda function
-
Open the Functions page
of the Lambda console. -
Select the function that you created.
-
Choose Actions, Delete.
-
Type
confirmin the text input field and choose Delete.
To delete the execution role
-
Open the Roles page
of the IAM console. -
Select the execution role that you created.
-
Choose Delete.
-
Enter the name of the role in the text input field and choose Delete.
To delete the VPC endpoints
-
Open the VPC console
. In the left menu, under Virtual private cloud, choose Endpoints. -
Select the endpoints you created.
-
Choose Actions, Delete VPC endpoints.
-
Enter
deletein the text input field. -
Choose Delete.
To delete the Amazon DocumentDB cluster
-
Open the Amazon DocumentDB console
. -
Choose the Amazon DocumentDB cluster you created for this tutorial, and disable deletion protection.
-
In the main Clusters page, choose your Amazon DocumentDB cluster again.
-
Choose Actions, Delete.
-
For Create final cluster snapshot, select No.
-
Enter
deletein the text input field. -
Choose Delete.
To delete the secret in Secrets Manager
-
Open the Secrets Manager
console. -
Choose the secret you created for this tutorial.
-
Choose Actions, Delete secret.
-
Choose Schedule deletion.