Create a tracking server using Studio
You can create a tracking server from the SageMaker Studio MLflow UI. If you created your SageMaker Studio domain following the Set up for organizations workflow, the service role for your SageMaker Studio domain has sufficient permissions to serve as the SageMaker AI IAM service roles and the tracking server IAM service role.
Create a tracking server from the SageMaker Studio MLflow UI with the following steps:
-
Navigate to Studio from the SageMaker AI console. Be sure that you are using the new Studio experience and have updated from Studio Classic. For more information, see Migration from Amazon SageMaker Studio Classic.
-
Choose MLflow in the Applications pane of the Studio UI.
-
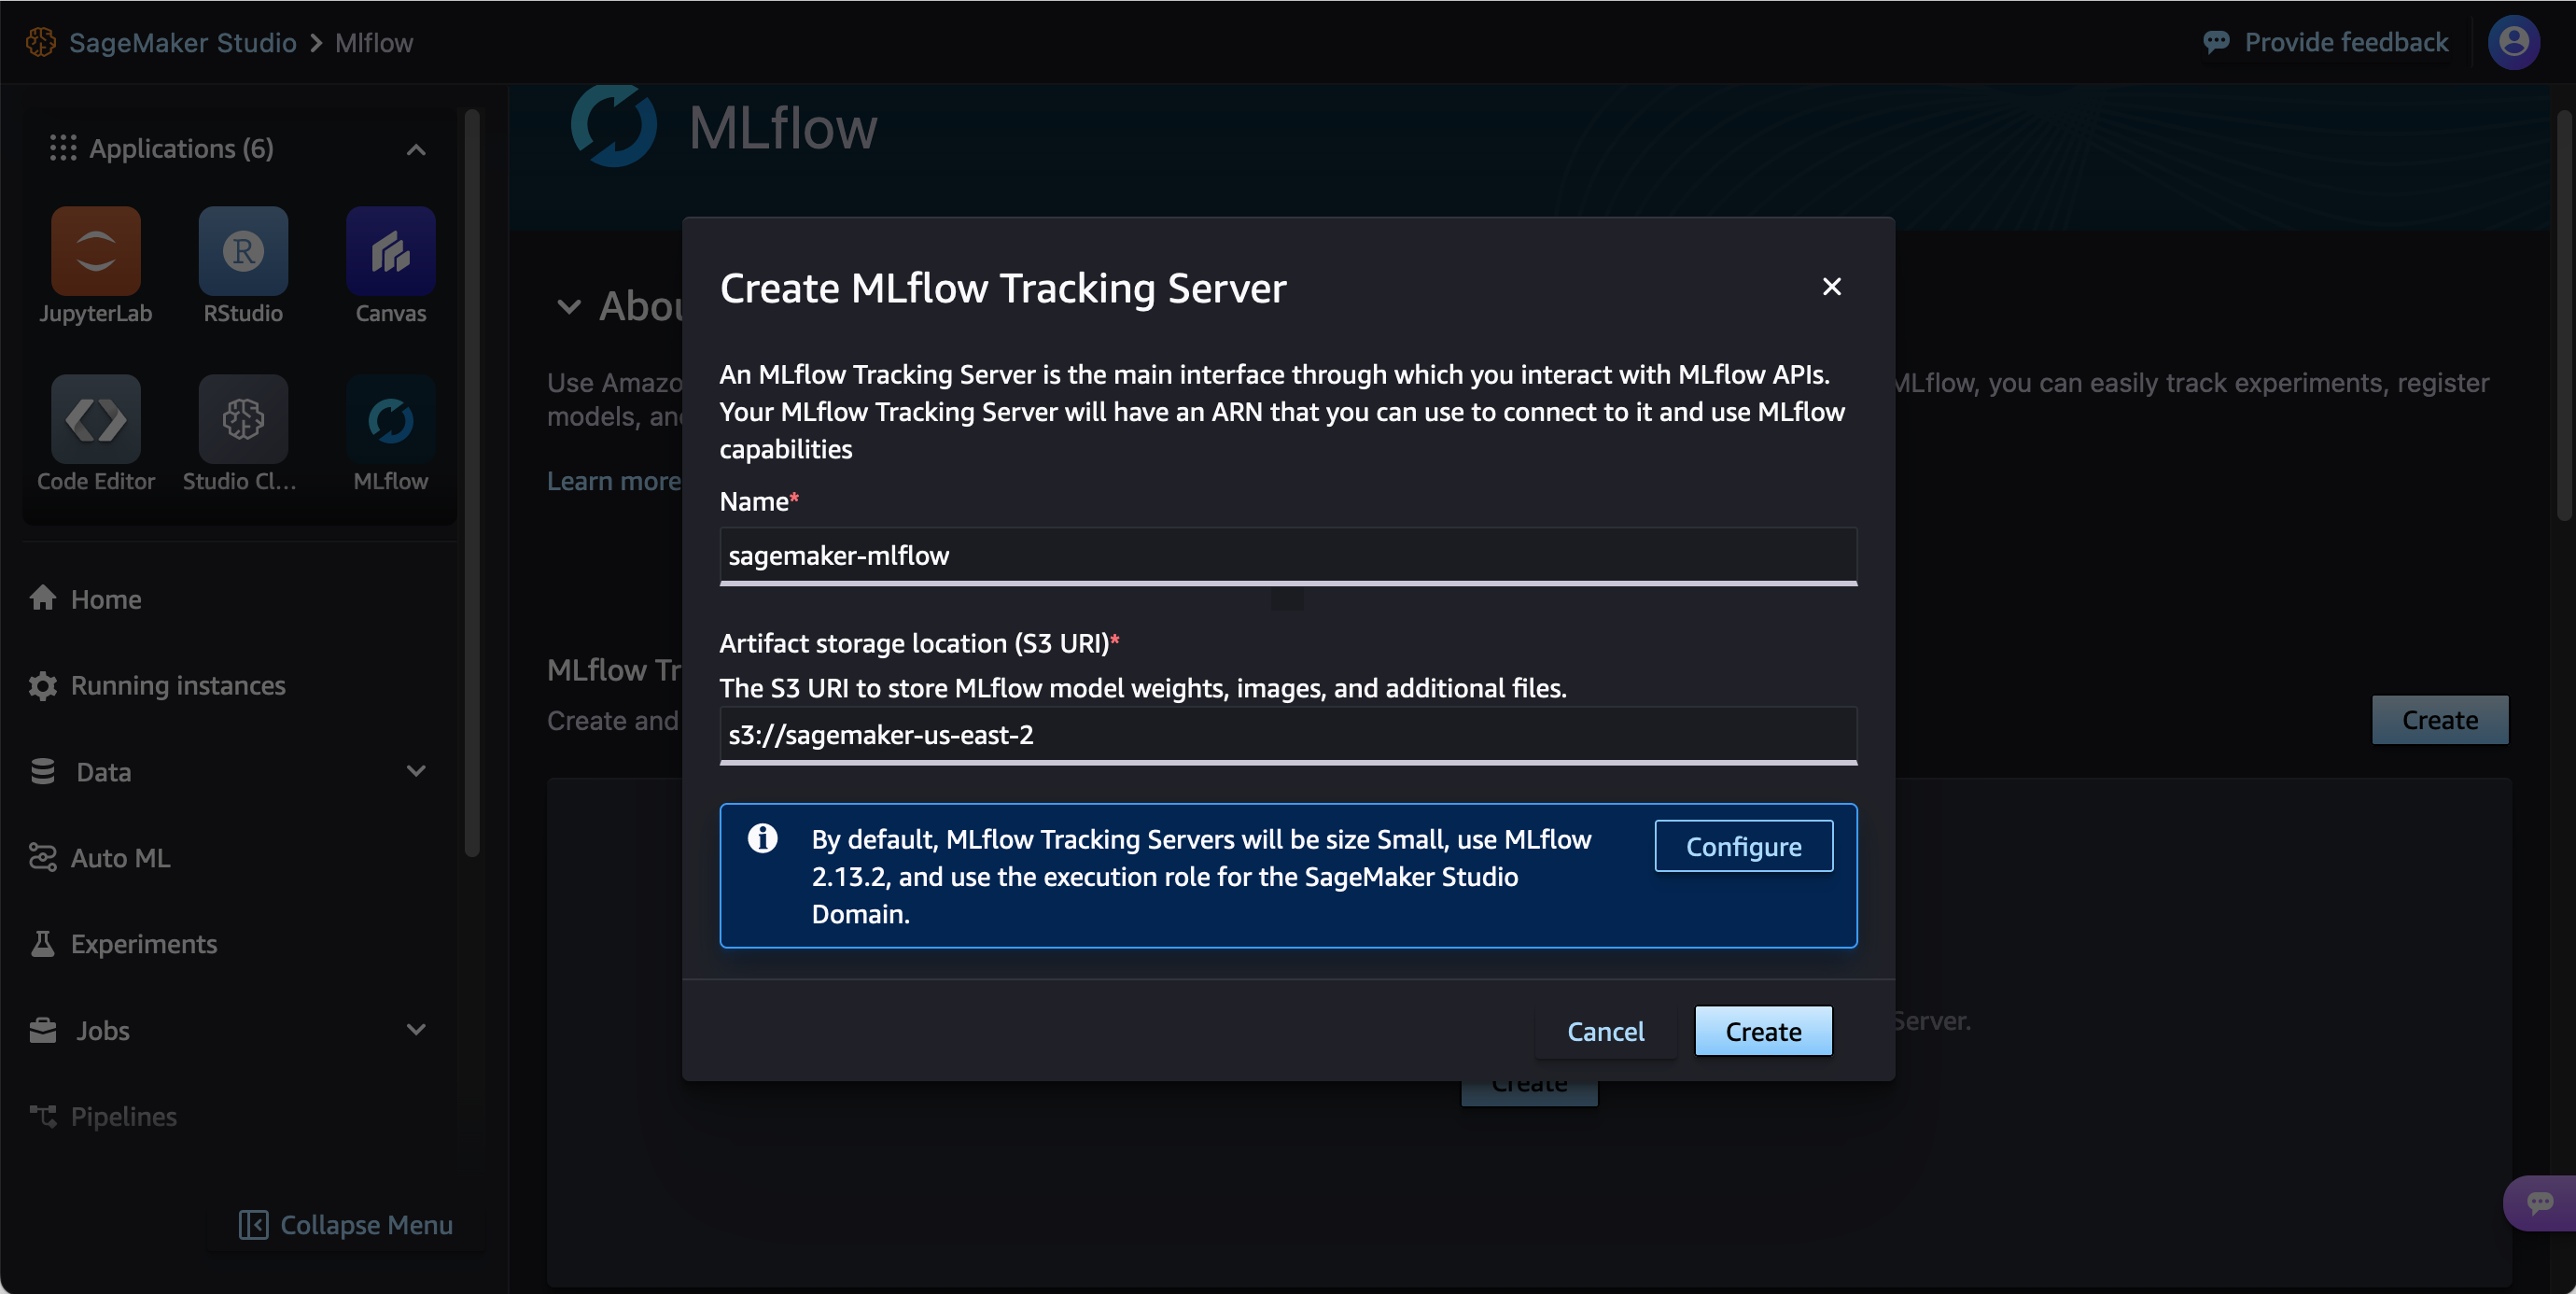
(Optional) If have not already created a Tracking Server or if you need to create a new one, you can choose Create. Then provide a unique tracking server name and S3 URI for artifact storage and create a tracking server. You can optionally choose Configure for more granular tracking server customization.
-
Choose Create in the MLflow Tracking Servers pane. The Studio domain IAM service role is used for the tracking server IAM service role.
-
Provide a unique name for your tracking server and an Amazon S3 URI for your tracking server artifact store. Your tracking server and the Amazon S3 bucket must be in the same Amazon Web Services Region.
Important
When you provide the Amazon S3 URI for your artifact store, ensure the Amazon S3 bucket is in the same Amazon Web Services Region as your tracking server. Cross-region artifact storage is not supported.
-
(Optional) Choose Configure to change default settings such as tracking server size, tags, and the IAM service role.
-
Choose Create.
Note
It may take up to 25 minutes to complete tracking server creation. If the tracking server takes over 25 minutes to create, check that you have the necessary IAM permissions. For more information on IAM permissions, see Set up IAM permissions for MLflow. When you successfully create a tracking server, it automatically starts.
-
After creating your tracking server, you can launch the MLflow UI. For more information, see Launch the MLflow UI using a presigned URL.
