3D point cloud semantic segmentation
Note
After careful consideration, we have made the decision to close new customer access to Amazon Ground Truth, effective 7/30/26. Existing customers can continue to use the service as normal. Amazon continues to invest in security and availability improvements for Ground Truth, but we do not plan to introduce new features.
Use this page to become familiarize with the user interface and tools available to complete your 3D point cloud semantic segmentation task.
Topics
Your Task
When you work on a 3D point cloud semantic segmentation task, you need to select a category from the Annotations menu on the right side of your worker portal using the drop down menu Label Categories. After you've selected a category, use the paint brush and polygon tools to paint each object in the 3D point cloud that this category applies to. For example, if you select the category Car, you would use these tools to paint all of the cars in the point cloud. The following video demonstrates how to use the paint brush tool to paint an object.
If you see one or more images in your worker portal, you can paint in the images or paint in the 3D point cloud and the paint will show up in the other medium.
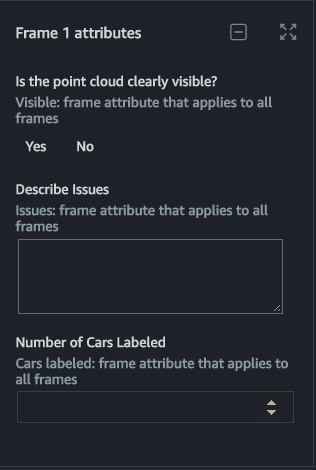
You may see frame attributes under the Labels menu. Use these attribute prompts to enter additional information about the point cloud.
Important
If you see that objects have already been painted when you open the task, adjust those annotations.
The following video includes an image that can be annotated. You may not see an image in your task.

After you've painted one or more objects using a label category, you can select that category from the Label Category menu on the right to only view points painted for that category.
Navigate the UI
You can navigate in the 3D scene using their keyboard and mouse. You can:
-
Double click on specific objects in the point cloud to zoom into them.
-
Use a mouse-scroller or trackpad to zoom in and out of the point cloud.
-
Use both keyboard arrow keys and Q, E, A, and D keys to move Up, Down, Left, Right. Use keyboard keys W and S to zoom in and out.
The following video demonstrates movements around the 3D point cloud and in the side-view. You can hide and re-expand all side views using the full screen icon. In this GIF, the side-views and menus have been collapsed.
When you are in the worker UI, you see the following menus:
-
Instructions – Review these instructions before starting your task.
-
Shortcuts – Use this menu to view keyboard shortcuts that you can use to navigate the point cloud and use the annotation tools provided.
-
View – Use this menu to toggle different view options on and off. For example, you can use this menu to add a ground mesh to the point cloud, and to choose the projection of the point cloud.
-
3D Point Cloud – Use this menu to add additional attributes to the points in the point cloud, such as color, and pixel intensity. Note that some or all of these options may not be available.
-
Paint – Use this menu to modify the functionality of the paint brush.
When you open a task, the move scene icon is on, and you can move around the point cloud using your mouse and the navigation buttons in the point cloud area of the screen. To return to the original view you see when you first opened the task, choose the reset scene icon.
After you select the paint icon, you can add paint to the point cloud and images (if included). You must select the move scene icon again to move to another area in the 3D point cloud or image.
To collapse all panels on the right and make the 3D point cloud full screen, select the full screen icon.
For the camera images and side-panels, you have the following view options:
-
C – View the camera angle on point cloud view.
-
F – View the frustum, or field of view, of the camera used to capture that image on point cloud view.
-
P – View the point cloud overlaid on the image.
Icon Guide
Use this table to learn about the icons available in your worker task portal.
| Icon | Name | Description |
|---|---|---|
|
|
brush |
Choose this icon to turn on the brush tool. To use with this tool, choose and move over the objects that you want to paint with your mouse. After you choose it, everything you paint be associated with the category you chose. |
|
|
polygon |
Choose this icon to use the polygon paint tool. Use this tool to draw polygons around objects that you want to paint. After you choose it, everything you draw a polygon around will be associated with the category you have chosen. |
|
|
reset scene |
Choose this icon to reset the view of the point cloud, side panels, and if applicable, all images to their original position when the task was first opened. |
|
|
move scene |
Choose this icon to move the scene. By default, this icon will be selected when you first start a task. |
|
|
full screen |
Choose this icon to make the 3D point cloud visualization full screen, and to collapse all side panels. |
|
|
ruler |
Use this icon to measure distances, in meters, in the point cloud. You may want to use this tool if your instructions ask you to annotate all objects in a given distance from the center of the cuboid or the object used to capture data. When you select this icon, you can place the starting point (first marker) anywhere in the point cloud by selecting it with your mouse. The tool will automatically use interpolation to place a marker on the closest point within threshold distance to the location you select, otherwise the marker will be placed on ground. If you place a starting point by mistake, you can use the Escape key to revert marker placement. After you place the first marker, you see a dotted line and a dynamic label that indicates the distance you have moved away from the first marker. Click somewhere else on the point cloud to place a second marker. When you place the second marker, the dotted line becomes solid, and the distance is set. After you set a distance, you can edit it by selecting either marker. You can delete a ruler by selecting anywhere on the ruler and using the Delete key on your keyboard. |
Shortcuts
The shortcuts listed in the Shortcuts menu can help you navigate the 3D point cloud and use the paint tool.
Before you start your task, it is recommended that you review the Shortcuts menu and become acquainted with these commands.
Release, Stop and Resume, and Decline Tasks
When you open the labeling task, three buttons on the top right allow you to decline the task (Decline task), release it (Release task), and stop and resume it at a later time (Stop and resume later). The following list describes what happens when you select one of these options:
-
Decline task: You should only decline a task if something is wrong with the task, such as an issue with the 3D point cloud, images or the UI. If you decline a task, you will not be able to return to the task.
-
Release Task: If you release a task, you loose all work done on that task. When the task is released, other workers on your team can pick it up. If enough workers pick up the task, you may not be able to return to it. When you select this button and then select Confirm, you are returned to the worker portal. If the task is still available, its status will be Available. If other workers pick it up, it will disappear from your portal.
-
Stop and resume later: You can use the Stop and resume later button to stop working and return to the task at a later time. You should use the Save button to save your work before you select Stop and resume later. When you select this button and then select Confirm, you are returned to the worker portal, and the task status is Stopped. You can select the same task to resume work on it.
Be aware that the person that creates your labeling tasks specifies a time limit in which all tasks much be completed by. If you do not return to and complete this task within that time limit, it will expire and your work will not be submitted. Contact your administrator for more information.
Saving Your Work and Submitting
You should periodically save your work. Ground Truth will automatically save your work ever 15 minutes.
When you open a task, you must complete your work on it before pressing Submit.