Amazon Systems Manager Change Manager is no longer open to new customers. Existing customers can continue to use the service as normal. For more information, see Amazon Systems Manager Change Manager availability change.
Configuring SSM Agent to use a proxy on Linux nodes
You can configure Amazon Systems Manager Agent (SSM Agent) to communicate through an HTTP proxy
by creating an override configuration file and adding http_proxy, https_proxy, and no_proxy settings to the file. An override file also
preserves the proxy settings if you install newer or older versions of SSM Agent.
This section includes procedures for creating an override file in both
upstart and systemd environments. If
you intend to use Session Manager, note that HTTPS proxy servers aren't supported.
Configure SSM Agent to use a proxy (upstart)
Use the following procedure to create an override configuration file for an
upstart environment.
To configure SSM Agent to use a proxy (upstart)
-
Connect to the managed instance where you installed SSM Agent.
-
Open a simple editor like VIM, and depending on whether you're using an HTTP proxy server or HTTPS proxy server, add one of the following configurations.
For an HTTP proxy server:
env http_proxy=http://hostname:portenv https_proxy=http://hostname:portenv no_proxy=IP address for instance metadata services (IMDS)For an HTTPS proxy server:
env http_proxy=http://hostname:portenv https_proxy=https://hostname:portenv no_proxy=IP address for instance metadata services (IMDS)Important
Add the
no_proxysetting to the file and specify the IP address. The IP address forno_proxyis the instance metadata services (IMDS) endpoint for Systems Manager. If you don't specifyno_proxy, calls to Systems Manager take on the identity from the proxy service (if IMDSv1 fallback is enabled) or calls to Systems Manager fail (if IMDSv2 is enforced).-
For IPv4, specify
no_proxy=169.254.169.254. -
For IPv6, specify
no_proxy=[fd00:ec2::254]. The IPv6 address of the instance metadata service is compatible with IMDSv2 commands. The IPv6 address is only accessible on instances built on the Amazon Nitro System. For more information, see How Instance Metadata Service Version 2 works in the Amazon EC2 User Guide.
-
-
Save the file with the name
amazon-ssm-agent.overridein the following location:/etc/init/ -
Stop and restart SSM Agent using the following commands.
sudo service stop amazon-ssm-agent
sudo service start amazon-ssm-agent
Note
For more information about working with .override
files in Upstart environments, see init: Upstart
init daemon job configuration
Configure SSM Agent to use a proxy (systemd)
Use the following procedure to configure SSM Agent to use a proxy in a
systemd environment.
Note
Some of the steps in this procedure contain explicit instructions for Ubuntu Server instances where SSM Agent was installed using Snap.
-
Connect to the instance where you installed SSM Agent.
-
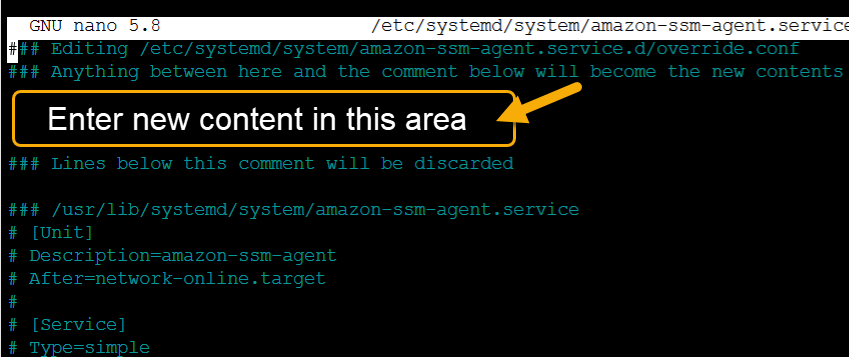
Run one of the follow commands, depending on the operating system type.
-
On Ubuntu Server instances where SSM Agent is installed by using a snap:
sudo systemctl edit snap.amazon-ssm-agent.amazon-ssm-agentOn other operating systems:
sudo systemctl edit amazon-ssm-agent
-
-
Open a simple editor like VIM, and depending on whether you're using an HTTP proxy server or HTTPS proxy server, add one of the following configurations.

For an HTTP proxy server:
[Service]
Environment="http_proxy=http://hostname:port"
Environment="https_proxy=http://hostname:port"
Environment="no_proxy=IP address for instance metadata services (IMDS)"
For an HTTPS proxy server:
[Service]
Environment="http_proxy=http://hostname:port"
Environment="https_proxy=https://hostname:port"
Environment="no_proxy=IP address for instance metadata services (IMDS)"
Important
Add the
no_proxysetting to the file and specify the IP address. The IP address forno_proxyis the instance metadata services (IMDS) endpoint for Systems Manager. If you don't specifyno_proxy, calls to Systems Manager take on the identity from the proxy service (if IMDSv1 fallback is enabled) or calls to Systems Manager fail (if IMDSv2 is enforced).-
For IPv4, specify
no_proxy=169.254.169.254. -
For IPv6, specify
no_proxy=[fd00:ec2::254]. The IPv6 address of the instance metadata service is compatible with IMDSv2 commands. The IPv6 address is only accessible on instances built on the Amazon Nitro System. For more information, see How Instance Metadata Service Version 2 works in the Amazon EC2 User Guide.
-
-
Save your changes. The system automatically creates one of the following files, depending on the operating system type.
-
On Ubuntu Server instances where SSM Agent is installed by using a snap:
/etc/systemd/system/snap.amazon-ssm-agent.amazon-ssm-agent.service.d/override.conf -
On Amazon Linux 2, Amazon Linux 2023, and RHEL instances:
/etc/systemd/system/amazon-ssm-agent.service.d/override.conf -
On other operating systems:
/etc/systemd/system/amazon-ssm-agent.service.d/amazon-ssm-agent.override
-
-
Restart SSM Agent by using one of the following commands, depending on the operating system type.
-
On Ubuntu Server instances installed by using a snap:
sudo systemctl daemon-reload && sudo systemctl restart snap.amazon-ssm-agent.amazon-ssm-agent -
On other operating systems:
sudo systemctl daemon-reload && sudo systemctl restart amazon-ssm-agent
-
Note
For more information about working with .override
files in systemd environments, see Modifying Existing Unit Files