Identity and Access Management
Amazon Identity and Access Management (IAM) enables you to more securely manage access to your Amazon Web Services accounts and resources. With IAM, you can create multiple users in your primary (root) Amazon Web Services account. These users can have their own credentials: password, access key ID, and secret key, but all IAM users share a single account number.
You can manage each IAM user's level of resource access by attaching IAM policies to the user. For example, you can attach a policy to an IAM user that gives the user access to the Amazon S3 service and related resources in your account, but which doesn't provide access to any other services or resources.
For more efficient access management, you can create IAM groups, which are collections of users. When you attach a policy to the group, it will affect all users who are members of that group.
In addition to managing permissions at the user and group level, IAM also supports the concept of IAM roles. Like users and groups, you can attach policies to IAM roles. You can then associate the IAM role with an Amazon EC2 instance. Applications that run on the EC2 instance are able to access Amazon using the permissions provided by the IAM role. For more information about using IAM roles with the Toolkit, see Create an IAM Role. For more information about IAM, go to the IAM User Guide.
Create and Configure an IAM User
IAM users enable you to grant others access to your Amazon Web Services account. Because you are able to attach policies to IAM users, you can precisely limit the resources an IAM user can access and the operations they can perform on those resources.
As a best practice, all users who access an Amazon Web Services account should do so as IAM users—even the owner of the account. This ensures that if the credentials for one of the IAM users are compromised, just those credentials can be deactivated. There is no need to deactivate or change the root credentials for the account.
From the Toolkit for Visual Studio, you can assign permissions to an IAM user either by attaching an IAM policy to the user or by assigning the user to a group. IAM users who are assigned to a group derive their permissions from the policies attached to the group. For more information, see Create an IAM Group and Add an IAM User to an IAM Group.
From the Toolkit for Visual Studio, you can also generate Amazon credentials (access key ID and secret key) for the IAM user. For more information, see Generate Credentials for an IAM User

The Toolkit for Visual Studio supports specifying IAM user credentials for accessing services through Amazon Explorer. Because IAM users typically do not have full access to all Amazon Web Services, some of the functionality in Amazon Explorer might not be available. If you use Amazon Explorer to change resources while the active account is an IAM user and then switch the active account to the root account, the changes might not be visible until you refresh the view in Amazon Explorer. To refresh the view, choose the refresh () button.
For information about how to configure IAM users from the Amazon Web Services Management Console, go to Working with Users and Groups in the IAM User Guide.
To create an IAM user
-
In Amazon Explorer, expand the Amazon Identity and Access Management node, open the context (right-click) menu for Users and then choose Create User.
-
In the Create User dialog box, type a name for the IAM user and choose OK. This is the IAM friendly name. For information about constraints on names for IAM users, go to the IAM User Guide.
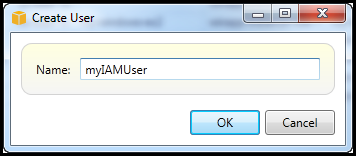 Create an IAM user
The new user will appear as a subnode under Users under the Amazon Identity and Access Management node.
For information about how to create a policy and attach it to the user, see Create an IAM Policy.
Create an IAM Group
Groups provide a way of applying IAM policies to a collection of users. For information about how to manage IAM users and groups, go to Working with Users and Groups in the IAM User Guide.
To create an IAM group
-
In Amazon Explorer, under Identity and Access Management, open the context (right-click) menu for Groups and choose Create Group.
-
In the Create Group dialog box, type a name for the IAM group and choose OK.
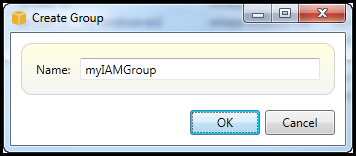 Create IAM group
The new IAM group will appear under the Groups subnode of Identity and Access Management.
For information about to create a policy and attach it to the IAM group, see Create an IAM Policy.
Add an IAM User to an IAM Group
IAM users who are members of an IAM group derive access permissions from the policies attached to the group. The purpose of an IAM group is to make it easier to manage permissions across a collection of IAM users.
For information about how the policies attached to an IAM group interact with the policies attached to IAM users who are members of that IAM group, go to Managing IAM Policies in the IAM User Guide.
In Amazon Explorer, you add IAM users to IAM groups from the Users subnode, not the Groups subnode.
To add an IAM user to a IAM group
-
In Amazon Explorer, under Identity and Access Management, open the context (right-click) menu for Users and choose Edit.
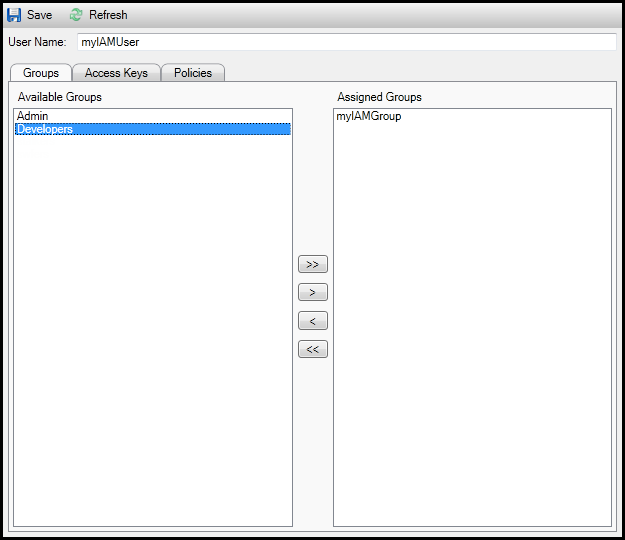 Assign an IAM user to a IAM group
 -
The left pane of the Groups tab displays the available IAM groups. The right pane displays the groups of which the specified IAM user is already a member.
To add the IAM user to a group, in the left pane, choose the IAM group and then choose the > button.
To remove the IAM user from a group, in the right pane, choose the IAM group and then choose the < button.
To add the IAM user to all of the IAM groups, choose the >> button. Similarly, to remove the IAM user from all of the groups, choose the << button.
To choose multiple groups, choose them in sequence. You do not need to hold down the Control key. To clear a group from your selection, simply choose it a second time.
-
When you have finished assigning the IAM user to IAM groups, choose Save.
Generate Credentials for an IAM User
With Toolkit for Visual Studio, you can generate the access key ID and secret key used to make API calls to Amazon. These keys can also be specified to access Amazon Web Services through the Toolkit. For more information about how to specify credentials for use with the Toolkit, see creds. For more information about how to safely handle credentials, see Best Practices for Managing Amazon Access Keys.
The Toolkit cannot be used to generate a password for an IAM user.
To generate credentials for an IAM user
-
In Amazon Explorer, open the context (right-click) menu for an IAM user and choose Edit.
-
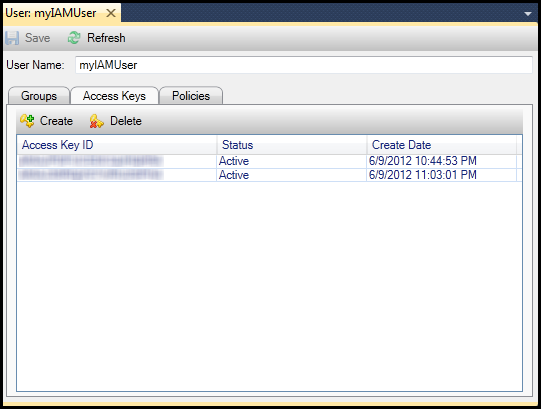
To generate credentials, on the Access Keys tab, choose Create.
You can generate only two sets of credentials per IAM user. If you already have two sets of credentials and need to create an additional set, you must delete one of the existing sets.
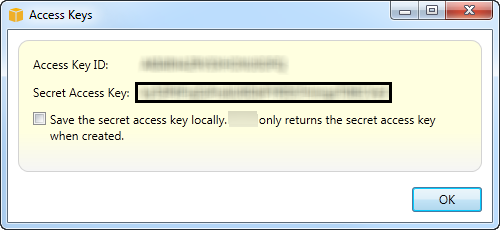 reate credentials for IAM user
If you want the Toolkit to save an encrypted copy of your secret access key to your local drive, select Save the secret access key locally. Amazon only returns the secret access key when created. You can also copy the secret access key from the dialog box and save it in a secure location.
-
Choose OK.
After you generate the credentials, you can view them from the Access Keys tab. If you selected the option to have the Toolkit save the secret key locally, it will be displayed here.
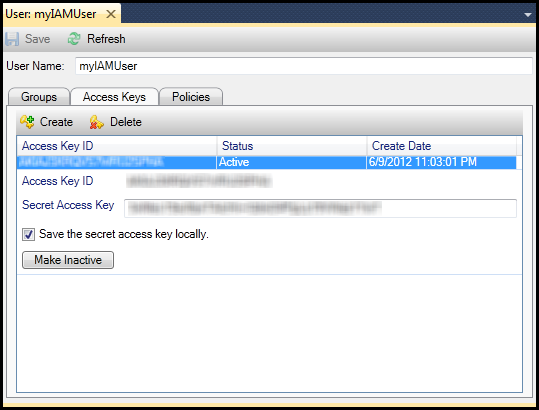
If you saved the secret key yourself and would also like the Toolkit to save it, in the Secret Access Key box, type the secret access key, and then select Save the secret access key locally.
To deactivate the credentials, choose Make Inactive. (You might do this if you suspect the credentials have been compromised. You can reactivate the credentials if you receive an assurance they are secure.)
Create an IAM Role
The Toolkit for Visual Studio supports the creation and configuration of IAM roles. Just as with users and groups, you can attach policies to IAM roles. You can then associate the IAM role with an Amazon EC2 instance. The association with the EC2 instance is handled through an instance profile, which is a logical container for the role. Applications that run on the EC2 instance are automatically granted the level of access specified by the policy associated with the IAM role. This is true even when the application hasn't specified other Amazon credentials.
For example, you can create a role and attach a policy to that role that limits access to Amazon S3 only. After associating this role with an EC2 instance, you can then run an application on that instance and the application will have access to Amazon S3, but not to any other services or resources. The advantage of this approach is that you don't need to be concerned with securely transferring and storing Amazon credentials on the EC2 instance.
For more information about IAM roles, go to Working with IAM Roles in the IAM User Guide. For examples of programs accessing Amazon using the IAM role associated with an Amazon EC2 instance, go to the Amazon developer guides for Java, .NET, PHP, and Ruby (Setting Credentials Using IAM, Creating an IAM Role, and Working with IAM Policies).
To create an IAM role
-
In Amazon Explorer, under Identity and Access Management, open the context (right-click) menu for Roles and then choose Create Roles.
-
In the Create Role dialog box, type a name for the IAM role and choose OK.
 Create IAM role
The new IAM role will appears under Roles in Identity and Access Management.
For information about how to create a policy and attach it to the role, see Create an IAM Policy.
Create an IAM Policy
Policies are fundamental to IAM. Policies can be associated with IAM entities such as users, groups, or roles. Policies specify the level of access enabled for a user, group, or role.
To create an IAM policy
In Amazon Explorer, expand the Amazon Identity and Access Management node, then expand the node for the type of entity (Groups, Roles, or Users) to which you will attach the policy. For example, open a context menu for an IAM role and choose Edit.
A tab associated with the role will appear in the Amazon Explorer. Choose the Add Policy link.
In the New Policy Name dialog box, type a name for the policy (for example, s3-access).

In the policy editor, add policy statements to specify the level of access to provide to the role (in this example, winapp-instance-role-2 associated with the policy. In this example, a policy provides full access to Amazon S3, but no access to any other resources.
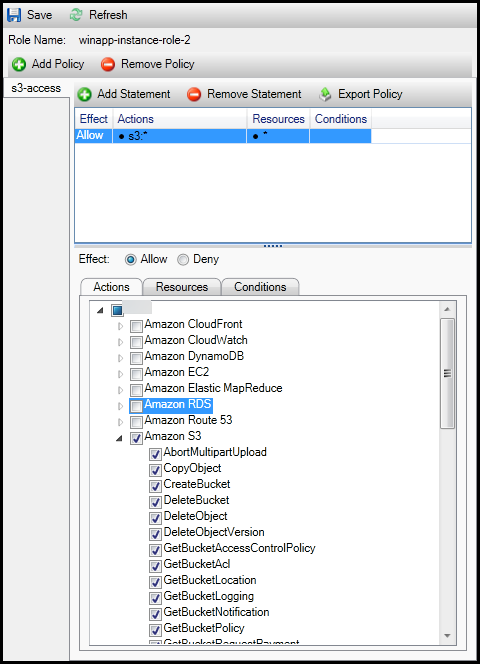
For more precise access control, you can expand the subnodes in the policy editor to allow or disallow actions associated with Amazon Web Services.
When you have edited the policy, choose the Save link.