Using Amazon SQS from Amazon Explorer
Amazon Simple Queue Service (Amazon SQS) is a flexible queue service that enables message passing between different processes of execution in a software application. Amazon SQS queues are located in the Amazon infrastructure, but the processes that are passing messages can be located locally, on Amazon EC2 instances, or on some combination of these. Amazon SQS is ideal for coordinating the distribution of work across multiple computers.
The Toolkit for Visual Studio enables you to view Amazon SQS queues associated with the active account, create and delete queues, and send messages through queues. (By active account, we mean the account selected in Amazon Explorer.)
For more information about Amazon SQS, go to Introduction to SQS in the Amazon documentation.
Creating a Queue
You can create an Amazon SQS queue from Amazon Explorer. The ARN and URL for the queue will be based on the account number for the active account and the queue name you specify at creation.
To create a queue
-
In Amazon Explorer, open the context (right-click) menu for the Amazon SQS node, and then choose Create Queue.
-
In the Create Queue dialog box, specify the queue name, the default visibility timeout, and the default delivery delay. The default visibility timeout and the default delivery delay are specified in seconds. The default visibility timeout is the amount of time that a message will be invisible to potential receiving processes after a given process has acquired the message. The default delivery delay is the amount of time from the moment the message is sent to the moment it first becomes visible to potential receiving processes.
-
Choose OK. The new queue will appear as a subnode under the Amazon SQS node.
Deleting a Queue
You can delete existing queues from Amazon Explorer. If you delete a queue, any messages associated with the queue are no longer available.
To delete a queue
-
In Amazon Explorer, open the context (right-click) menus for the queue you want to delete, and then choose Delete.
Managing Queue Properties
You can view and edit the properties for any of the queues displayed in Amazon Explorer. You can also send messages to the queue from this properties view.
To manage queue properties
-
In Amazon Explorer, open the context (right-click) menu for the queue whose properties you want to manage, and then choose View Queue.
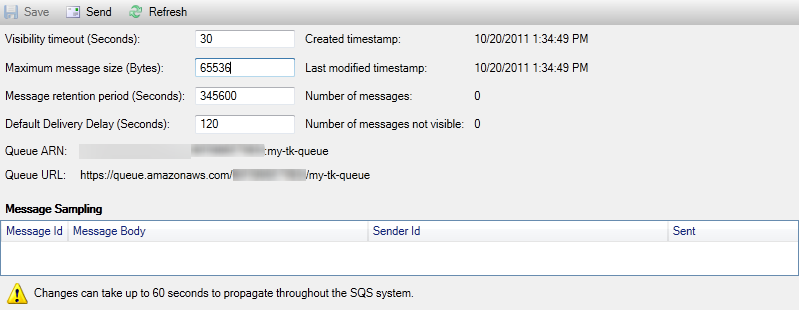
From the queue properties view, you can edit the visibility timeout, the maximum message size, message retention period, and default delivery delay. The default delivery delay can be overridden when you send a message. In the following screenshot, the obscured text is the account number component of the queue ARN and URL.
Sending a Message to a Queue
From the queue properties view, you can send a message to the queue.
To send a message
-
At the top of the queue properties view, choose the Send button.
-
Type the message. (Optional) Enter a delivery delay that will override the default delivery delay for the queue. In the following example, we have overridden the delay with a value of 240 seconds. Choose OK.
 Send Message dialog box
 -
Wait for approximately 240 seconds (four minutes). The message will appear in the Message Sampling section of the of the queue properties view.
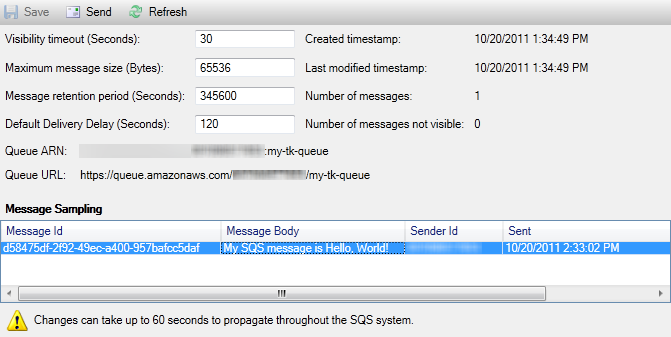 SQS properties view with sent message
The timestamp in the queue properties view is the time you chose the Send button. It does not include the delay. Therefore, the time that the message appears in the queue and is available to receivers might be later than this timestamp. The timestamp is displayed in your computer's local time.