Services or capabilities described in Amazon Web Services documentation might vary by Region. To see the differences applicable to the China Regions,
see Getting Started with Amazon Web Services in China
(PDF).
Transfer files to a Windows instance using RDP
You can work with your Windows instance in the same way that you would work with any Windows
server. For example, you can transfer files between a Windows instance and your local
computer using the local file sharing feature of the Microsoft Remote Desktop Connection (RDP)
software. You can access local files on hard disk drives, DVD drives, portable media
drives, and mapped network drives.
To access your local files from your Windows instances, you must enable the local file
sharing feature by mapping the remote session drive to your local drive. The steps are
slightly different depending on whether your local computer operating system is Windows
or macOS X.
For more information about the prerequisites to connect using RDP, see Prerequisites.
- Windows
-
To map the remote session drive to your local drive on your local Windows computer
-
Open the Remote Desktop Connection client.
-
Choose Show Options.
-
Add the instance host name to the Computer
field and username to the User name field, as
follows:
-
Under Connection settings, choose
Open..., and browse to the RDP
shortcut file that you downloaded from the Amazon EC2 console.
The file contains the Public IPv4 DNS host name, which
identifies the instance, and the Administrator user
name.
-
Select the file and choose Open. The
Computer and User
name fields are populated with the values
from the RDP shortcut file.
-
Choose Save.
-
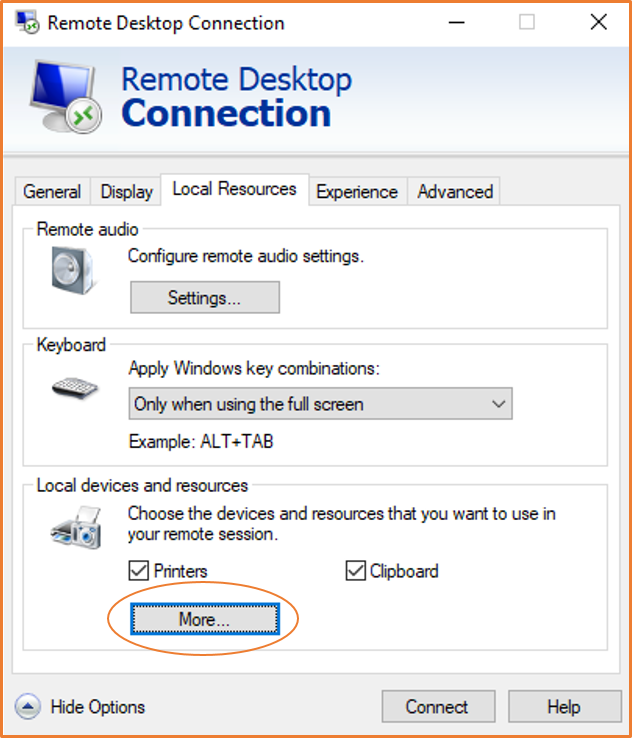
Choose the Local Resources tab.
-
Under Local devices and resources, choose
More...
-
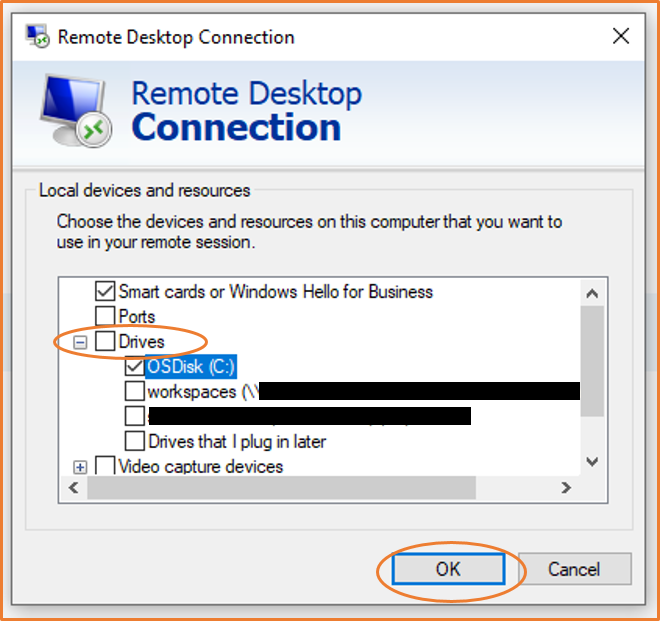
Open Drives and select the local drive to map
to your Windows instance.
-
Choose OK.
-
Choose Connect to connect to your Windows
instance.
- macOS X
-
To map the remote session drive to your local folder on your local macOS X computer
-
Open the Remote Desktop Connection client.
-
Browse to the RDP file that you downloaded from the Amazon EC2 console
(when you initially connected to the instance), and drag it onto the
Remote Desktop Connection client.
-
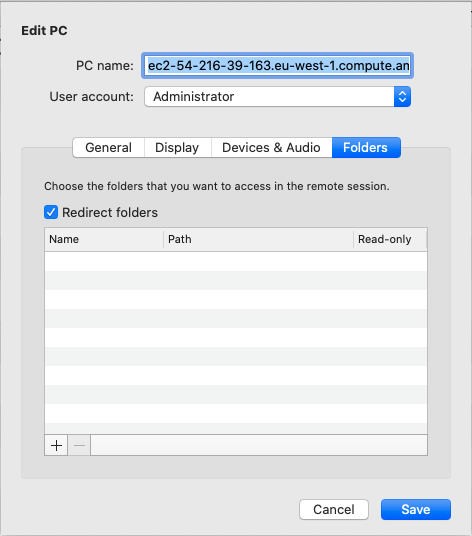
Right-click the RDP file, and choose Edit.
-
Choose the Folders tab, and select the
Redirect folders checkbox.
-
Choose the + icon at bottom left, browse to
the folder to map, and choose Open. Repeat this
step for every folder to map.
-
Choose Save.
-
Choose Connect to connect to your Windows
instance. You'll be prompted for the password.
-
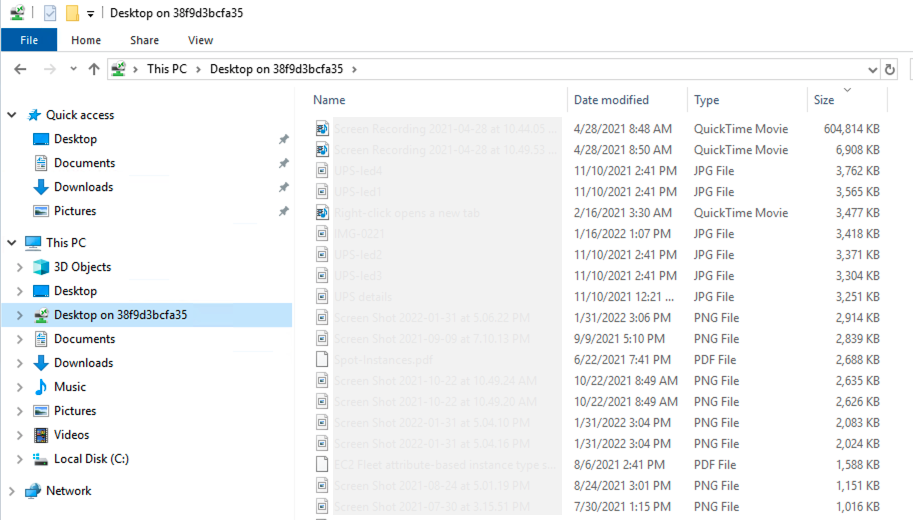
On the instance, in File Explorer, expand This PC, and find the
shared folder from which you can access your local files. In the
following screenshot, the Desktop folder on the
local computer was mapped to the remote session drive on the
instance.
For more information on making local devices available to a remote session
on a Mac computer, see Get started with the macOS client.