Creating a Virtual Private Cloud (VPC)
In this example, you create an Amazon VPC with a private subnet for each Availability Zone.
Creating an Amazon VPC (Console)
-
Sign in to the Amazon Management Console, and open the Amazon VPC console at https://console.amazonaws.cn/vpc/
. -
In the VPC dashboard, choose Create VPC.
-
Under Resources to create, choose VPC and more.
Under Number of Availability Zones (AZs), choose the number of Availability Zones you want to launch your subnets in.
Under Number of public subnets, choose the number of public subnets you want to add to your VPC.
Under Number of private subnets, choose the number of private subnets you want to add to your VPC.
Tip
Make a note of your subnet identifiers, and which are public and private. You will need this information later when you launch your clusters and add an Amazon EC2 instance to your Amazon VPC.
-
Create an Amazon VPC security group. You will use this group for your cluster and your Amazon EC2 instance.
-
In the navigation pane of the Amazon VPC Management console, choose Security Groups.
-
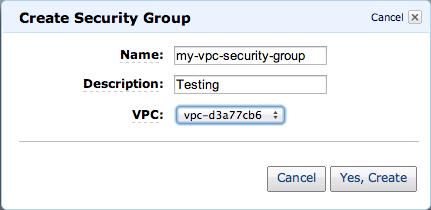
Choose Create Security Group.
-
Type a name and a description for your security group in the corresponding boxes. In the VPC box, choose the identifier for your Amazon VPC.

-
When the settings are as you want them, choose Yes, Create.
-
-
Define a network ingress rule for your security group. This rule will allow you to connect to your Amazon EC2 instance using Secure Shell (SSH).
-
In the navigation list, choose Security Groups.
-
Find your security group in the list, and then choose it.
-
Under Security Group, choose the Inbound tab. In the Create a new rule box, choose SSH, and then choose Add Rule.
-
Set the following values for your new inbound rule to allow HTTP access:
Type: HTTP
Source: 0.0.0.0/0
Choose Apply Rule Changes.
-
Now you are ready to create a cache subnet group and launch a cluster in your Amazon VPC.