Creating a Babelfish for Aurora PostgreSQL DB cluster
Babelfish for Aurora PostgreSQL is supported on all supported Aurora PostgreSQL versions, 13 and higher.
You can use the Amazon Web Services Management Console or the Amazon CLI to create an Aurora PostgreSQL cluster with Babelfish.
Note
In an Aurora PostgreSQL cluster, the babelfish_db database name is
reserved for Babelfish. Creating your own "babelfish_db" database
on a Babelfish for Aurora PostgreSQL prevents Aurora from successfully provisioning Babelfish.
To create a cluster with Babelfish running with the Amazon Web Services Management Console
-
Open the Amazon RDS console at https://console.amazonaws.cn/rds/
, and choose Create database. 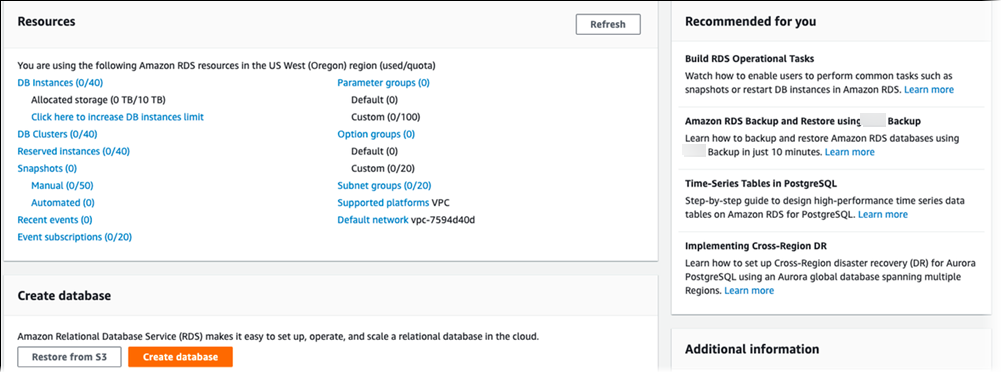
-
For Choose a database creation method, do one of the following:
-
To specify detailed engine options, choose Standard create.
-
To use preconfigured options that support best practices for an Aurora cluster, choose Easy create.
-
-
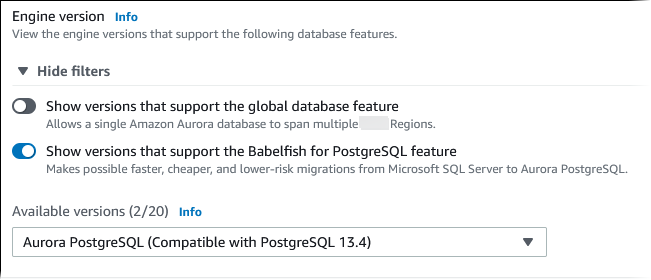
For Engine type, choose Aurora (PostgreSQL Compatible).
-
For Available versions, choose an Aurora PostgreSQL version. To get the latest Babelfish features, choose the highest Aurora PostgreSQL major version. Babelfish is supported on all supported Aurora PostgreSQL versions, 13 and higher.
-
For Templates, choose the template that matches your use case.
-
For DB cluster identifier, enter a name that you can easily find later in the DB cluster list.
-
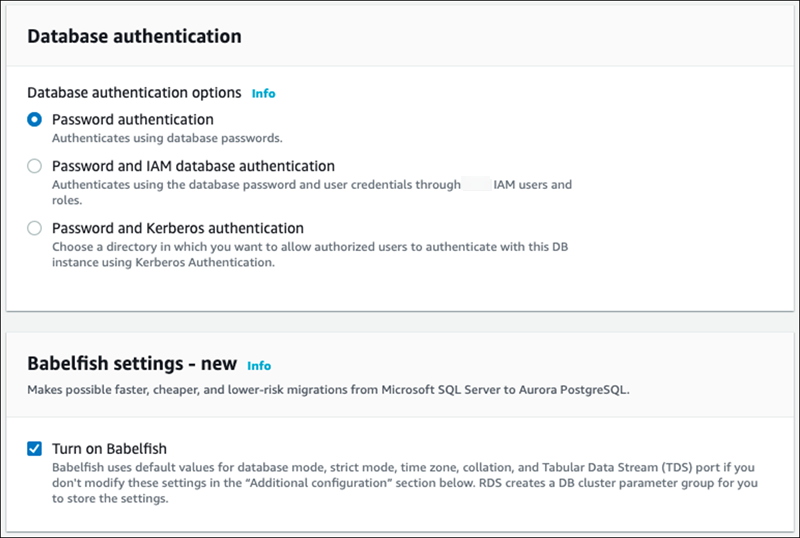
For Master username, enter an administrator user name. The default value for Aurora PostgreSQL is
postgres. You can accept the default or choose a different name. For example, to follow the naming convention used on your SQL Server databases, you can entersa(system administrator) for the Master username.If you don't create a user named
saat this time, you can create one later with your choice of client. After creating the user, use theALTER SERVER ROLEcommand to add it to thesysadmingroup (role) for the cluster.Warning
Master username must always use lowercase characters failing which the DB cluster can't connect to Babelfish via the TDS port.
-
For Master password, create a strong password and confirm the password.
-
For the options that follow, until the Babelfish settings section, specify your DB cluster settings. For information about each setting, see Settings for Aurora DB clusters.
-
To make Babelfish functionality available, select the Turn on Babelfish box.
-
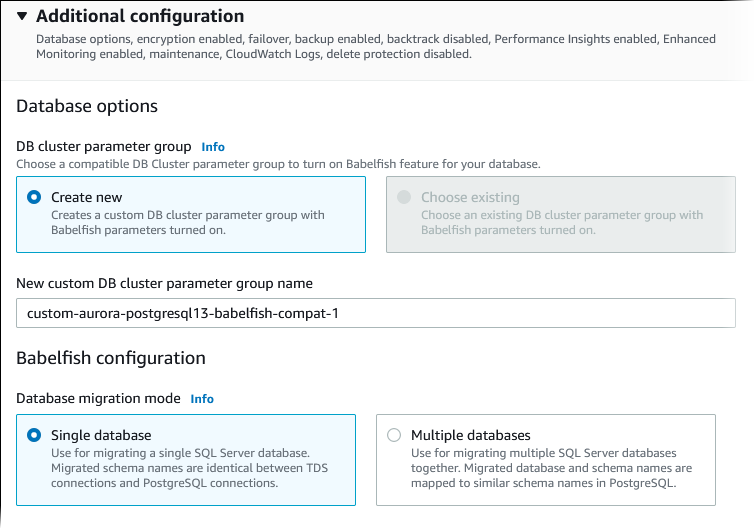
For DB cluster parameter group, do one of the following:
-
Choose Create new to create a new parameter group with Babelfish turned on.
-
Choose Choose existing to use an existing parameter group. If you use an existing group, make sure to modify the group before creating the cluster and add values for Babelfish parameters. For information about Babelfish parameters, see DB cluster parameter group settings for Babelfish.
If you use an existing group, provide the group name in the box that follows.
-
-
For Database migration mode, choose one of the following:
-
Single database to migrate a single SQL Server database.
In some cases, you might migrate multiple user databases together, with your end goal a complete migration to native Aurora PostgreSQL without Babelfish. If the final applications require consolidated schemas (a single
dboschema), make sure to first consolidate your SQL Server databases into a single SQL server database. Then migrate to Babelfish using Single database mode. -
Multiple databases to migrate multiple SQL Server databases (originating from a single SQL Server installation). Multiple database mode doesn't consolidate multiple databases that don't originate from a single SQL Server installation. For information about migrating multiple databases, see Using Babelfish with a single database or multiple databases.
Note
From Aurora PostgreSQL 16 version, Multiple databases is chosen by default as the Database migration mode.
-
-
For Default collation locale, enter your server locale. The default is
en-US. For detailed information about collations, see Understanding Collations in Babelfish for Aurora PostgreSQL. -
For Collation name field, enter your default collation. The default is
sql_latin1_general_cp1_ci_as. For detailed information, see Understanding Collations in Babelfish for Aurora PostgreSQL. -
For DB parameter group, choose a parameter group or have Aurora create a new group for you with default settings.
-
For Failover priority, choose a failover priority for the instance. If you don't choose a value, the default is
tier-1. This priority determines the order in which replicas are promoted when recovering from a primary instance failure. For more information, see Fault tolerance for an Aurora DB cluster. -
For Backup retention period, choose the length of time (1–35 days) that Aurora retains backup copies of the database. You can use backup copies for point-in-time restores (PITR) of your database down to the second. The default retention period is seven days.

-
Choose Copy tags to snapshots to copy any DB instance tags to a DB snapshot when you create a snapshot.
Note
When restoring a DB cluster from a snapshot, it does not restore as a Babelfish for Aurora PostgreSQL DB cluster. You need to turn on the parameters that control Babelfish preferences in the DB cluster parameter group to enable Babelfish again. For more information on the Babelfish parameters, see DB cluster parameter group settings for Babelfish.
-
Choose Enable encryption to turn on encryption at rest (Aurora storage encryption) for this DB cluster.
-
Choose Enable Performance Insights to turn on Amazon RDS Performance Insights.
-
Choose Enable Enhanced monitoring to start gathering metrics in real time for the operating system that your DB cluster runs on.
-
Choose PostgreSQL log to publish the log files to Amazon CloudWatch Logs.
-
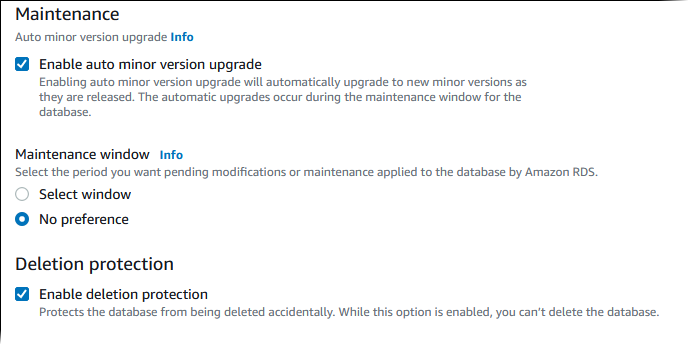
Choose Enable auto minor version upgrade to automatically update your Aurora DB cluster when a minor version upgrade is available.
-
For Maintenance window, do the following:
-
To choose a time for Amazon RDS to make modifications or perform maintenance, choose Select window.
-
To perform Amazon RDS maintenance at an unscheduled time, choose No preference.
-
-
Select the Enable deletion protection box to protect your database from being deleted by accident.
If you turn on this feature, you can't directly delete the database. Instead, you need to modify the database cluster and turn off this feature before deleting the database.
-
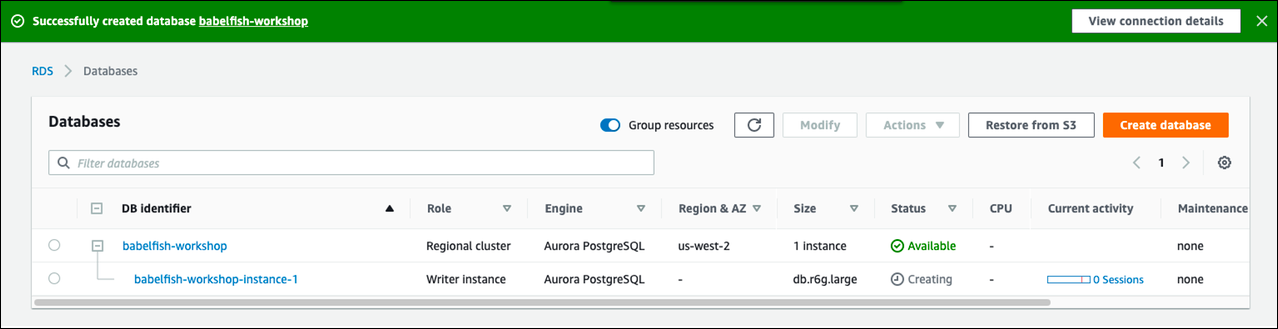
Choose Create database.
You can find your new database set up for Babelfish in the Databases listing. The Status column displays Available when the deployment is complete.
When you create an Babelfish for Aurora PostgreSQL; using the Amazon CLI, you need to pass the command the name of the DB cluster parameter group to use for the cluster. For more information, see DB cluster prerequisites.
Before you can use the Amazon CLI to create an Aurora PostgreSQL cluster with Babelfish, do the following:
-
Choose your endpoint URL from the list of services at Amazon Aurora endpoints and quotas.
-
Create a parameter group for the cluster. For more information about parameter groups, see Parameter groups for Amazon Aurora.
-
Modify the parameter group, adding the parameter that turns on Babelfish.
To create an Aurora PostgreSQL DB cluster with Babelfish using the Amazon CLI
The examples that follow use the default Master username,
postgres. Replace as needed with the username that you
created for your DB cluster, such as sa or whatever username
you chose if you didn't accept the default.
-
Create a parameter group.
For Linux, macOS, or Unix:
aws rds create-db-cluster-parameter-group \ --endpoint-urlendpoint-url\ --db-cluster-parameter-group-nameparameter-group\ --db-parameter-group-familyaurora-postgresql14\ --description"description"For Windows:
aws rds create-db-cluster-parameter-group ^ --endpoint-urlendpoint-URL^ --db-cluster-parameter-group-nameparameter-group^ --db-parameter-group-familyaurora-postgresql14^ --description"description" -
Modify your parameter group to turn on Babelfish.
For Linux, macOS, or Unix:
aws rds modify-db-cluster-parameter-group \ --endpoint-urlendpoint-url\ --db-cluster-parameter-group-nameparameter-group\ --parameters "ParameterName=rds.babelfish_status,ParameterValue=on,ApplyMethod=pending-reboot"For Windows:
aws rds modify-db-cluster-parameter-group ^ --endpoint-urlendpoint-url^ --db-cluster-parameter-group-nameparamater-group^ --parameters "ParameterName=rds.babelfish_status,ParameterValue=on,ApplyMethod=pending-reboot" -
Identify your DB subnet group and the virtual private cloud (VPC) security group ID for your new DB cluster, and then call the create-db-cluster command.
For Linux, macOS, or Unix:
aws rds create-db-cluster \ --db-cluster-identifiercluster-name\ --master-usernamepostgres\ --manage-master-user-password \ --engine aurora-postgresql \ --engine-version14.3\ --vpc-security-group-idssecurity-group\ --db-subnet-group-namesubnet-group-name\ --db-cluster-parameter-group-nameparameter-groupFor Windows:
aws rds create-db-cluster ^ --db-cluster-identifiercluster-name^ --master-usernamepostgres^ --manage-master-user-password ^ --engine aurora-postgresql ^ --engine-version14.3^ --vpc-security-group-idssecurity-group^ --db-subnet-group-namesubnet-group^ --db-cluster-parameter-group-nameparameter-groupThis example specifies the
--manage-master-user-passwordoption to generate the master user password and manage it in Secrets Manager. For more information, see Password management with Amazon Aurora and Amazon Secrets Manager. Alternatively, you can use the--master-passwordoption to specify and manage the password yourself. -
Explicitly create the primary instance for your DB cluster. Use the name of the cluster that you created in step 3 for the
--db-cluster-identifierargument when you call the create-db-instance command, as shown following.For Linux, macOS, or Unix:
aws rds create-db-instance \ --db-instance-identifierinstance-name\ --db-instance-classdb.r6g\ --db-subnet-group-namesubnet-group\ --db-cluster-identifiercluster-name\ --engine aurora-postgresqlFor Windows:
aws rds create-db-instance ^ --db-instance-identifierinstance-name^ --db-instance-classdb.r6g^ --db-subnet-group-namesubnet-group^ --db-cluster-identifiercluster-name^ --engine aurora-postgresql