Db2 audit logging
With Db2 audit logging, Amazon RDS records database activity, including users logging on to the database and queries run against the database. RDS uploads the completed audit logs to your Amazon S3 bucket, using the Amazon Identity and Access Management (IAM) role that you provide.
Topics
Setting up Db2 audit logging
To enable audit logging for an Amazon RDS for Db2 database, you enable the
DB2_AUDIT option on the RDS for Db2 DB instance. Then, configure an audit
policy to enable the feature for the specific database. To enable the option on the
RDS for Db2 DB instance, you configure the option settings for the DB2_AUDIT
option. You do so by providing the Amazon Resource Names (ARNs) for your Amazon S3 bucket and
the IAM role with permissions to access your bucket.
To set up Db2 audit logging for an RDS for Db2 database, complete the following steps.
Topics
Step 1: Create an Amazon S3 bucket
If you haven't already done so, create an Amazon S3 bucket where Amazon RDS can upload your RDS for Db2 database's audit log files. The following restrictions apply to the S3 bucket that you use as a target for audit files:
-
It must be in the same Amazon Web Services Region as your RDS for Db2 DB instance.
-
It must not be open to the public.
-
The bucket owner must also be the IAM role owner.
To learn how to create an Amazon S3 bucket, see Creating a bucket in the Amazon S3 User Guide.
After you enable audit logging, Amazon RDS automatically sends the logs from your DB instance to the following locations:
-
DB instance level logs –
bucket_name/db2-audit-logs/dbi_resource_id/date_time_utc/ -
Database level logs –
bucket_name/db2-audit-logs/dbi_resource_id/date_time_utc/db_name/
Take note of the Amazon Resource Name (ARN) for your bucket. This information is needed to complete subsequent steps.
Step 2: Create an IAM policy
Create an IAM policy with the permissions required to transfer audit log files from your DB instance to your Amazon S3 bucket. This step assumes that you have an S3 bucket.
Before you create the policy, gather the following information:
-
The ARN for your bucket.
-
The ARN for your Amazon Key Management Service (Amazon KMS) key, if your bucket uses SSE-KMS encryption.
Create an IAM policy that includes the following permissions:
"s3:ListBucket",
 "s3:GetBucketAcl",
 "s3:GetBucketLocation",
 "s3:PutObject",
 "s3:ListMultipartUploadParts",
 "s3:AbortMultipartUpload",
 "s3:ListAllMyBuckets"
Note
Amazon RDS needs the s3:ListAllMyBuckets action internally to verify
that the same Amazon Web Services account owns both the S3 bucket and the RDS for Db2 DB
instance.
If your bucket uses SSE-KMS encryption, also include the following permissions for your IAM role and Amazon KMS key.
Include the following permissions to the policy for your IAM role.
"kms:GenerateDataKey",
 "kms:Decrypt"
Include the following permissions to the key policy for your Amazon KMS key. Replace 111122223333 with your account number and AROA123456789EXAMPLE with your IAM role name.
{
  "Sid": "Allow RDS role to use the key",
  "Effect": "Allow",
  "Principal": {
    "AWS": [
      "arn:aws:sts::111122223333:assumed-role/AROA123456789EXAMPLE/RDS-Db2Audit",
      "arn:aws:iam::111122223333:role/AROA123456789EXAMPLE"
    ]
  },
  "Action": [
    "kms:GenerateDataKey",
    "kms:Decrypt"
  ],
  "Resource": "*"
}
You can create an IAM policy by using the Amazon Web Services Management Console or the Amazon Command Line Interface (Amazon CLI).
To create an IAM policy to allow Amazon RDS to access your Amazon S3 bucket
Sign in to the Amazon Web Services Management Console and open the IAM console at https://console.amazonaws.cn/iam/
. -
In the navigation pane, choose Policies.
-
Choose Create policy, and then choose JSON.
-
In Add actions, filter by S3. Add access ListBucket, GetBucketAcl, and GetBucketLocation.
-
For Add a resource, choose Add. For Resource type, choose bucket, and enter the name of your bucket. Then, choose Add resource.
-
Choose Add new statement.
-
In Add actions, filter by S3. Add access PutObject, ListMultipartUploadParts, and AbortMultipartUpload.
-
For Add a resource, choose Add. For Resource type, choose object, and enter
your bucket name/*. Then, choose Add resource. -
Choose Add new statement.
-
In Add actions, filter by S3. Add access ListAllMyBuckets.
-
For Add a resource, choose Add. For Resource type, choose All Resources. Then, choose Add resource.
-
If you're using your own KMS keys to encrypt the data:
-
Choose Add new statement.
-
In Add actions, filter by KMS. Add access GenerateDataKey and Decrypt.
-
For Add a resource, choose Add. For Resource type, choose All Resources. Then, choose Add resource.
-
-
Choose Next.
-
For Policy name, enter a name for this policy.
-
(Optional) For Description, enter a description for this policy.
-
Choose Create policy.
To create an IAM policy to allow Amazon RDS to access your Amazon S3 bucket
-
Run the create-policy command. In the following example, replace
iam_policy_nameandamzn-s3-demo-bucketwith a name for your IAM policy and the name of your target Amazon S3 bucket.For Linux, macOS, or Unix:
aws iam create-policy \ --policy-nameiam_policy_name\ --policy-document '{ "Version": "2012-10-17", "Statement": [ { "Sid": "Statement1", "Effect": "Allow", "Action": [ "s3:ListBucket", "s3:GetBucketAcl", "s3:GetBucketLocation" ], "Resource": [ "arn:aws:s3:::amzn-s3-demo-bucket" ] }, { "Sid": "Statement2", "Effect": "Allow", "Action": [ "s3:PutObject", "s3:ListMultipartUploadParts", "s3:AbortMultipartUpload" ], "Resource": [ "arn:aws:s3:::amzn-s3-demo-bucket/*" ] }, { "Sid": "Statement3", "Effect": "Allow", "Action": [ "s3:ListAllMyBuckets" ], "Resource": [ "*" ] }, { "Sid": "Statement4", "Effect": "Allow", "Action": [ "kms:GenerateDataKey", "kms:Decrypt" ], "Resource": [ "*" ] } ] }'For Windows:
aws iam create-policy ^ --policy-nameiam_policy_name^ --policy-document '{ "Version": "2012-10-17", "Statement": [ { "Sid": "Statement1", "Effect": "Allow", "Action": [ "s3:ListBucket", "s3:GetBucketAcl", "s3:GetBucketLocation" ], "Resource": [ "arn:aws:s3:::amzn-s3-demo-bucket" ] }, { "Sid": "Statement2", "Effect": "Allow", "Action": [ "s3:PutObject", "s3:ListMultipartUploadParts", "s3:AbortMultipartUpload" ], "Resource": [ "arn:aws:s3:::amzn-s3-demo-bucket/*" ] }, { "Sid": "Statement3", "Effect": "Allow", "Action": [ "s3:ListAllMyBuckets" ], "Resource": [ "*" ] }, { "Sid": "Statement4", "Effect": "Allow", "Action": [ "kms:GenerateDataKey", "kms:Decrypt" ], "Resource": [ "*" ] } ] }' -
After the policy is created, note the ARN of the policy. You need the ARN for Step 3: Create an IAM role and attach your IAM policy.
For information about creating an IAM policy, see Creating IAM policies in the IAM User Guide.
Step 3: Create an IAM role and attach your IAM policy
This step assumes that you created the IAM policy in Step 2: Create an IAM policy. In this step, you create an IAM role for your RDS for Db2 DB instance and then attach your IAM policy to the role.
You can create an IAM role for your DB instance by using the console or the Amazon CLI.
To create an IAM role and attach your IAM policy to it
Sign in to the Amazon Web Services Management Console and open the IAM console at https://console.amazonaws.cn/iam/
. -
In the navigation pane, choose Roles.
-
Choose Create role.
-
For Trusted entity type, select Amazon Web Services service.
-
For Service or use case, select RDS, and then select RDS – Add Role to Database.
-
Choose Next.
-
For Permissions policies, search for and select the name of the IAM policy that you created.
-
Choose Next.
-
For Role name, enter a role name.
-
(Optional) For Description, enter a description for the new role.
-
Choose Create role.
To create an IAM role and attach your IAM policy to it
-
Run the create-role command. In the following example, replace
iam_role_namewith a name for your IAM role.For Linux, macOS, or Unix:
aws iam create-role \ --role-nameiam_role_name\ --assume-role-policy-document '{ "Version": "2012-10-17", "Statement": [ { "Effect": "Allow", "Principal": { "Service": "rds.amazonaws.com" }, "Action": "sts:AssumeRole" } ] }'For Windows:
aws iam create-role ^ --role-nameiam_role_name^ --assume-role-policy-document '{ "Version": "2012-10-17", "Statement": [ { "Effect": "Allow", "Principal": { "Service": "rds.amazonaws.com" }, "Action": "sts:AssumeRole" } ] }' -
After the role is created, note the ARN of this role. You need this ARN for the next step, Step 4: Configure an option group for Db2 audit logging.
-
Run the attach-role-policy command. In the following example, replace
iam_policy_arnwith the ARN of the IAM policy that you created in Step 2: Create an IAM policy. Replaceiam_role_namewith the name of the IAM role that you just created.For Linux, macOS, or Unix:
aws iam attach-role-policy \ --policy-arniam_policy_arn\ --role-nameiam_role_nameFor Windows:
aws iam attach-role-policy ^ --policy-arniam_policy_arn^ --role-nameiam_role_name
For more information, see Creating a role to delegate permissions to an IAM user in the IAM User Guide.
Step 4: Configure an option group for Db2 audit logging
The process for adding the Db2 audit logging option to an RDS for Db2 DB instance is as follows:
-
Create a new option group, or copy or modify an existing option group.
-
Add and configure all required options.
-
Associate the option group with the DB instance.
After you add the Db2 audit logging option, you don't need to restart your DB instance. As soon as the option group is active, you can create audits and store audit logs in your S3 bucket.
To add and configure Db2 audit logging on a DB instance's option group
-
Choose one of the following:
-
Use an existing option group.
-
Create a custom DB option group, and use that option group. For more information, see Creating an option group.
-
-
Add the DB2_AUDIT option to the option group, and configure the option settings. For more information about adding options, see Adding an option to an option group.
-
For IAM_ROLE_ARN, enter the ARN of the IAM role that you created in Step 3: Create an IAM role and attach your IAM policy.
-
For S3_BUCKET_ARN, enter the ARN of the S3 bucket to use for your Db2 audit logs. The bucket must be in the same Region as your RDS for Db2 DB instance. The policy associated with the IAM role you entered must allow the required operations on this resource.
-
-
Apply the option group to a new or existing DB instance. Choose one of the following:
-
If you are creating a new DB instance, apply the option group when you launch the instance.
-
On an existing DB instance, apply the option group by modifying the instance and then attaching the new option group. For more information, see Modifying an Amazon RDS DB instance.
-
Step 5: Configure the audit policy
To configure the audit policy for your RDS for Db2 database, connect to the
rdsadmin database using the master username and master password for
your RDS for Db2 DB instance. Then, call the rdsadmin.configure_db_audit
stored procedure with the DB name of your database and the applicable parameter
values.
The following example connects to the database and configures an audit policy for
testdb with the categories AUDIT, CHECKING, OBJMAINT, SECMAINT,
SYSADMIN, and VALIDATE. The status value BOTH logs success and
failures, and the ERROR TYPE is NORMAL by default. For
more information about how to use this stored procedure, see rdsadmin.configure_db_audit.
db2 "connect to rdsadmin usermaster_userusingmaster_password" db2 "call rdsadmin.configure_db_audit('testdb', 'ALL', 'BOTH', ?)"
Step 6: Check the audit configuration
To make sure that your audit policy is set up correctly, check the status of your audit configuration.
To check the configuration, connect to the rdsadmin database using
the master username and master password for your RDS for Db2 DB instance. Then, run the
following SQL statement with the DB name of your database. In the following example,
the DB name is testdb.
db2 "select task_id, task_type, database_name, lifecycle,
    varchar(bson_to_json(task_input_params), 500) as task_params,
    cast(task_output as varchar(500)) as task_output
    from table(rdsadmin.get_task_status(null,'testdb','CONFIGURE_DB_AUDIT'))"

Sample Output

TASK_ID              TASK_TYPE            DATABASE_NAME       LIFECYCLE
-------------------- -------------------- --------------- -------------
                   2  CONFIGURE_DB_AUDIT            DB2DB       SUCCESS

... continued ...
TASK_PARAMS
--------------------------------------------------------
{ "AUDIT_CATEGORY" : "ALL", "CATEGORY_SETTING" : "BOTH" }

... continued ...
                                        TASK_OUTPUT
---------------------------------------------------
2023-12-22T20:27:03.029Z Task execution has started.

2023-12-22T20:27:04.285Z Task execution has completed successfully.
Managing Db2 audit logging
After you set up Db2 audit logging, you can modify the audit policy for a specific database, or disable audit logging at the database level or for the entire DB instance. You can also change the Amazon S3 bucket where your log files are uploaded to.
Topics
Modifying a Db2 audit policy
To modify the audit policy for a specific RDS for Db2 database, run the
rdsadmin.configure_db_audit stored procedure. With this stored
procedure, you can change the categories, category settings, and error type
configuration of the audit policy. For more information, see rdsadmin.configure_db_audit.
Modifying the location of your log files
To change the Amazon S3 bucket where your log files are uploaded to, do one of the following:
-
Modify the current option group attached to your RDS for Db2 DB instance – Update the
S3_BUCKET_ARNsetting for theDB2_AUDIToption to point to the new bucket. Also, make sure to update the IAM policy attached to the IAM role specified by theIAM_ROLE_ARNsetting in the attached option group. This IAM policy must provide your new bucket with the required access permissions. For information about the permissions required in the IAM policy, see Create an IAM policy. -
Attach your RDS for Db2 DB instance to a different option group – Modify your DB instance to change the option group that's attached to it. Make sure that the new option group is configured with the correct
S3_BUCKET_ARNandIAM_ROLE_ARNsettings. For information about how to configure these settings for theDB2_AUDIToption, see Configure an option group.
When you modify the option group, make sure that you apply the changes immediately. For more information, see Modifying an Amazon RDS DB instance.
Disabling Db2 audit logging
To disable Db2 audit logging, do one of the following:
-
Disable audit logging for the RDS for Db2 DB instance – Modify your DB instance and remove the option group with the
DB2_AUDIToption from it. For more information, see Modifying an Amazon RDS DB instance. -
Disable audit logging for a specific database – Stop audit logging and remove the audit policy by calling
rdsadmin.disable_db_auditwith the DB name of your database. For more information, see rdsadmin.disable_db_audit.db2 "call rdsadmin.disable_db_audit( 'db_name', ?)"
Viewing audit logs
After you enable Db2 audit logging, wait for at least one hour before viewing the audit data in your Amazon S3 bucket. Amazon RDS automatically sends the logs from your RDS for Db2 DB instance to the following locations:
-
DB instance level logs –
bucket_name/db2-audit-logs/dbi_resource_id/date_time_utc/ -
Database level logs –
bucket_name/db2-audit-logs/dbi_resource_id/date_time_utc/db_name/
The following example screenshot of the Amazon S3 console shows a list of folders for RDS for Db2 DB instance level log files.
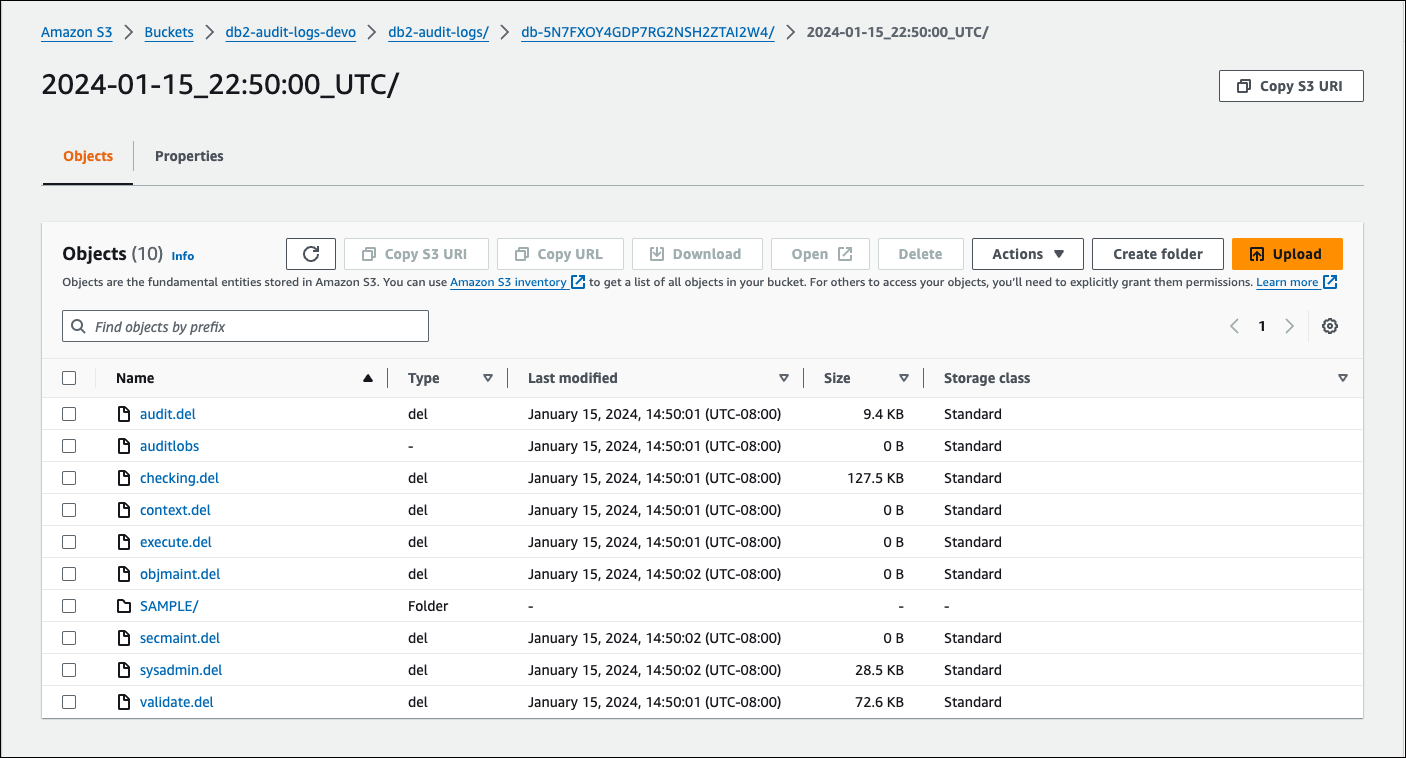
The following example screenshot of the Amazon S3 console shows database level log files for the RDS for Db2 DB instance.

Troubleshooting Db2 audit logging
Use the following information to troubleshoot common issues with Db2 audit logging.
Can't configure the audit policy
If calling the stored procedure rdsadmin.configure_db_audit returns
an error, it could be that the option group with the DB2_AUDIT option
isn't associated with the RDS for Db2 DB instance. Modify the DB instance to add the
option group, and then try calling the stored procedure again. For more information,
see Modifying an Amazon RDS DB instance.
No data in the Amazon S3 bucket
If logging data is missing from the Amazon S3 bucket, check the following:
-
The Amazon S3 bucket is in the same Region as your RDS for Db2 DB instance.
-
The role you specified in the
IAM_ROLE_ARNoption setting is configured with the required permissions to upload logs to your Amazon S3 bucket. For more information, see Create an IAM policy. -
The ARNs for the
IAM_ROLE_ARNandS3_BUCKET_ARNoption settings are correct in the option group associated with your RDS for Db2 DB instance. For more information, see Configure an option group.
You can check the task status of your audit logging configuration by connecting to the database and running a SQL statement. For more information, see Check the audit configuration.
You can also check events to find out more about why logs might be missing. For information about how to view events, see Viewing logs, events, and streams in the Amazon RDS console.