Get started with Apache Spark on Amazon Athena
Note
For the release version Apache Spark version 3.5, following the Getting Started guide in SageMaker Notebooks. Use this guide for the release version Pyspark engine version 3.
To get started with Apache Spark on Amazon Athena, you must first create a Spark enabled workgroup. After you switch to the workgroup, you can create a notebook or open an existing notebook. When you open a notebook in Athena, a new session is started for it automatically and you can work with it directly in the Athena notebook editor.
Note
Make sure that you create a Spark enabled workgroup before you attempt to create a notebook.
Step 1: Create a Spark enabled workgroup in Athena
You can use workgroups in Athena to group users, teams, applications, or workloads, and to track costs. To use Apache Spark in Amazon Athena, you create an Amazon Athena workgroup that uses a Spark engine.
Note
Apache Spark enabled workgroups can use the Athena notebook editor, but not the Athena query editor. Only Athena SQL workgroups can use the Athena query editor.
To create a Spark enabled workgroup in Athena
-
Open the Athena console at https://console.amazonaws.cn/athena/
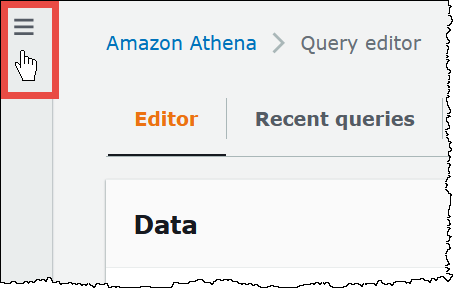
If the console navigation pane is not visible, choose the expansion menu on the left.
-
In the navigation pane, choose Workgroups.
-
On the Workgroups page, choose Create workgroup.
-
For Workgroup name, enter a name for your Apache Spark workgroup.
-
(Optional) For Description, enter a description for your workgroup.
-
For Analytics engine, choose Apache Spark.
Note
After you create a workgroup, the workgroup's type of analytics engine cannot be changed. For example, an Athena engine version 3 workgroup cannot be changed to a PySpark engine version 3 workgroup.
-
For the purposes of this tutorial, select Turn on example notebook. This optional feature adds an example notebook with the name
example-notebook-to your workgroup and adds Amazon Glue-related permissions that the notebook uses to create, show, and delete specific databases and tables in your account, and read permissions in Amazon S3 for the sample dataset. To see the added permissions, choose View additional permissions details.random_stringNote
Running the example notebook may incur some additional cost.
-
For Calculation result settingschoose from the following options:
-
Create a new S3 bucket – This option creates an Amazon S3 bucket in your account for your calculation results. The bucket name has the format
account_id-region-athena-results-bucket-alphanumeric_id -
Choose an existing S3 location – For this option, do the following:
-
Enter the S3 path to an existing the location in the search box, or choose Browse S3 to choose a bucket from a list.
Note
When you select an existing location in Amazon S3, do not append a forward slash (
/) to the location. Doing so causes the link to the calculation results location on the calculation details page to point to the incorrect directory. If this occurs, edit the workgroup's results location to remove the trailing forward slash. -
(Optional) Choose View to open the Buckets page of the Amazon S3 console where you can view more information about the existing bucket that you chose.
-
(Optional) For Expected bucket owner, enter the Amazon account ID that you expect to be the owner of your query results output location bucket. We recommend that you choose this option as an added security measure whenever possible. If the account ID of the bucket owner does not match the ID that you specify, attempts to output to the bucket will fail. For in-depth information, see Verifying bucket ownership with bucket owner condition in the Amazon S3 User Guide.
-
(Optional) Select Assign bucket owner full control over query results if your calculation result location is owned by another account and you want to grant full control over your query results to the other account.
-
-
-
(Optional) Choose Encrypt query results if you want your query results to be encrypted.
-
For Encryption type, choose one of the following options:
-
SSE_S3 – This option uses server-side encryption (SSE) with Amazon S3-managed encryption keys.
-
SSE_KMS – This option uses server-side encryption (SSE) with Amazon KMS-managed keys.
For Choose an Amazon KMS key, choose one of the following options.
-
Use Amazon owned key – The Amazon KMS key is owned and managed by Amazon. You are not charged an additional fee for using this key.
-
Choose a different Amazon KMS key (advanced) – For this option, do one of the following:
-
To use an existing key, use the search box to choose an Amazon KMS or enter a key ARN.
-
To create a key in the Amazon KMS console, choose Create an Amazon KMS key. Your execution role must have permission to use the key that you create. After you finish creating the key in the KMS console, return to the Create workgroup page in Athena console, and then use the Choose an Amazon KMS key or enter an ARN search box to choose the key that you just created.
-
-
Important
When you change the Amazon KMS key for a workgroup, notebooks managed before the update still reference the old KMS key. Notebooks managed after the update use the new KMS key. To update the old notebooks to reference the new KMS key, export and then import each of the old notebooks. If you delete the old KMS key before you update the old notebook references to the new KMS key, the old notebooks are no longer decryptable and cannot be recovered.
This behavior also applies for updates to aliases, which are friendly names for KMS keys. When you update a KMS key alias to point to a new KMS key, notebooks managed before the alias update still reference the old KMS key, and notebooks managed after the alias update use the new KMS key. Consider these points before updating your KMS keys or aliases.
-
-
-
For Additional configurations, choose Use defaults. This option helps you get started with your Spark-enabled workgroup. When you use the defaults, Athena creates an IAM role and calculation results location in Amazon S3 for you. The name of the IAM role and the S3 bucket location to be created are displayed in the box below the Additional configurations heading.
If you do not want to use the defaults, continue with the steps in the (Optional) Specify your own workgroup configurations section to configure your workgroup manually.
-
(Optional) Tags – Use this option to add tags to your workgroup. For more information, see Tag Athena resources.
-
Choose Create workgroup. A message informs you that the workgroup was created successfully, and the workgroup shows in the list of workgroups.
(Optional) Specify your own workgroup configurations
If you want to specify your own IAM role and calculation results location for your notebook, follow the steps in this section. If you chose Use defaults for the Additional configurations option, skip this section and go directly to Step 2: Open notebook explorer and switch workgroups.
The following procedure assumes you have completed steps 1 to 9 of the To create a Spark enabled workgroup in Athena procedure in the previous section.
To specify your own workgroup configurations
-
If you want to create or use your own IAM role or configure notebook encryption, expand IAM role configuration.
-
For Service Role to authorize Athena, choose one of the following:
-
Create and use a new service role – Choose this option to have Athena create a service role for you. To see the permissions the role grants, choose View permission details.
-
Use an existing service role – From the drop down menu, choose an existing role. The role that you choose must include the permissions in the first option. For more information about permissions for notebook-enabled workgroups, see Troubleshoot Spark-enabled workgroups.
-
-
For Notebook and calculation code encryption key management, choose one of the following options:
-
Encrypt using Amazon owned key (Default) – The Amazon KMS key is owned and managed by Amazon. You are not charged an additional fee for using this key.
-
Encrypt using your own Amazon KMS key – For this option, do one of the following:
-
To use an existing key, use the search box to choose an Amazon KMS or enter a key ARN.
-
To create a key in the Amazon KMS console, choose Create an Amazon KMS key. Your execution role must have permission to use the key that you create. After you finish creating the key in the KMS console, return to the Create workgroup page in Athena console, and then use the Choose an Amazon KMS key or enter an ARN search box to choose the key that you just created.
-
Important
When you change the Amazon KMS key for a workgroup, notebooks managed before the update still reference the old KMS key. Notebooks managed after the update use the new KMS key. To update the old notebooks to reference the new KMS key, export and then import each of the old notebooks. If you delete the old KMS key before you update the old notebook references to the new KMS key, the old notebooks are no longer decryptable and cannot be recovered.
This behavior also applies for updates to aliases, which are friendly names for KMS keys. When you update a KMS key alias to point to a new KMS key, notebooks managed before the alias update still reference the old KMS key, and notebooks managed after the alias update use the new KMS key. Consider these points before updating your KMS keys or aliases.
-
-
-
(Optional) Other settings – Expand this option to enable or disable the Publish CloudWatch metrics option for the workgroup. This field is selected by default. For more information, see Monitor Apache Spark with CloudWatch metrics.
-
(Optional) Tags – Use this option to add tags to your workgroup. For more information, see Tag Athena resources.
-
Choose Create workgroup. A message informs you that the workgroup was created successfully, and the workgroup shows in the list of workgroups.
Step 2: Open notebook explorer and switch workgroups
Before you can use the Spark enabled workgroup that you just created, you must switch to the workgroup. To switch Spark enabled workgroups, you can use the Workgroup option in Notebook explorer or Notebook editor.
Note
To open notebook explorer and switch workgroups
-
In the navigation pane,choose Notebook explorer.
-
Use the Workgroup option on the upper right of the console to choose the Spark enabled workgroup that you created. The example notebook is shown in the list of notebooks.
You can use the notebook explorer in the following ways:
-
Choose the linked name of a notebook to open the notebook in a new session.
-
To rename, delete, or export your notebook, use the Actions menu.
-
To import a notebook file, choose Import file.
-
To create a notebook, choose Create notebook.
-
Step 3: Run the example notebook
The sample notebook queries data from a publicly available New York City taxi trip dataset. The notebook has examples that show how to work with Spark DataFrames, Spark SQL, and the Amazon Glue Data Catalog.
To run the example notebook
-
In Notebook explorer, choose the linked name of the example notebook.
This starts a notebook session with the default parameters and opens the notebook in the notebook editor. A message informs you that a new Apache Spark session has been started using the default parameters (20 maximum DPUs).
-
To run the cells in order and observe the results, choose the Run button once for each cell in the notebook.
-
Scroll down to see the results and bring new cells into view.
-
For the cells that have a calculation, a progress bar shows the percentage completed, the time elapsed, and the time remaining.
-
The example notebook creates a sample database and table in your account. The final cell removes these as a clean-up step.
-
Note
If you change folder, table, or database names in the example notebook, make sure those changes are reflected in the IAM roles that you use. Otherwise, the notebook can fail to run due to insufficient permissions.
Step 4: Edit session details
After you start a notebook session, you can edit session details like table format, encryption, session idle timeout, and the maximum concurrent number of data processing units (DPUs) that you want to use. A DPU is a relative measure of processing power that consists of 4 vCPUs of compute capacity and 16 GB of memory.
To edit session details
-
In the notebook editor, from the Session menu on the upper right, choose Edit session.
-
In the Edit session details dialog box, in the Spark properties section, choose or enter values for the following options:
-
Additional table format – Choose Linux Foundation Delta Lake, Apache Hudi, Apache Iceberg, or Custom.
-
For the Delta, Hudi, or Iceberg table options, the required table properties for the corresponding table format are automatically provided for you in the Edit in table and Edit in JSON options. For more information about using these table formats, see Use non-Hive table formats in Athena for Spark.
-
To add or remove table properties for the Custom or other table types, use the Edit in table and Edit in JSON options.
-
For the Edit in table option, choose Add property to add a property, or Remove to remove a property. To enter property names and their values, use the Key and Value boxes.
-
For the Edit in JSON option, use the JSON text editor to edit the configuration directly.
-
To copy the JSON text to the clipboard, choose Copy.
-
To remove all text from the JSON editor, choose Clear.
-
To configure line wrapping or choose a color theme for the JSON editor, choose the settings (gear) icon.
-
-
-
Turn on Spark encryption - – Select this option to encrypt data that is written to disk and sent through Spark network nodes. For more information, see Enable Apache Spark encryption.
-
-
In the Session parameters section, choose or enter values for the following options:
-
Session idle timeout - Choose or enter a value between 1 and 480 minutes. The default is 20.
-
Coordinator size - A coordinator is a special executor that orchestrates processing work and manages other executors in a notebook session. Currently, 1 DPU is the default and only possible value.
-
Executor size - An executor is the smallest unit of compute that a notebook session can request from Athena. Currently, 1 DPU is the default and only possible value.
-
Max concurrent value - The maximum number of DPUs that can run concurrently. The default is 20, the minimum is 3, and the maximum is 60. Increasing this value does not automatically allocate additional resources, but Athena will attempt to allocate up to the maximum specified when the compute load requires it and when resources are available.
-
-
Choose Save.
-
At the Confirm edit prompt, choose Confirm.
Athena saves your notebook and starts a new session with the parameters that you specified. A banner in the notebook editor informs you that a new session has started with the modified parameters.
Note
Athena remembers your session settings for the notebook. If you edit a session's parameters and then terminate the session, Athena uses the session parameters that you configured the next time you start a session for the notebook.
Step 5: View session and calculation details
After you run the notebook, you can view your session and calculation details.
To view session and calculation details
-
From the Session menu on the upper right, choose View details.
-
The Current session tab shows information about the current session, including session ID, creation time, status, and workgroup.
-
The History tab lists the session IDs for previous sessions. To view details for a previous session, choose the History tab, and then choose a session ID in the list.
-
The Calculations section shows a list of calculations that ran in the session.
-
-
To view the details for a calculation, choose the calculation ID.
-
On the Calculation details page, you can do the following:
-
To view the code for the calculation, see the Code section.
-
To see the results for the calculation, choose the Results tab.
-
To download the results that you see in text format, choose Download results.
-
To view information about the calculation results in Amazon S3, choose View in S3.
-
Step 6: Terminate the session
To end the notebook session
-
In the notebook editor, from the Session menu on the upper right, choose Terminate.
-
At the Confirm session termination prompt, choose Confirm. Your notebook is saved and you are returned to the notebook editor.
Note
Closing a notebook tab in the notebook editor does not by itself terminate the session for an active notebook. If you want to ensure that the session is terminated, use the Session, Terminate option.
Step 7: Create your own notebook
After you have created a Spark enabled Athena workgroup, you can create your own notebook.
To create a notebook
-
If the console navigation pane is not visible, choose the expansion menu on the left.
-
In the Athena console navigation pane, choose Notebook explorer or Notebook editor.
-
Do one of the following:
-
In Notebook explorer, choose Create notebook.
-
In Notebook editor, choose Create notebook, or choose the plus icon (+) to add a notebook.
-
-
In the Create notebook dialog box, for Notebook name, enter a name.
-
(Optional) Expand Spark properties, and then choose or enter values for the following options:
-
Additional table format – Choose Linux Foundation Delta Lake, Apache Hudi, Apache Iceberg, or Custom.
-
For the Delta, Hudi, or Iceberg table options, the required table properties for the corresponding table format are automatically provided for you in the Edit in table and Edit in JSON options. For more information about using these table formats, see Use non-Hive table formats in Athena for Spark.
-
To add or remove table properties for the Custom or other table types, use the Edit in table and Edit in JSON options.
-
For the Edit in table option, choose Add property to add a property, or Remove to remove a property. To enter property names and their values, use the Key and Value boxes.
-
For the Edit in JSON option, use the JSON text editor to edit the configuration directly.
-
To copy the JSON text to the clipboard, choose Copy.
-
To remove all text from the JSON editor, choose Clear.
-
To configure line wrapping or choose a color theme for the JSON editor, choose the settings (gear) icon.
-
-
-
Turn on Spark encryption - – Select this option to encrypt data that is written to disk and sent through Spark network nodes. For more information, see Enable Apache Spark encryption.
-
-
(Optional) Expand Session parameters, and then choose or enter values for the following options:
-
Session idle timeout - choose or enter a value between 1 and 480 minutes. The default is 20.
-
Coordinator size - A coordinator is a special executor that orchestrates processing work and manages other executors in a notebook session. Currently, 1 DPU is the default and only possible value. A DPU (data processing unit) is a relative measure of processing power that consists of 4 vCPUs of compute capacity and 16 GB of memory.
-
Executor size - An executor is the smallest unit of compute that a notebook session can request from Athena. Currently, 1 DPU is the default and only possible value.
-
Max concurrent value - The maximum number of DPUs that can run concurrently. The default is 20 and the maximum is 60. Increasing this value does not automatically allocate additional resources, but Athena will attempt to allocate up to the maximum specified when the compute load requires it and when resources are available.
-
-
Choose Create. Your notebook opens in a new session in the notebook editor.
For information about managing your notebook files, see Manage notebook files.