Tutorial: Filter on branch names for pull requests to start your pipeline (V2 type)
In this tutorial, you will create a pipeline that connects to your GitHub.com repository where the source action is configured to start your pipeline with a trigger configuration that filters on pull requests. When a specified pull request event occurs for a specified branch, your pipeline starts. This example shows you how to create a pipeline that allows filtering for branch names. For more information about working with triggers, see Add filters for push and pull request event types (CLI). For more information about filtering with regex patterns in glob format, see Working with glob patterns in syntax.
Important
As part of creating a pipeline, an S3 artifact bucket provided by the customer will be used by CodePipeline for artifacts. (This is different from the bucket used for an S3 source action.) If the S3 artifact bucket is in a different account from the account for your pipeline, make sure that the S3 artifact bucket is owned by Amazon Web Services accounts that are safe and will be dependable.
This tutorial connects to GitHub.com through the CodeStarSourceConnection
action type.
Topics
Prerequisites
Before you begin, you must do the following:
-
Create a GitHub.com repository with your GitHub.com account.
-
Have your GitHub credentials ready. When you use the Amazon Web Services Management Console to set up a connection, you are asked to sign in with your GitHub credentials.
Step 1: Create a pipeline to start on pull request for specified branches
In this section, you create a pipeline with the following actions:
-
A source stage with a connection to your GitHub.com repository and action.
-
A build stage with an Amazon CodeBuild build action.
To create a pipeline with the wizard
-
Sign in to the CodePipeline console at https://console.amazonaws.cn/codepipeline/
. -
On the Welcome page, Getting started page, or Pipelines page, choose Create pipeline.
-
On the Step 1: Choose creation option page, under Creation options, choose the Build custom pipeline option. Choose Next.
-
In Step 2: Choose pipeline settings, in Pipeline name, enter
MyFilterBranchesPipeline. -
In Pipeline type, keep the default selection at V2. Pipeline types differ in characteristics and price. For more information, see Pipeline types.
-
In Service role, choose New service role.
Note
If you choose instead to use your existing CodePipeline service role, make sure that you have added the
codeconnections:UseConnectionIAM permission to your service role policy. For instructions for the CodePipeline service role, see Add permissions to the the CodePipeline service role. -
Under Advanced settings, leave the defaults. In Artifact store, choose Default location to use the default artifact store, such as the Amazon S3 artifact bucket designated as the default, for your pipeline in the Region you selected for your pipeline.
Note
This is not the source bucket for your source code. This is the artifact store for your pipeline. A separate artifact store, such as an S3 bucket, is required for each pipeline.
Choose Next.
-
On the Step 3: Add source stage page, add a source stage:
-
In Source provider, choose GitHub (via GitHub App).
-
Under Connection, choose an existing connection or create a new one. To create or manage a connection for your GitHub source action, see GitHub connections.
-
In Repository name, choose the name of your GitHub.com repository.
-
Under Trigger type, choose Specify filter.
Under Event type, choose Pull request. Select all of the events under pull request so that the event occurs for created, updated, or closed pull requests.
Under Branches, in the Include field, enter
main*.
Important
Pipelines that start with this trigger type will be configured for WebhookV2 events and will not use the Webhook event (change detection on all push events) to start the pipeline.
Choose Next.
-
-
In Step 4: Add build stage, in Build provider, choose Amazon CodeBuild. Allow Region to default to the pipeline Region. Choose or create the build project as instructed in Tutorial: Use Git tags to start your pipeline. This action will only be used in this tutorial as the second stage needed to create your pipeline.
-
In Step 5: Add test stage, choose Skip test stage, and then accept the warning message by choosing Skip again.
Choose Next.
-
On the Step 6: Add deploy stage page, choose Skip deploy stage, and then accept the warning message by choosing Skip again. Choose Next.
-
On Step 7: Review, choose Create pipeline.
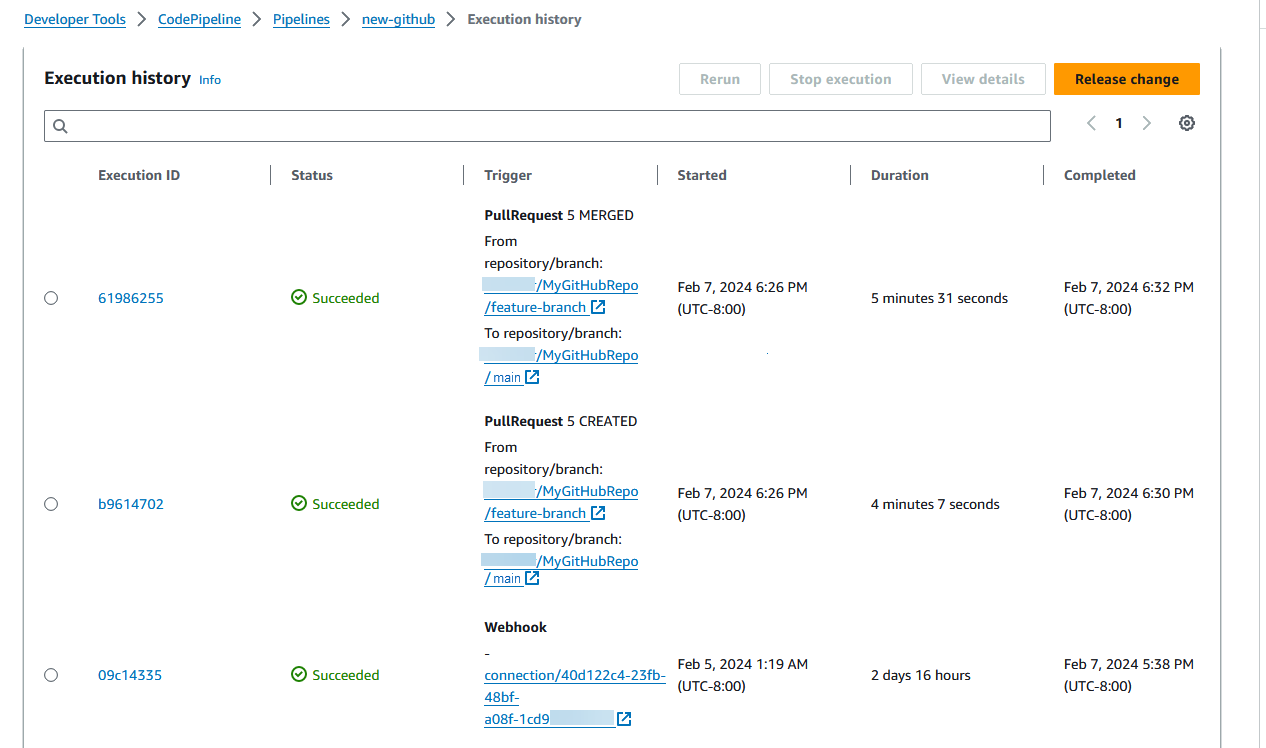
Step 2: Create and merge a pull request in GitHub.com to start your pipeline executions
In this section, you create and merge a pull request. This starts your pipeline, with one execution for the opened pull request and one execution for the closed pull request.
To create a pull request and start your pipeline
-
In GitHub.com, create a pull request by making a change to the README.md on a feature branch and raising a pull request to the
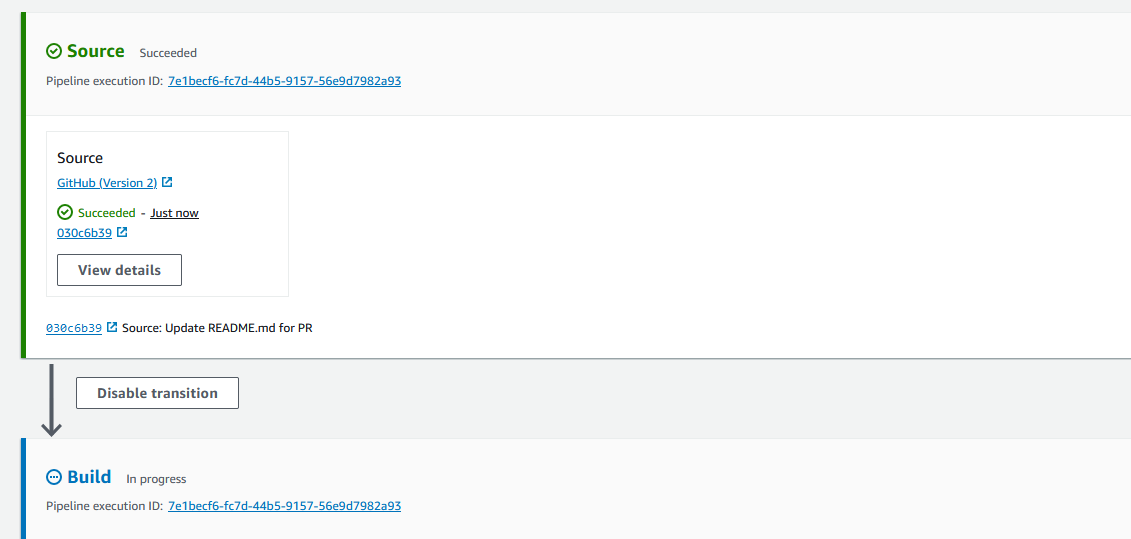
mainbranch. Commit the change with a message likeUpdate README.md for PR. -
The pipeline starts with the source revision showing the Source message for the pull request as Update README.md for PR.
-
Choose History. In the pipeline execution history, view the CREATED and MERGED pull request status events that started the pipeline executions.