Get started with Amazon DocumentDB elastic clusters
This getting started section walks you through on how you can create and query your first elastic cluster.
There are many ways to connect and get started with Amazon DocumentDB. The following procedure is the quickest, simplest, and easiest way for users to get started using our powerful document database. This guide uses Amazon CloudShell to connect and query your Amazon DocumentDB cluster directly from the Amazon Web Services Management Console. New customers who are eligible for the Amazon Free Tier can use Amazon DocumentDB and CloudShell for free. If your Amazon CloudShell environment or Amazon DocumentDB elastic cluster makes use of resources beyond the free tier, you are charged the normal Amazon rates for those resources. This guide will get you started with Amazon DocumentDB in less than 5 minutes.
Topics
Prerequisites
Before you create your first Amazon DocumentDB cluster, you must do the following:
- Create an Amazon Web Services (Amazon) account
-
Before you can begin using Amazon DocumentDB, you must have an Amazon Web Services (Amazon) account. The Amazon account is free. You pay only for the services and resources that you use.
If you do not have an Amazon Web Services account, use the following procedure to create one.
To sign up for Amazon Web Services
Open http://www.amazonaws.cn/
and choose Sign Up. Follow the on-screen instructions.
- Set up the needed Amazon Identity and Access Management (IAM) permissions.
-
Access to manage Amazon DocumentDB resources such as clusters, instances, and cluster parameter groups requires credentials that Amazon can use to authenticate your requests. For more information, see Identity and Access Management for Amazon DocumentDB.
-
In the search bar of the Amazon Web Services Management Console, type in IAM and select IAM in the drop down menu.
-
Once you're in the IAM console, select Users from the navigation pane.
-
Select your username.
-
Choose Add permissions.
-
Select Attach policies directly.
-
Type
AmazonDocDBElasticFullAccessin the search bar and select it once it appears in the search results. -
Choose Next.
-
Choose Add permissions.
-
Note
Your Amazon account includes a default VPC in each region. If you choose to use an Amazon VPC, complete the steps in the Create a Amazon VPC topic in the Amazon VPC User Guide.
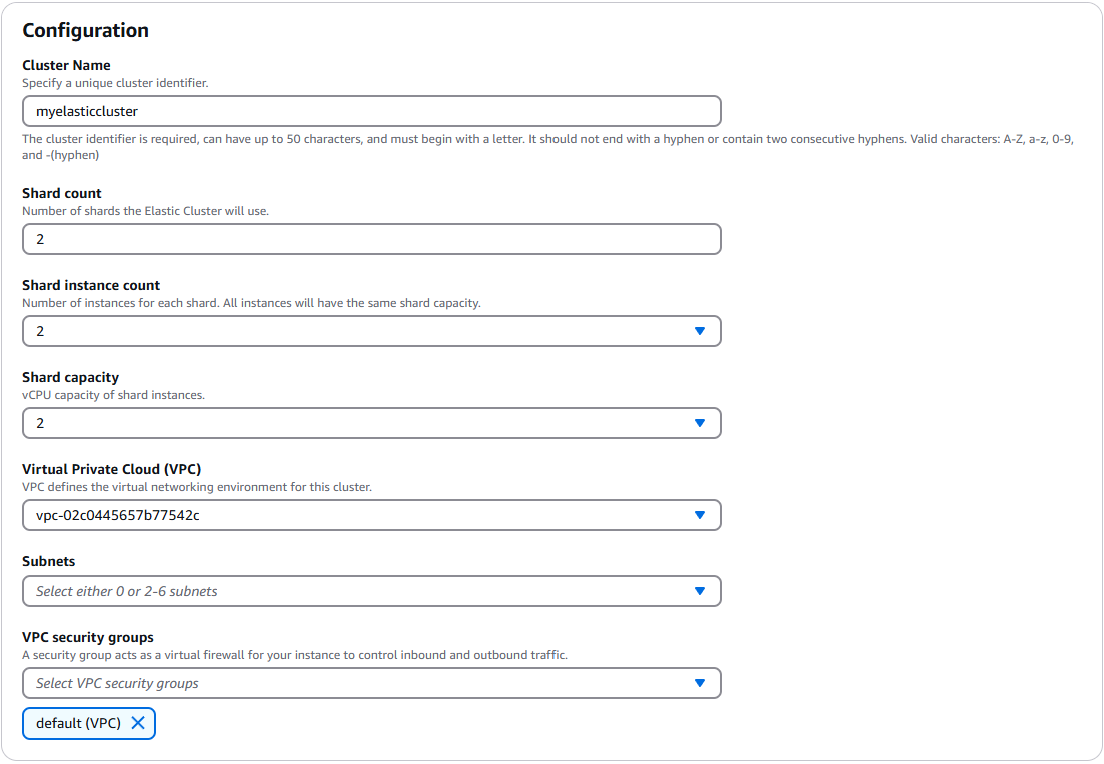
Step 1: Create an elastic cluster
In this section we explain how to create a brand new elastic cluster, using either the Amazon Web Services Management Console or Amazon CLI with the following instructions.


Step 2: Connect to your elastic cluster
Connect to your Amazon DocumentDB elastic cluster using Amazon CloudShell.
-
On the Amazon DocumentDB management console, under Clusters, locate the elastic cluster you created. Choose your cluster by clicking the check box next to it.

-
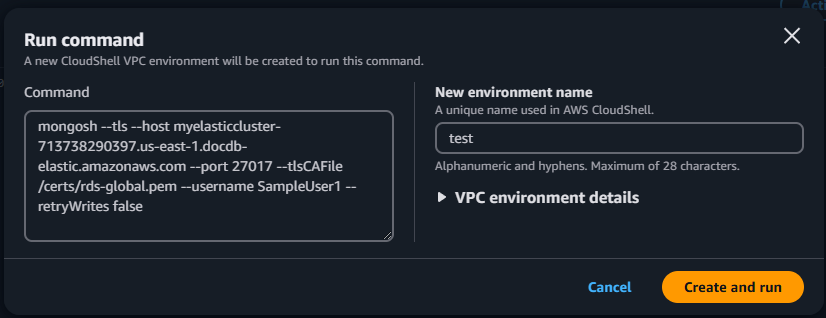
Choose Connect to cluster (which is next to the Actions dropdown menu. This button is enabled only after you have clicked the checkbox next to your cluster, and the status of the cluster shows as Available. The CloudShell Run command screen appears.
-
In the New environment name field, enter a unique name, such as "test" and choose Create and run. VPC environment details are automatically configured for your Amazon DocumentDB database.
-
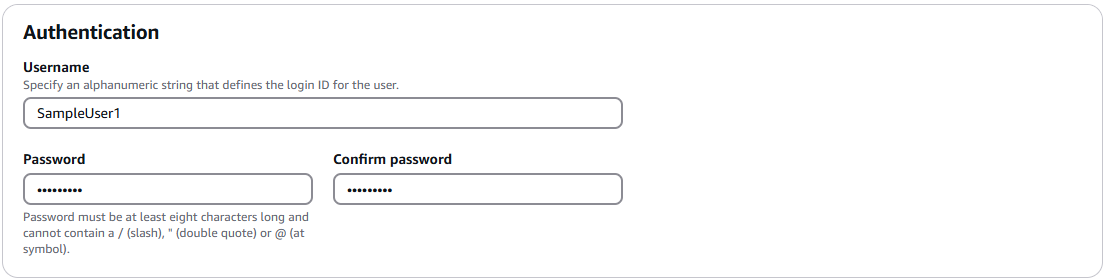
When prompted, enter the password you created in Step 1: Create an Amazon DocumentDB elastic cluster (sub-step 5).
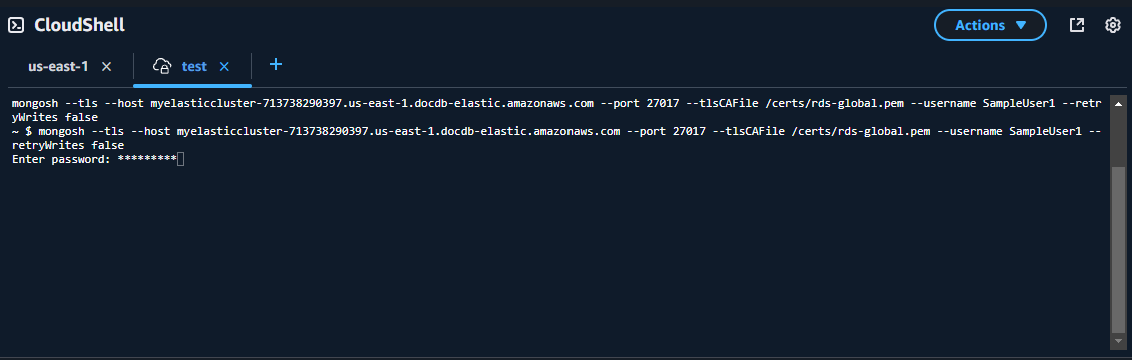
After you enter your password and your prompt becomes
direct: mongos] <env-name>>, you are successfully connected to your Amazon DocumentDB cluster
Note
For information about troubleshooting, see Troubleshooting Amazon DocumentDB.
Step 3: Shard your collection, insert and query data
Elastic clusters add support for sharding in Amazon DocumentDB. Now that you are connected to your cluster, you can shard the cluster, insert data and run a few queries.
-
To shard a collection, enter the following:
sh.shardCollection("db.Employee1" , { "Employeeid" : "hashed" }) -
To insert a single document, enter the following:
db.Employee1.insertOne({"Employeeid":1, "Name":"Joe", "LastName": "Bruin", "level": 1 })The following output is displayed:
WriteResult({ "nInserted" : 1 }) -
To read the document that you wrote, enter the
findOne()command (it returns a single document):db.Employee1.findOne()The following output is displayed:
{ "_id" : ObjectId("61f344e0594fe1a1685a8151"), "EmployeeID" : 1, "Name" : "Joe", "LastName" : "Bruin", "level" : 1 } -
To perform a few more queries, consider a gaming profile use case. First, insert a few entries into a collection titled "Employee". Enter the following:
db.profiles.insertMany([ { "_id": 1, "name": "Matt", "status": "active", "level": 12, "score": 202 },
     { "_id": 2, "name": "Frank", "status": "inactive", "level": 2, "score": 9 },
     { "_id": 3, "name": "Karen", "status": "active", "level": 7, "score": 87 },
     { "_id": 4, "name": "Katie", "status": "active", "level": 3, "score": 27 }
])
The following output is displayed:
{ acknowledged: true, insertedIds: { '0': ObjectId('679d02cd6b5a0581be78bcbd'), '1': ObjectId('679d02cd6b5a0581be78bcbe'), '2': ObjectId('679d02cd6b5a0581be78bcbf'), '3': ObjectId('679d02cd6b5a0581be78bcc0') } } -
To return all the documents in the profiles collection, enter the
find() command:db.Employee.find()The data you entered in step 4 is displayed.
-
To query a single document, include a filter (for example: "Katie"). Enter the following:
db.Employee.find({name: "Katie"})The following output is displayed:
[ { _id: ObjectId('679d02cd6b5a0581be78bcc0'), Employeeid: 4, name: 'Katie', lastname: 'Schaper', level: 3 } ] -
To find a profile and modify it, enter the
findAndModifycommand. In this example, the employee "Matt" is given a higher level of "14":db.Employee.findAndModify({ query: { "Employeeid" : 1, "name" : "Matt"}, update: { "Employeeid" : 1, "name" : "Matt", "lastname" : "Winkle", "level" : 14 } })The following output is displayed (note that the level has not changed yet):
{ _id: ObjectId('679d02cd6b5a0581be78bcbd'), Employeeid: 1, name: 'Matt', lastname: 'Winkle', level: 12 } -
To verify the level increase, enter the following query:
db.Employee.find({name: "Matt"})The following output is displayed:
[
   {

   _id: ObjectId('679d02cd6b5a0581be78bcbd'),

   Employeeid: 1,

   name: 'Matt',

   lastname: 'Winkle',

   level: 14

   }
]
Step 4: Explore
Congratulations! You have successfully completed the Get started procedure for Amazon DocumentDB elastic clusters.
What’s next? Learn how to fully leverage this database with some of its popular features:
Note
The elastic cluster you created from this get started procedure will continue to accrue costs unless you delete it. For directions, see Deleting an elastic cluster.