Tutorial: Build your first streaming workload using Amazon Glue Studio notebooks
In this tutorial, you will explore how to leverage Amazon Glue Studio notebooks to interactively build and refine your ETL jobs for near real-time data processing. Whether you're new to Amazon Glue or looking to enhance your skill set, this guide will walk you through the process, empowering you to harness the full potential of Amazon Glue interactive session notebooks.
With Amazon Glue Streaming, you can create streaming extract, transform, and load (ETL) jobs that run continuously and consume data from streaming sources such as Amazon Kinesis Data Streams, Apache Kafka, and Amazon Managed Streaming for Apache Kafka (Amazon MSK).
Prerequisites
To follow this tutorial you'll need a user with Amazon console permissions to use Amazon Glue, Amazon Kinesis, Amazon S3, Amazon Athena, Amazon CloudFormation, Amazon Lambda and Amazon Cognito.
Consume streaming data from Amazon Kinesis
Topics
Generating mock data with Kinesis Data Generator
Note
If you have already completed our previous Tutorial: Build your first streaming workload using Amazon Glue Studio, you already have the Kinesis Data Generator installed on your account and you can skip steps 1-8 below and move on to the section Creating an Amazon Glue streaming job with Amazon Glue Studio.
You can synthetically generate sample data in JSON format using the Kinesis Data Generator (KDG). You can find full instructions and details in the tool documentation
To get started, click

to run an Amazon CloudFormation template on your Amazon environment. Note
You may encounter a CloudFormation template failure because some resources, such as the Amazon Cognito user for Kinesis Data Generator already exist in your Amazon account. This could be because you already set that up from another tutorial or blog. To address this, you can either try the template in a new Amazon account for a fresh start, or explore a different Amazon Region. These options let you run the tutorial without conflicting with existing resources.
The template provisions a Kinesis data stream and a Kinesis Data Generator account for you.
Enter a Username and Password that the KDG will use to authenticate. Note the username and password for further usage.
Select Next all the way to the last step. Acknowledge the creation of IAM resources. Check for any errors at the top of the screen, such as the password not meeting the minimum requirements, and deploy the template.
Navigate to the Outputs tab of the stack. Once the template is deployed, it will display the generated property KinesisDataGeneratorUrl. Click that URL.
Enter the Username and Password you noted down.
Select the Region you are using and select the Kinesis Stream
GlueStreamTest-{AWS::AccountId}Enter the following template:
{
    "ventilatorid": {{random.number(100)}},
    "eventtime": "{{date.now("YYYY-MM-DD HH:mm:ss")}}",
    "serialnumber": "{{random.uuid}}",
    "pressurecontrol": {{random.number(
        {
            "min":5,
            "max":30
        }
    )}},
    "o2stats": {{random.number(
        {
            "min":92,
            "max":98
        }
    )}},
    "minutevolume": {{random.number(
        {
            "min":5,
            "max":8
        }
    )}},
    "manufacturer": "{{random.arrayElement(
        ["3M", "GE","Vyaire", "Getinge"]
    )}}"
}
You can now view mock data with Test template and ingest the mock data to Kinesis with Send data.
Click Send data and generate 5-10K records to Kinesis.
Creating an Amazon Glue streaming job with Amazon Glue Studio
Amazon Glue Studio is a visual interface that simplifies the process of designing, orchestrating, and monitoring data integration pipelines. It enables users to build data transformation pipelines without writing extensive code. Apart from the visual job authoring experience, Amazon Glue Studio also includes a Jupyter notebook backed by Amazon Glue Interactive sessions, which you will be using in the remainder of this tutorial.
Set up the Amazon Glue Streaming interactive sessions job
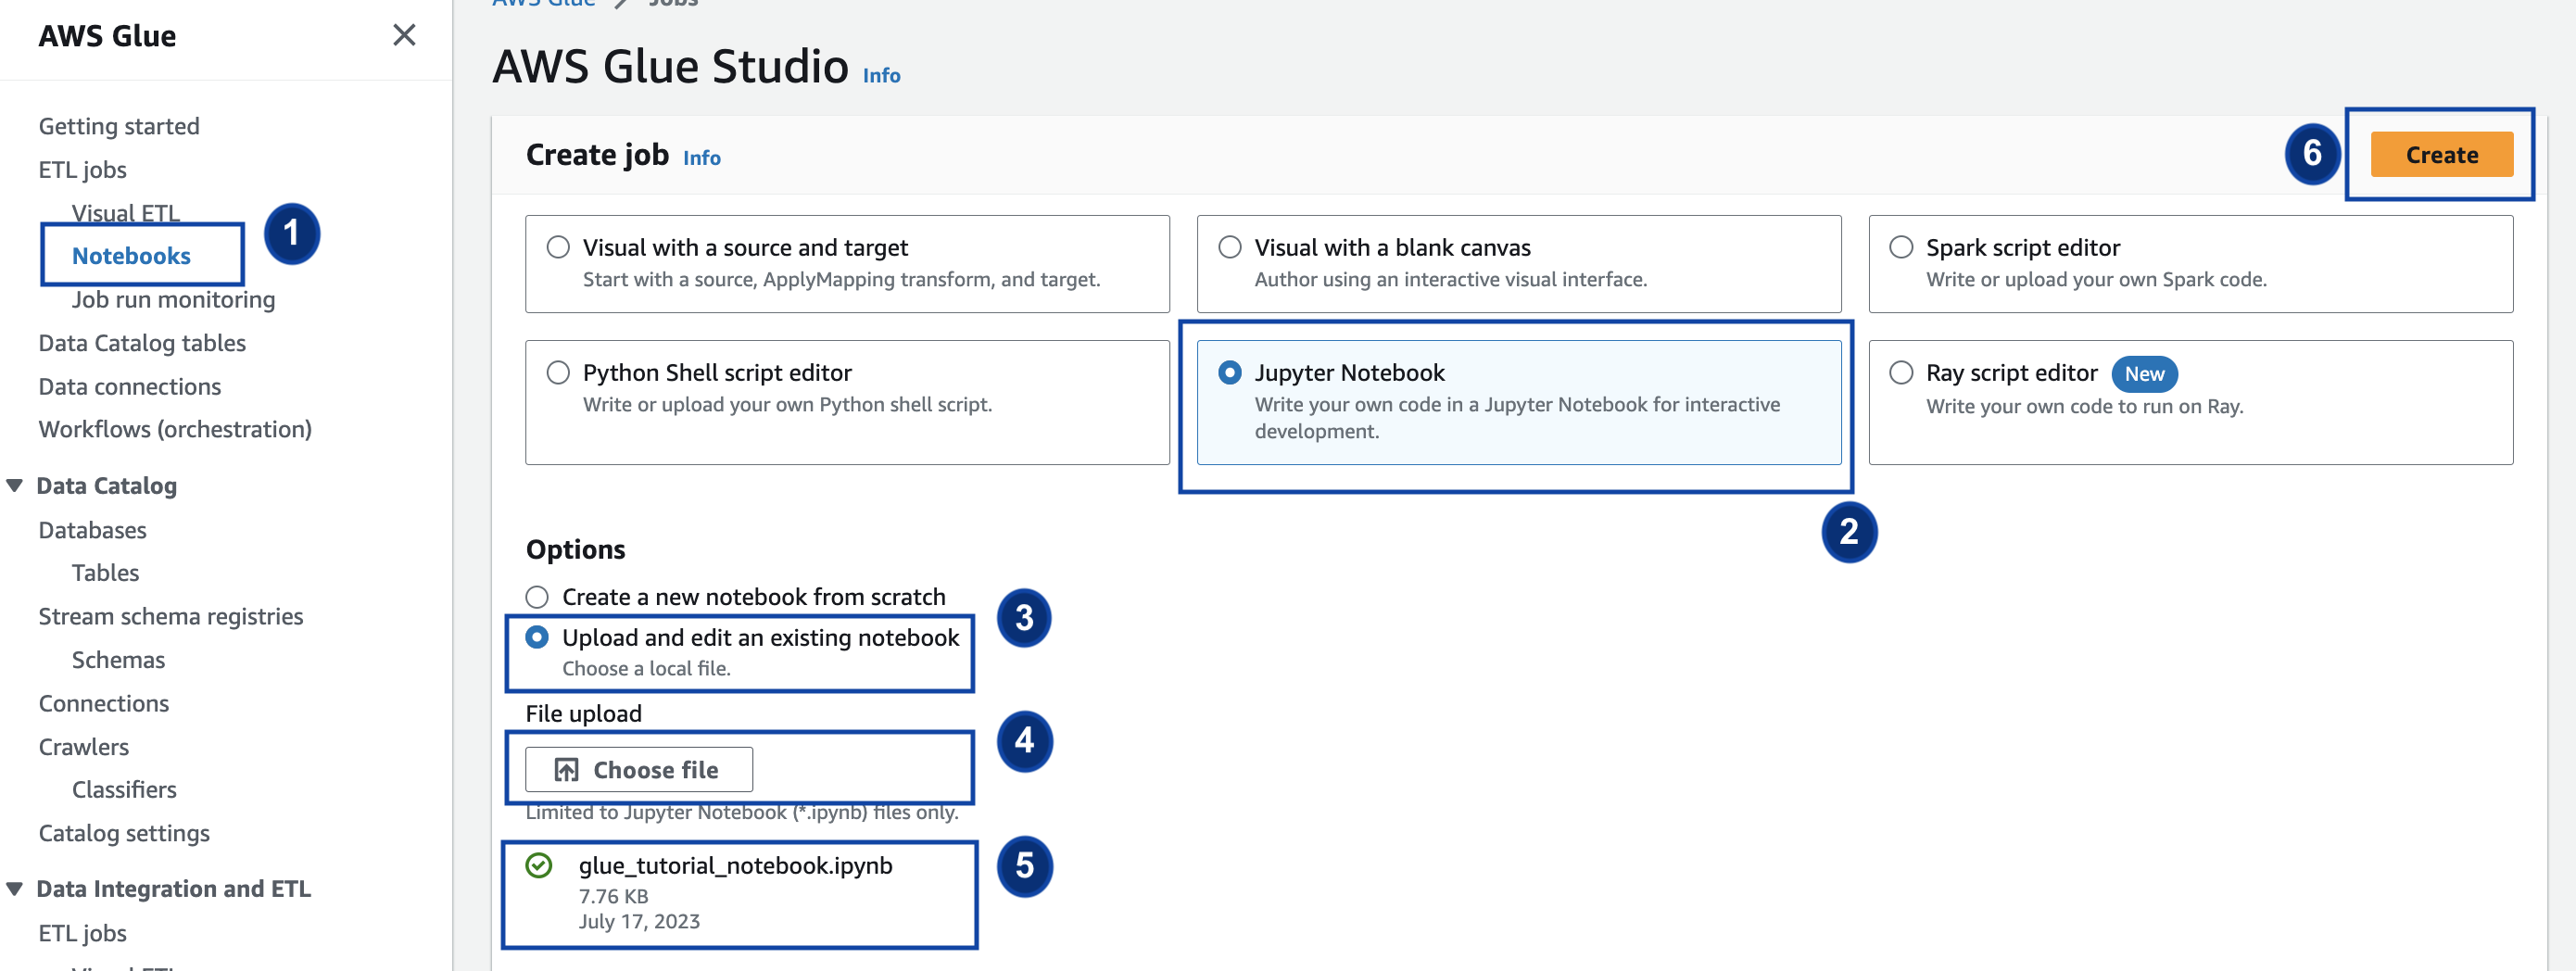
Download the provided notebook file
and save it to a local directory Open the Amazon Glue Console and on the left pane click Notebooks > Jupyter Notebook > Upload and edit an existing notebook. Upload the notebook from the previous step and click Create.
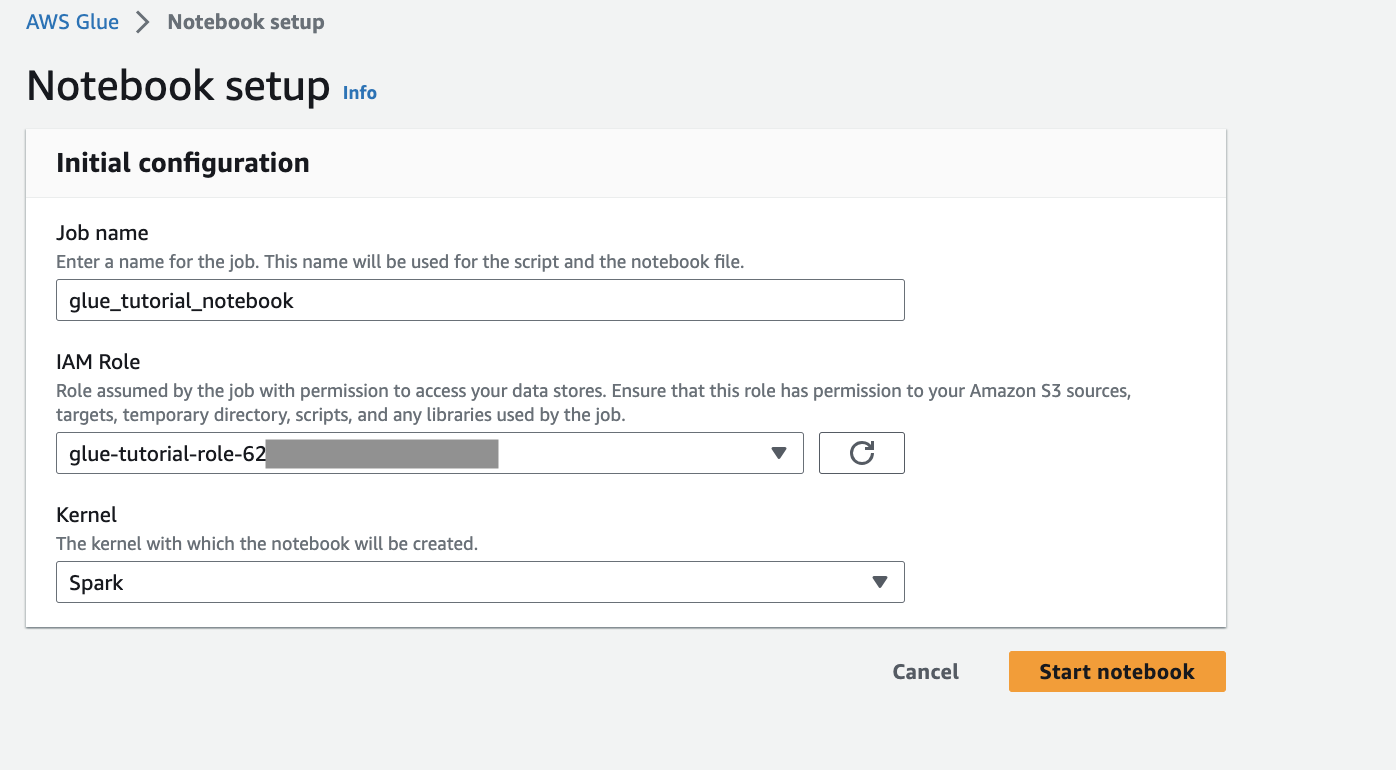
Provide the job a name, role and select the default Spark kernel. Next click Start notebook. For the IAM Role, select the role provisioned by the CloudFormation template. You can see this in the Outputs tab of CloudFormation.
The notebook has all necessary instructions to continue the tutorial. You can either run the instructions on the notebook or follow along with this tutorial to continue with the job development.
Run the notebook cells
(Optional) The first code cell,
%helplists all available notebook magics. You can skip this cell for now, but feel free to explore it.Start with the next code block
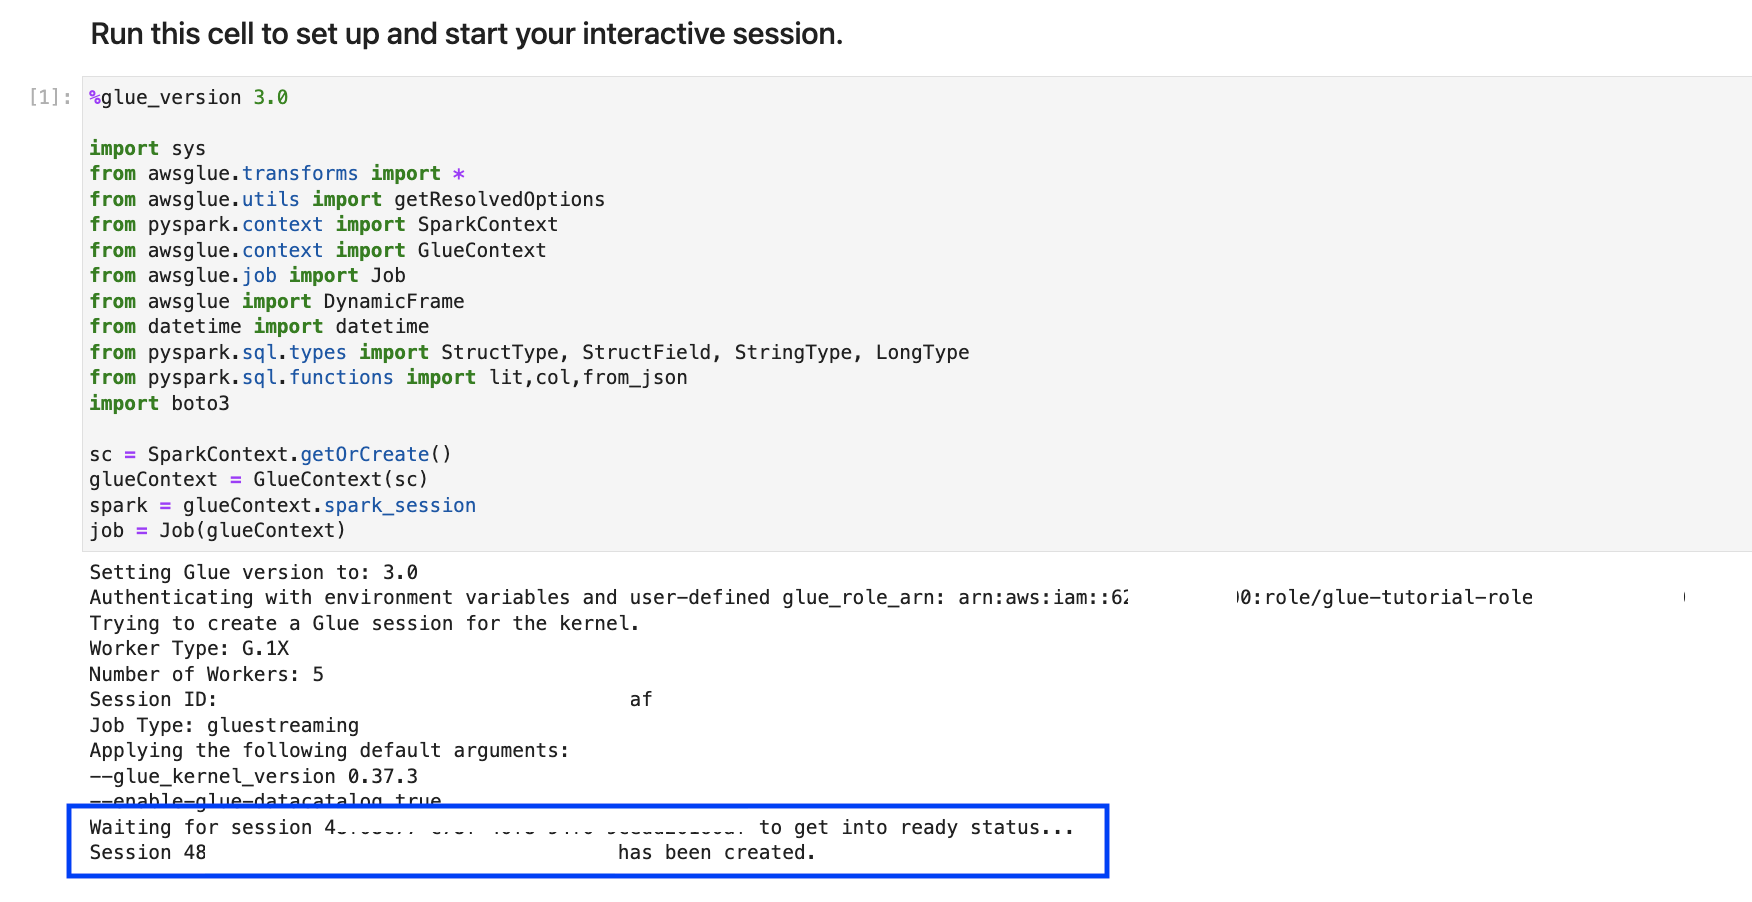
%streaming. This magic sets the job type to streaming which lets you develop, debug and deploy an Amazon Glue streaming ETL job.Run the next cell to create an Amazon Glue interactive session. The output cell has a message that confirms the session creation.
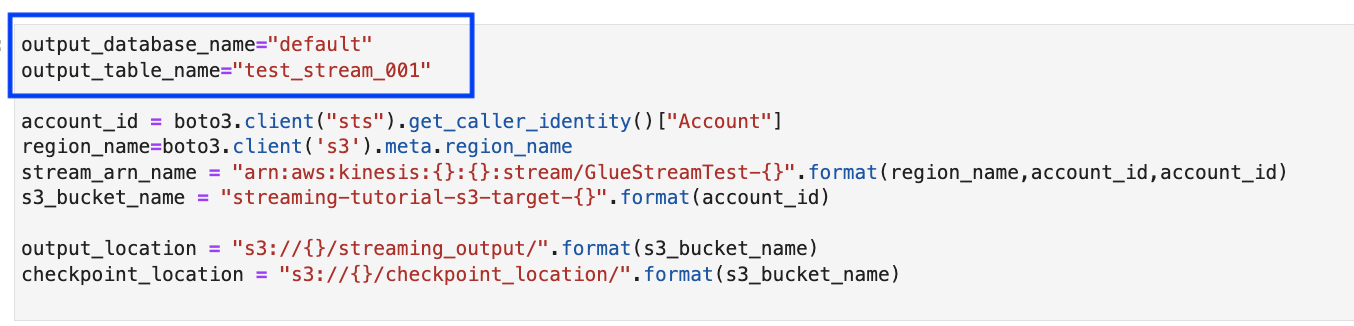
The next cell defines the variables. Replace the values with ones appropriate to your job and run the cell. For example:
Since the data is being streamed already to Kinesis Data Streams, your next cell will consume the results from the stream. Run the next cell. Since there are no print statements, there is no expected output from this cell.
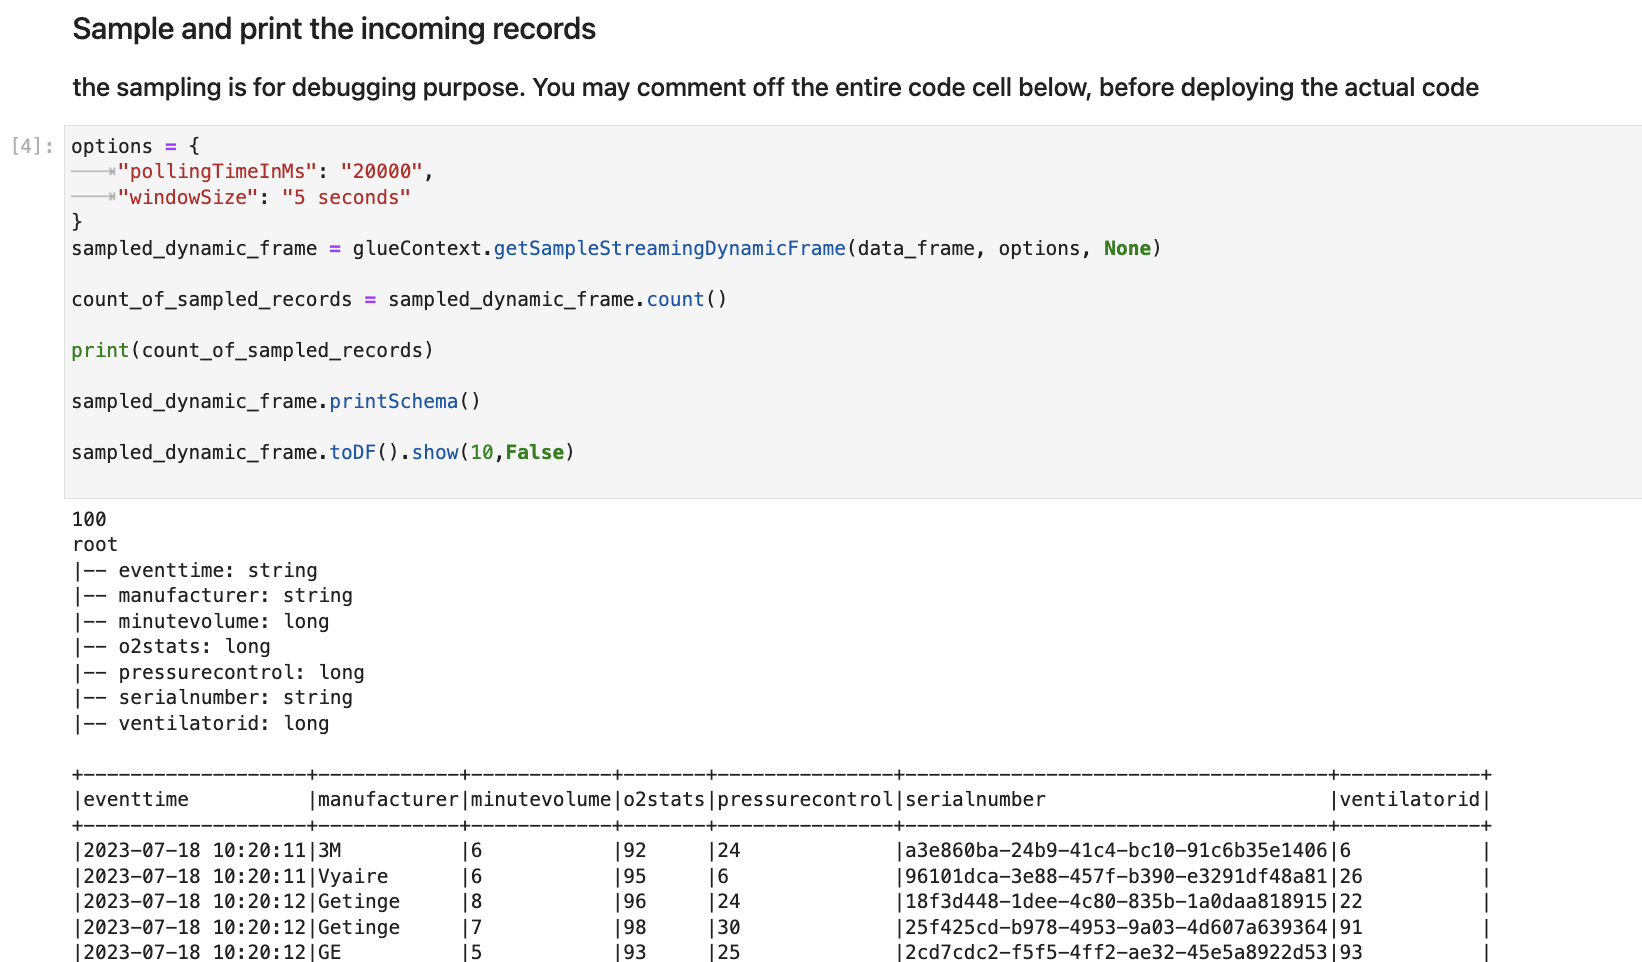
In the following cell, you explore the incoming stream by taking a sample set and print its schema and the actual data. For example:
Next, define the actual data transformation logic. The cell consists of the
processBatchmethod that is triggered during every micro-batch. Run the cell. At a high level, we do the following to the incoming stream:Select a subset of the input columns.
Rename a column (o2stats to oxygen_stats).
Derive new columns (serial_identifier, ingest_year, ingest_month and ingest_day).
Store the results into an Amazon S3 bucket and also create a partitioned Amazon Glue catalog table
In the last cell, you trigger the process batch every 10 seconds. Run the cell and wait for about 30 seconds for it to populate the Amazon S3 bucket and the Amazon Glue catalog table.
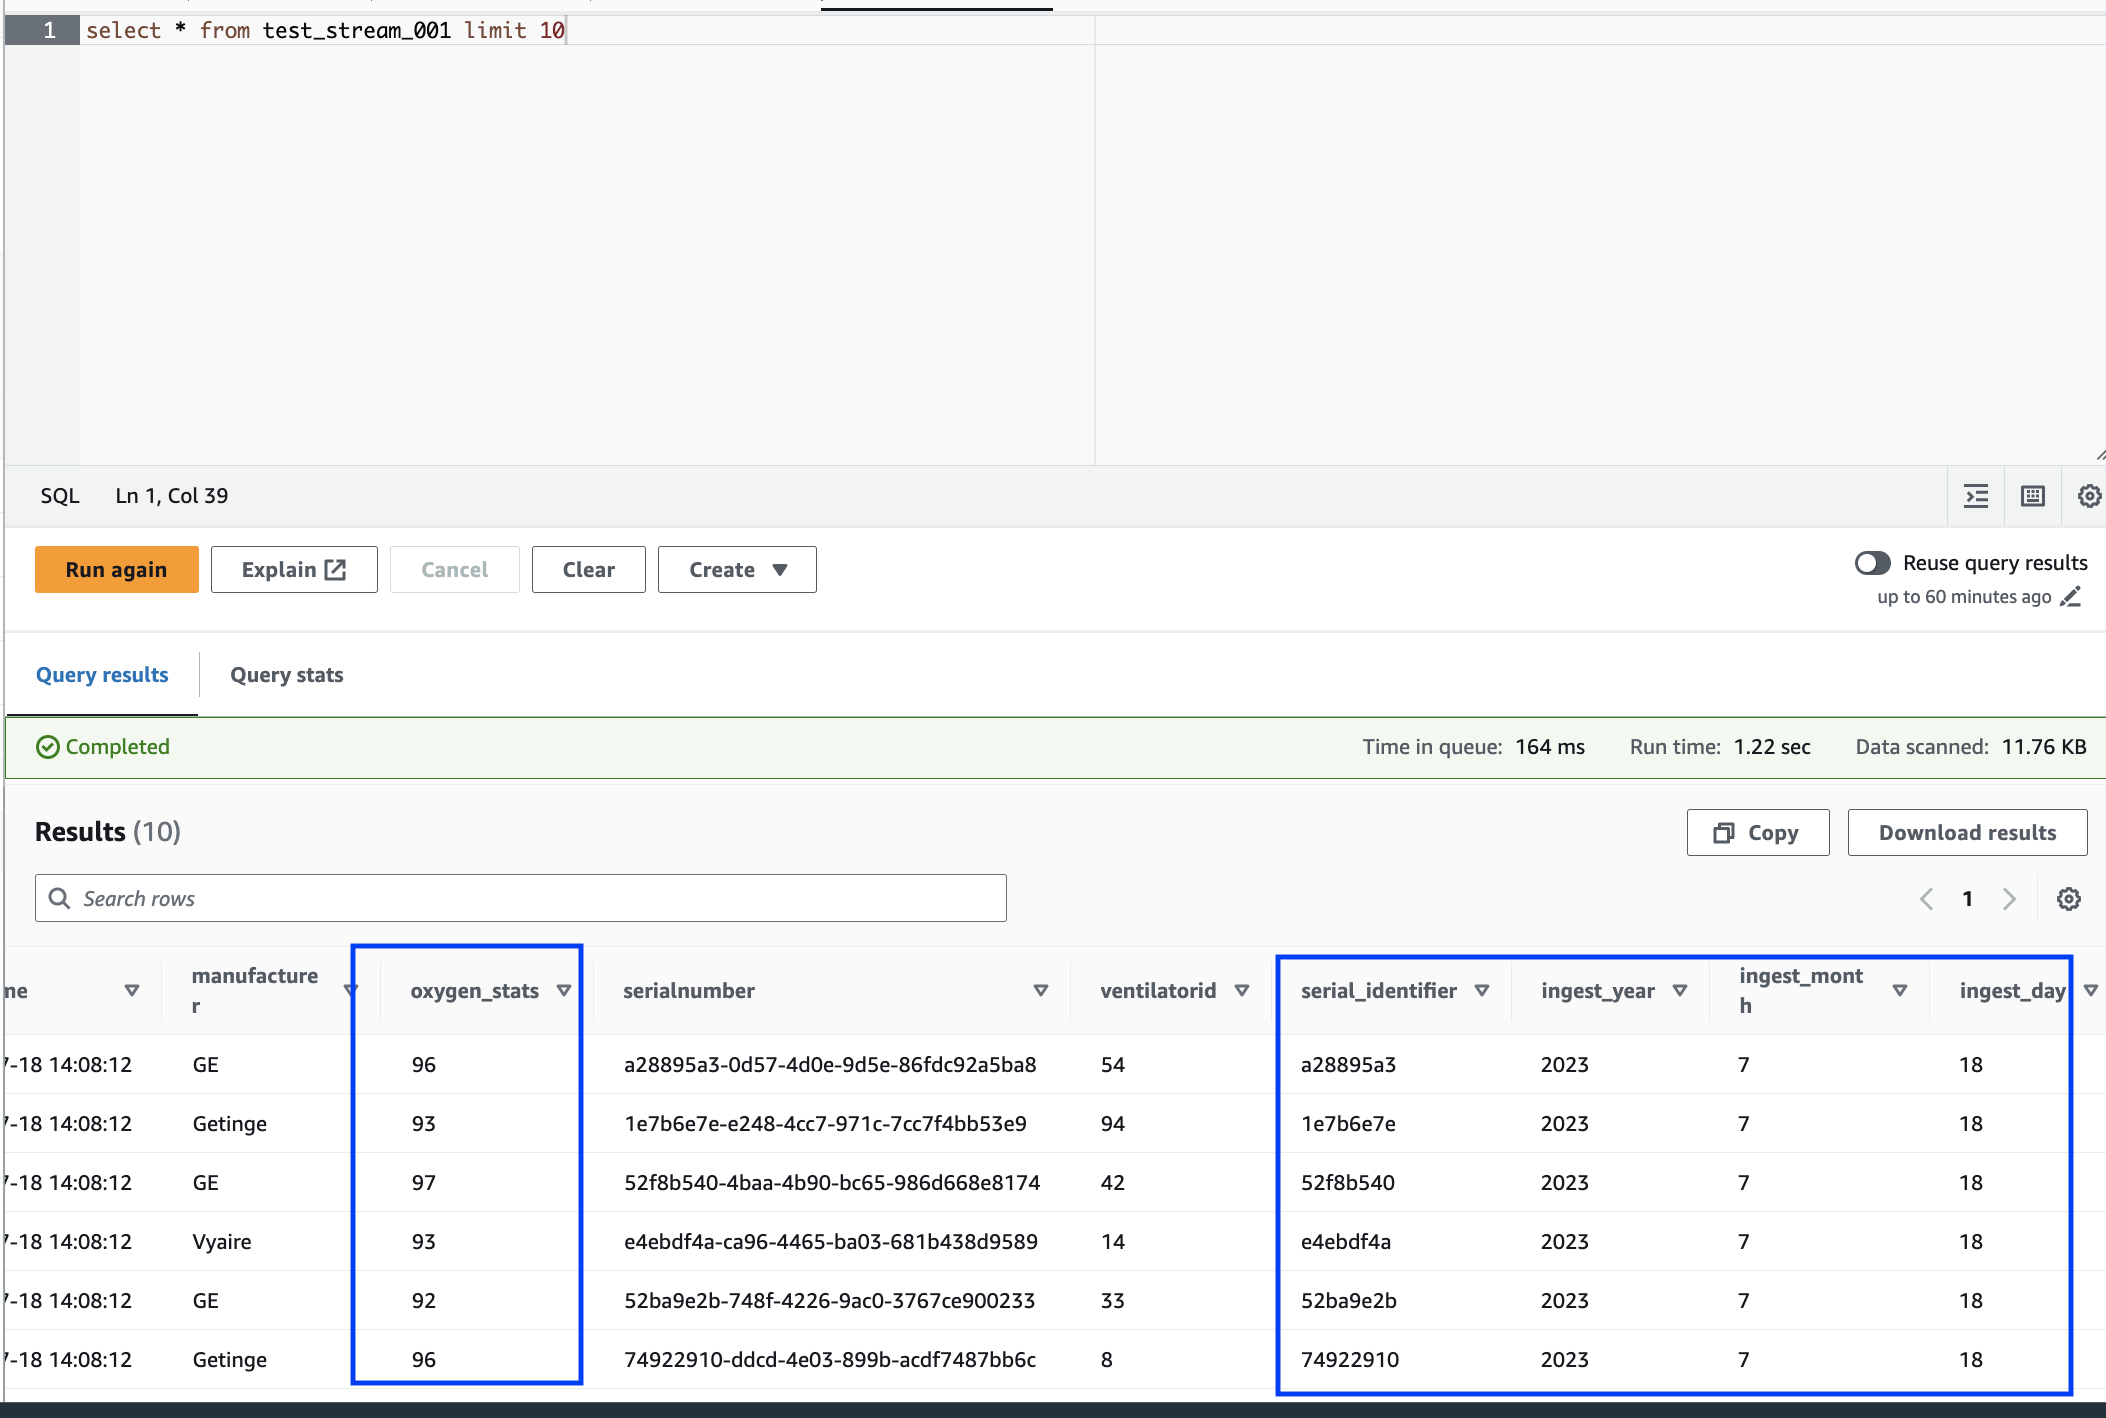
Finally, browse the stored data using the Amazon Athena query editor. You can see the renamed column and also the new partitions.
The notebook has all necessary instructions to continue the tutorial. You can either run the instructions on the notebook or follow along with this tutorial to continue with the job development.
Save and run the Amazon Glue job
With the development and testing of your application complete using the interactive sessions notebook, click Save at the top of the notebook interface. Once saved you can also run the application as a job.

Clean up
To avoid incurring additional charges to your account, stop the streaming job that you started as part of the instructions. You can do this by stopping the notebook, which will end the session. Empty the Amazon S3 bucket and delete the Amazon CloudFormation stack that you provisioned earlier.
Conclusion
In this tutorial, we demonstrated how to do the following using the Amazon Glue Studio notebook
Author a streaming ETL job using notebooks
Preview incoming data streams
Code and fix issues without having to publish Amazon Glue jobs
Review the end-to-end working code, remove any debugging, and print statements or cells from the notebook
Publish the code as an Amazon Glue job
The goal of this tutorial is to give you hands-on experience working with Amazon Glue Streaming and interactive sessions. We encourage you to use this as a reference for your individual Amazon Glue Streaming use cases. For more information, see Getting started with Amazon Glue interactive sessions using Livy.