The SiteWise Monitor feature is not available to new customers. Existing customers can continue to use the service as normal. For more information, see SiteWise Monitor availability change
Set up a portal administrator for Amazon IoT SiteWise Monitor
As the portal administrator, you create projects and associate assets with those projects. You specify an owner for each project. The project owner can then create dashboards with visualizations of the property values and alarms. Only portal administrators can create projects, assign owners, and change the list of assets associated with each project. As the portal administrator, you can do the following tasks:
Explore asset data and adding assets to projects
You can explore the list of assets to which you have access to view their properties and alarms. As the portal administrator, you can add assets to a project to make them available to the project owner. The project owner can then create dashboards to give other subject matter experts a common view of the asset properties and alarms.
The following procedure assumes that you signed in the Amazon IoT SiteWise Monitor portal.
To explore asset data and add asset to projects
-
In the navigation bar, choose the Assets icon.

The Assets page appears.
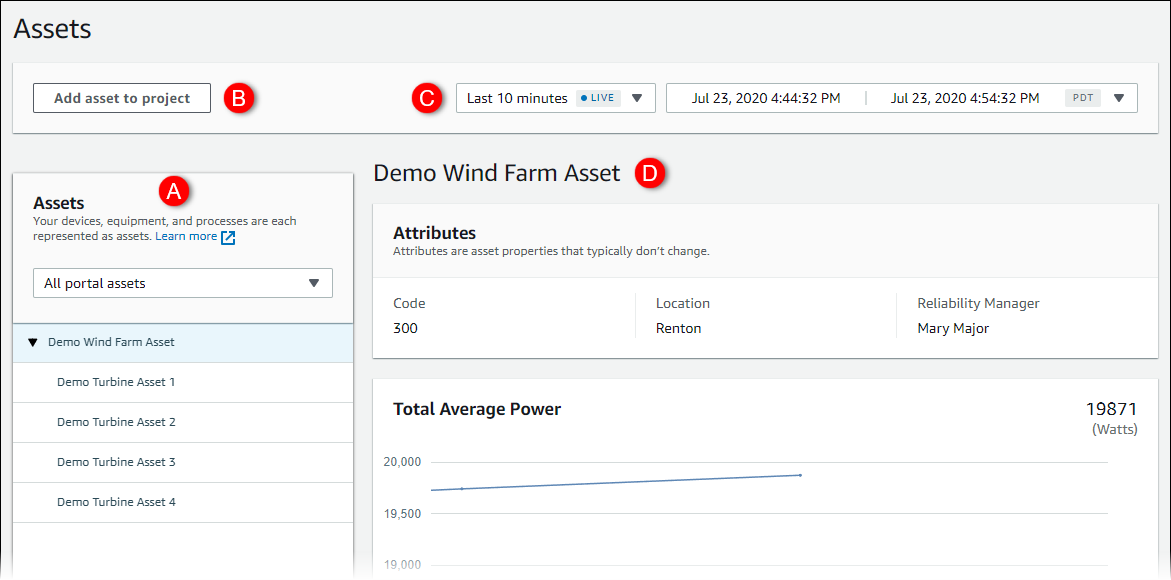
See the following areas of the page.
Callout Description A Browse the asset hierarchy to find the assets to view or add to a project. B Add assets to a project so you and your project owners can create dashboards and visualizations that provide a common way of looking at your organizational data. C Select the time range for the data shown for the properties of the selected asset. D View the values for the properties of the selected asset. View, configure, and respond to the alarms for the selected asset. -
Choose an asset in the Assets hierarchy, and then choose Add asset to project.
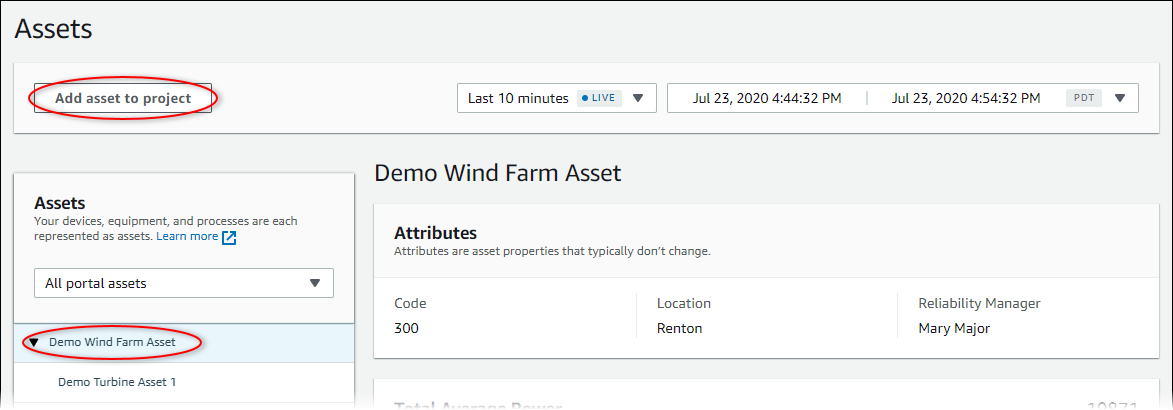
Note
You can add only a single node hierarchy (an asset and all assets that are subordinate to that asset) to a project. To create a dashboard to compare two assets that are children of a common parent asset, add that common parent to the project.
-
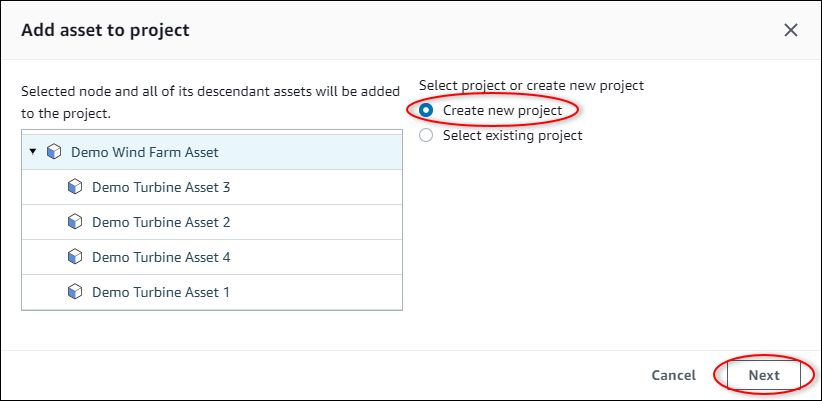
In the Add assets to project dialog box, choose Create new project, then choose Next.
-
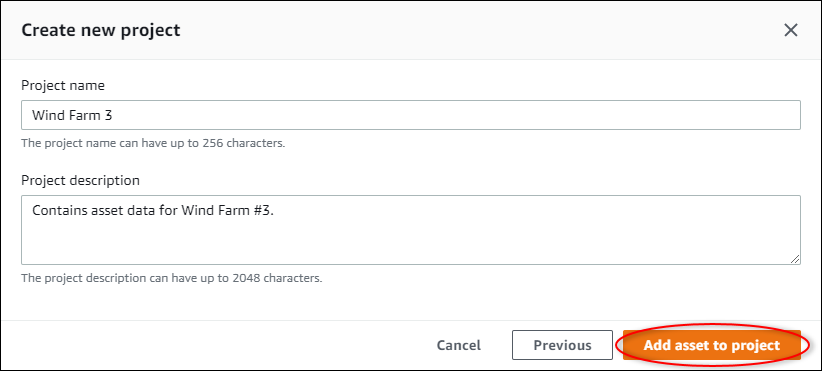
In Project name, enter a name for your project. If you plan to create multiple projects, each with a distinct set of assets, choose a descriptive name.
-
In Project description, enter a description of the project and its contents.
You can add project owners after you create the project.
-
Choose Add asset to project.
The Create new project dialog box closes, and the new project's page opens.
-
When you're ready to share your project, you can add owners to your project to create dashboards and invite viewers. You can see and change who you invited to the project on the project details page.
Assign owners to the project
As a portal administrator, after you create a project, you can assign project owners. Project owners create dashboards to provide a consistent way to view your asset data. You can send an invitation email to assigned project owners when you are ready for them to work with the project.
To assign owners to a project
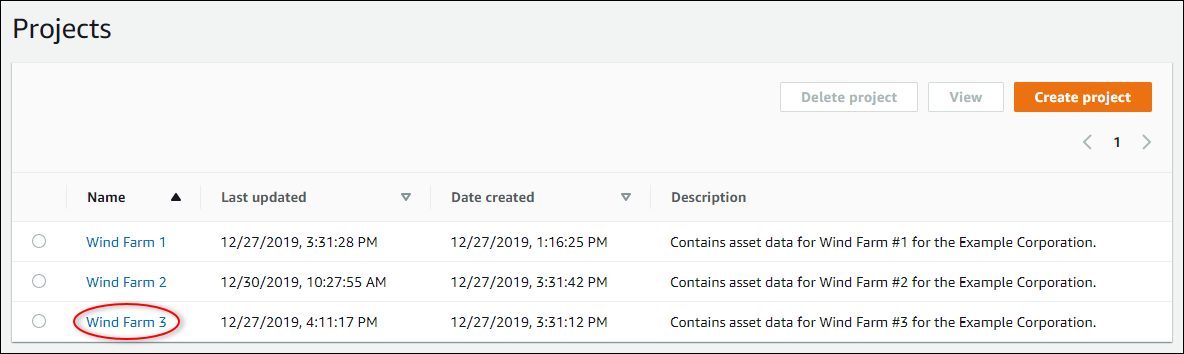
In the navigation bar, choose the Projects icon.

-
On the Projects page, choose the project to which to assign project owners.
-
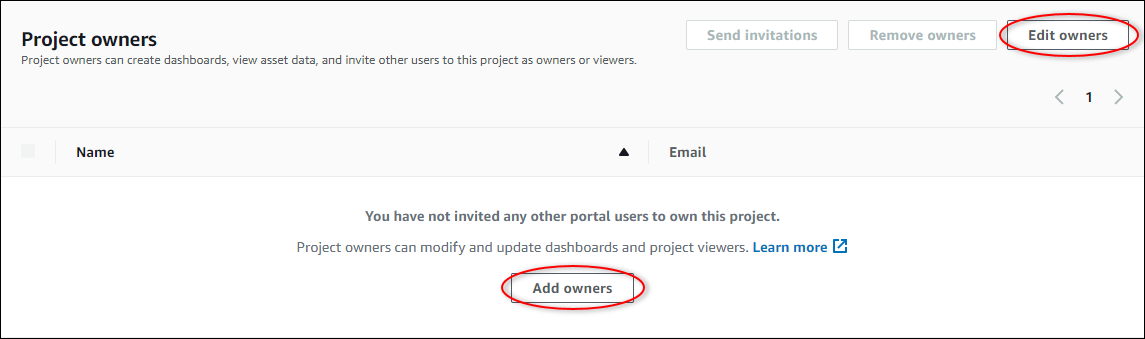
In the Project owners section of the project details page, choose Add owners if the project has no owners, or Edit owners.
-
In the Project owners dialog box, select the check boxes for the users to be owners for this project.

Note
You can only add project owners if they're portal users. If you don't see a user listed, contact your Amazon administrator to add them to the list of portal users.
-
Choose the >> icon to add those users as project owners.
-
Choose Save to save your changes.
Next, you can send emails to your project owners so they can sign in and start managing the project.
To send email invitations to project owners
In the navigation bar, choose the Projects icon.
-
On the Projects page, choose the project for which to invite project owners.
-
In the Project owners section of the project details page, select the check boxes for the project owners to receive an email, and then choose Send invitations.

-
Your preferred email client opens, prepopulated with the recipients and the email body with details from your project. You can customize the email before you send it to the project owners.