Data sharing using tag-based access control
Amazon Lake Formation tag-based access control (LF-TBAC) is an authorization strategy that defines permissions based on attributes. The following steps explain how to grant cross-account permissions by using LF-Tags.
Set up required on the producer/grantor account
Add LF-Tags.
Sign in to Lake Formation console as a data lake administrator or a LF-Tag creator.
In the left navigation bar, choose Permissions, and LF-Tags and permissions.
Choose Add LF-Tag.
For detailed instructions to create LF-Tags, see Creating LF-Tags.
-
Grant Describe and/or Associate permissions LF-Tag key-value pairs to IAM principals in your account or external accounts.
Granting permissions on LF-Tag key-value pairs enables the principals to view the LF-Tags, and assign them to Data Catalog resources (databases, tables, and columns).
Next, the data lake administrator or an IAM principal with Associate permission can assign the LF-Tag to databases, tables, or columns. For more information, see Assigning LF-Tags to Data Catalog resources.
Next, grant data permission to external accounts using LF-Tag expressions. This enables the grantee or recipient of the permissions to access the Data Catalog resource(s) that are tagged with the same key(s) and value(s).
In the navigation pane, choose Permissions and Data permissions.
Choose Grant.
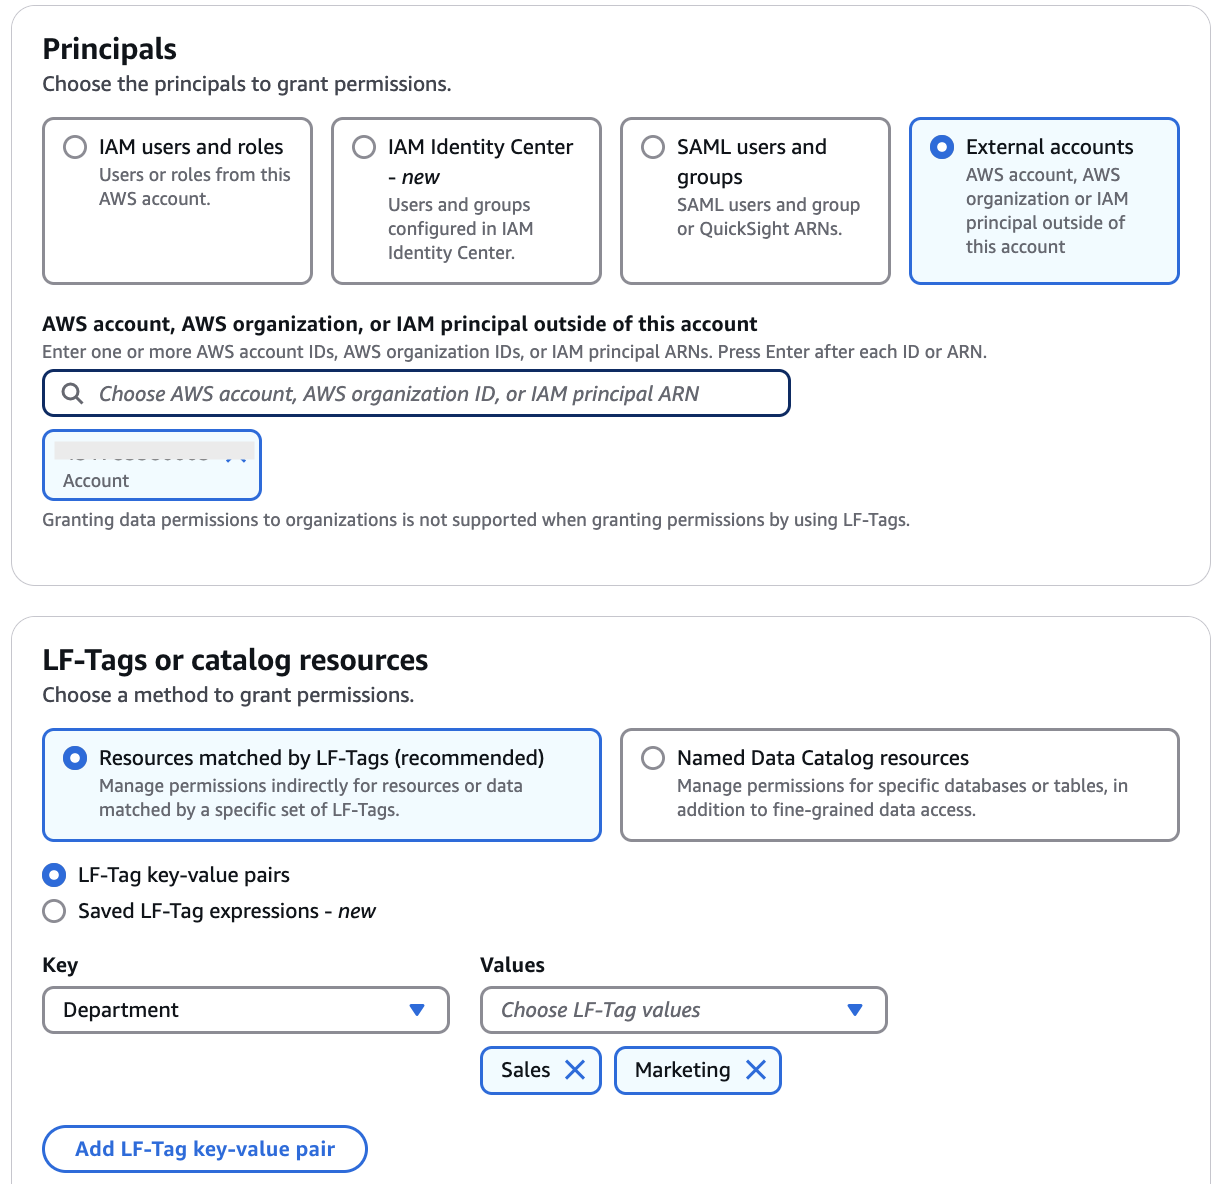
On the Grant permissions page, for Principals, choose External accounts, and enter the grantee Amazon Web Services account ID or the IAM role of the principal or the Amazon Resource Name (ARN) for the principal (principal ARN) if making a direct cross-account grant to an external principal. You need to press Enter after entering the account ID.
-
For LF-Tags or catalog resources, choose Resources matched by LF-Tags (recommended).
-
Choose the option LF-Tag key-value pairs or Saved LF-Tag expressions .
If you choose, LF-Tag key-value pairs, enter the key and value(s) of the LF-Tag that is associated with the Data Catalog resource being shared with the grantee account.
The grantee is granted permissions on the Data Catalog resources that were assigned a matching LF-Tag in the LF-Tag expression. If the LF-Tag expression specifies multiple values per tag key, any one of the tag values can be a match.
-
-
Choose the database-level or table-level permissions to grant on resources that match the LF-Tag expression.
Important
Because the data lake administrator must grant permissions on shared resources to the principals in the grantee account, you must always grant cross-account permissions with the grant option.
For more information, see Granting LF-Tag permissions using the console.
Note
Principals who receive direct cross-account grants will not have the Grantable permissions option.
Set up required on the receiving/grantee account
Sign in to Lake Formation console as a data lake administrator of the consumer account.
-
Next, receive the resource share in the consumer account.
Open the Amazon RAM console.
-
In the navigation pane, under Shared with me, choose Resource shares.
-
Select the resource shares, choose Accept resource share.
-
When you share a resource with another account, the resource still belongs to the producer account and is not visible within the Athena console. To make the resource visible in the Athena console, you need to create a resource link pointing to the shared resource. For instructions on creating a resource link, see Creating a resource link to a shared Data Catalog table and Creating a resource link to a shared Data Catalog database
Choose Databases or Tables under the Data Catalog.
On the Databases/Tables page, choose Create, Resource link .
-
Enter the following information for a database resource link:
Resource link name – A unique name for the resource link.
Destination catalog – The catalog where you're creating the resource link.
-
Shared database Region – The Region of the database shared with you if you are creating the resource link in a different Region.
-
Shared database – Choose the shared database.
-
Shared database’s catalog ID – Enter the catalog ID for the shared database.
-
Choose Create. You can see the newly created resource link in the databases list.
Similarly, you can create a resource link to a shared table.
-
Now grant Describe permission on the resource link to the IAM principals that you are sharing the resource.
-
On the Databases/Tables page, select the resource link, and on the Actions menu, choose Grant.
In the Grant permissions section, select IAM users and roles.
Choose the IAM role that you want to grant access to the resource link.
In the Resource link permissions section, select Describe.
Choose Grant.
-
-
Next, grant LF-Tag key-value permissions to the principals in the consumer account.
You should be able to find the LF-Tags that are shared with you in the consumer account on the Lake Formation console, under Permissions, LF-Tags and permissions. You can associate tags shared from grantor on resources shared from grantor account that includes: databases, tables, and columns. You can further grant permissions on the resources to other principals.
In the navigation pane, under Permissions, Data permissions, choose Grant.
-
On the Grant permissions page, choose IAM users and roles.
Next, choose the IAM users and roles in your account to grant access to the shared databases/tables.
-
Next, for LF-Tags or catalog resources, choose Resources matched by LF-Tags.
-
Next, choose the key and values of the LF-Tag that is shared with you.
-
Next, choose the database and table permissions that you want to grant to the IAM users and roles. You can also choose Grantable permissions that enables the IAM users and roles to grant permissions to other users/roles.
-
Choose Grant.
-
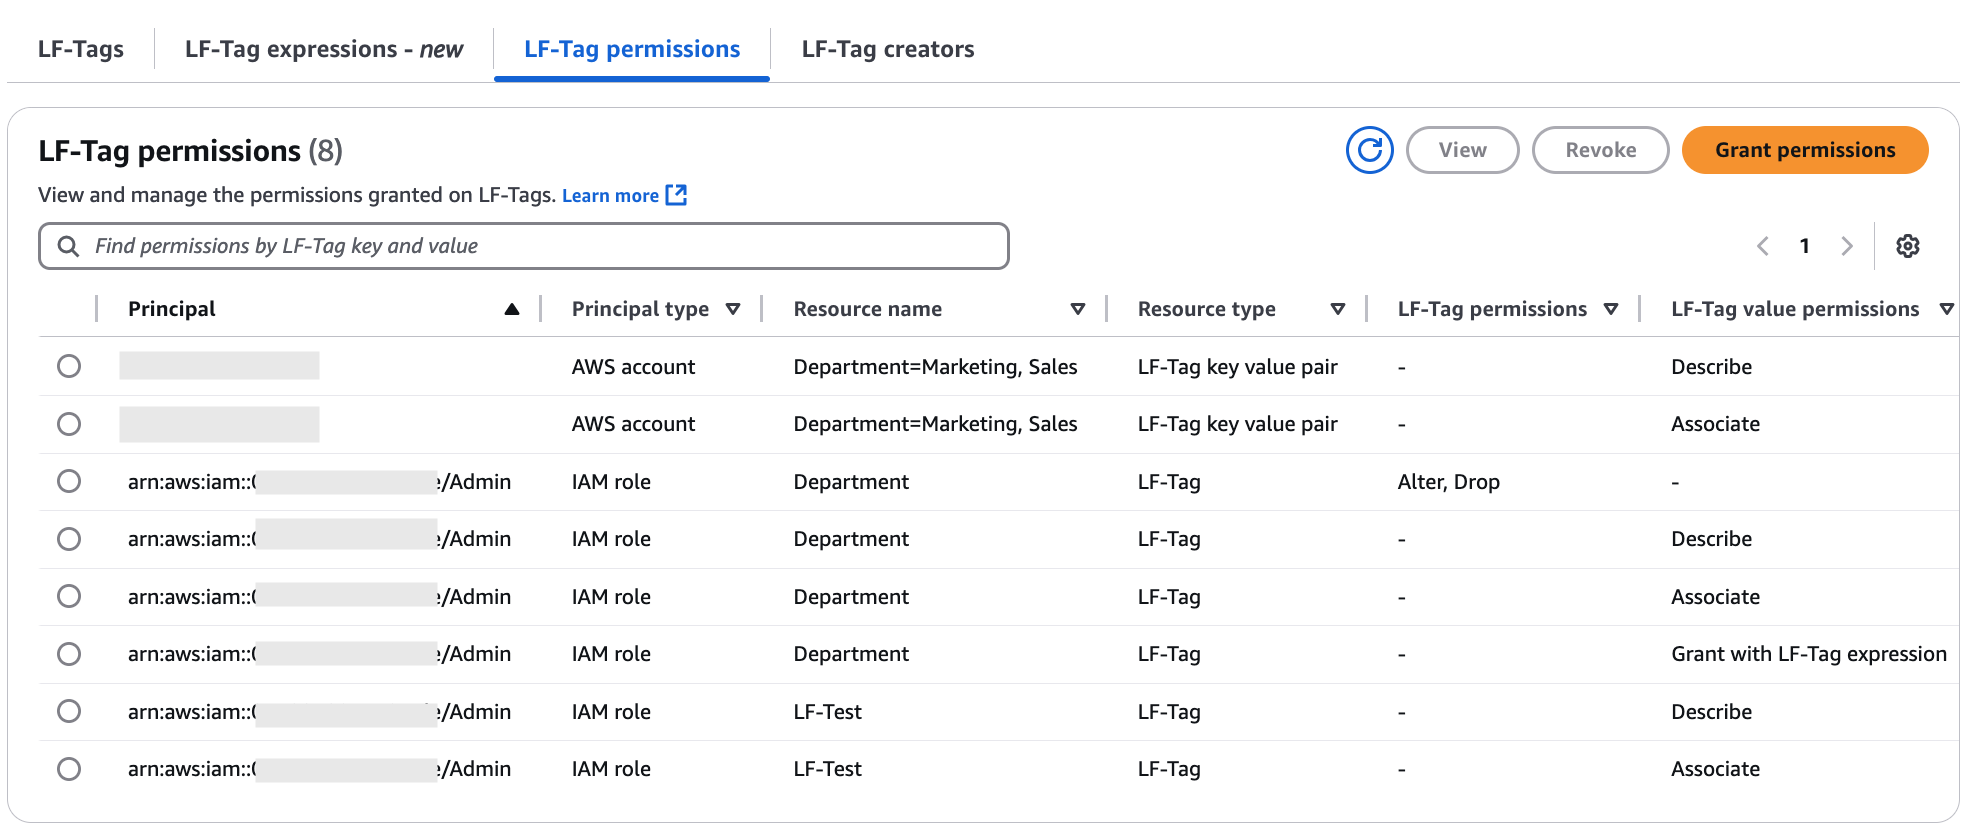
You can view the permission grants under Data permissions on the Lake Formation console.