Getting started (console)
In this exercise, you use the Amazon Personalize console to create a Custom dataset group with a solution that returns movie recommendations for a given user. Before you start this exercise, review the Getting started prerequisites.
When you finish the getting started exercise, to avoid incurring unnecessary charges, delete the resources that you created. For more information, see Requirements for deleting Amazon Personalize resources.
In this procedure, you first create a dataset group. Next, you create an Amazon Personalize Item interactions dataset dataset in the dataset group.
To create a dataset group and a dataset
-
Open the Amazon Personalize console at https://console.amazonaws.cn/personalize/home
and sign in to your account. -
Choose Create dataset group.
-
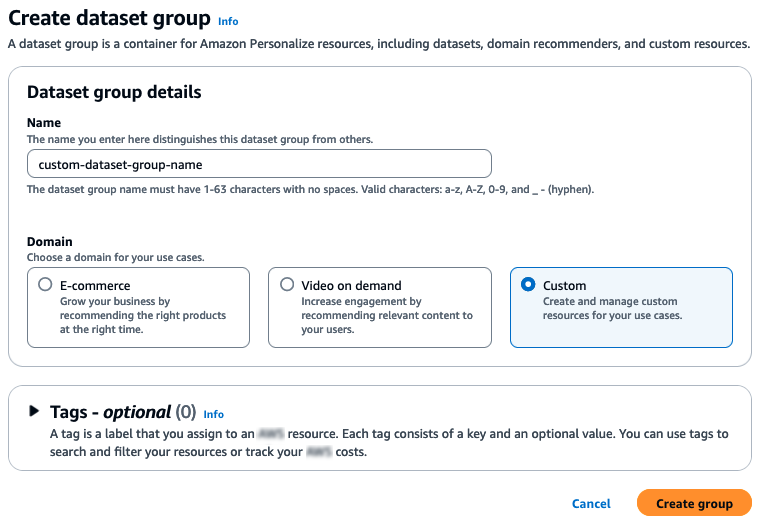
In Dataset group details, for Dataset group name, specify a name for your dataset group.
-
For Domain choose Custom. Your screen should look similar to the following:
-
Choose Create group. The Overview page appears.
-
In Step 1. Create datasets and import data, choose Create dataset and choose Item interactions dataset.
-
Choose Import data directly into Amazon Personalize datasets and choose Next.
-
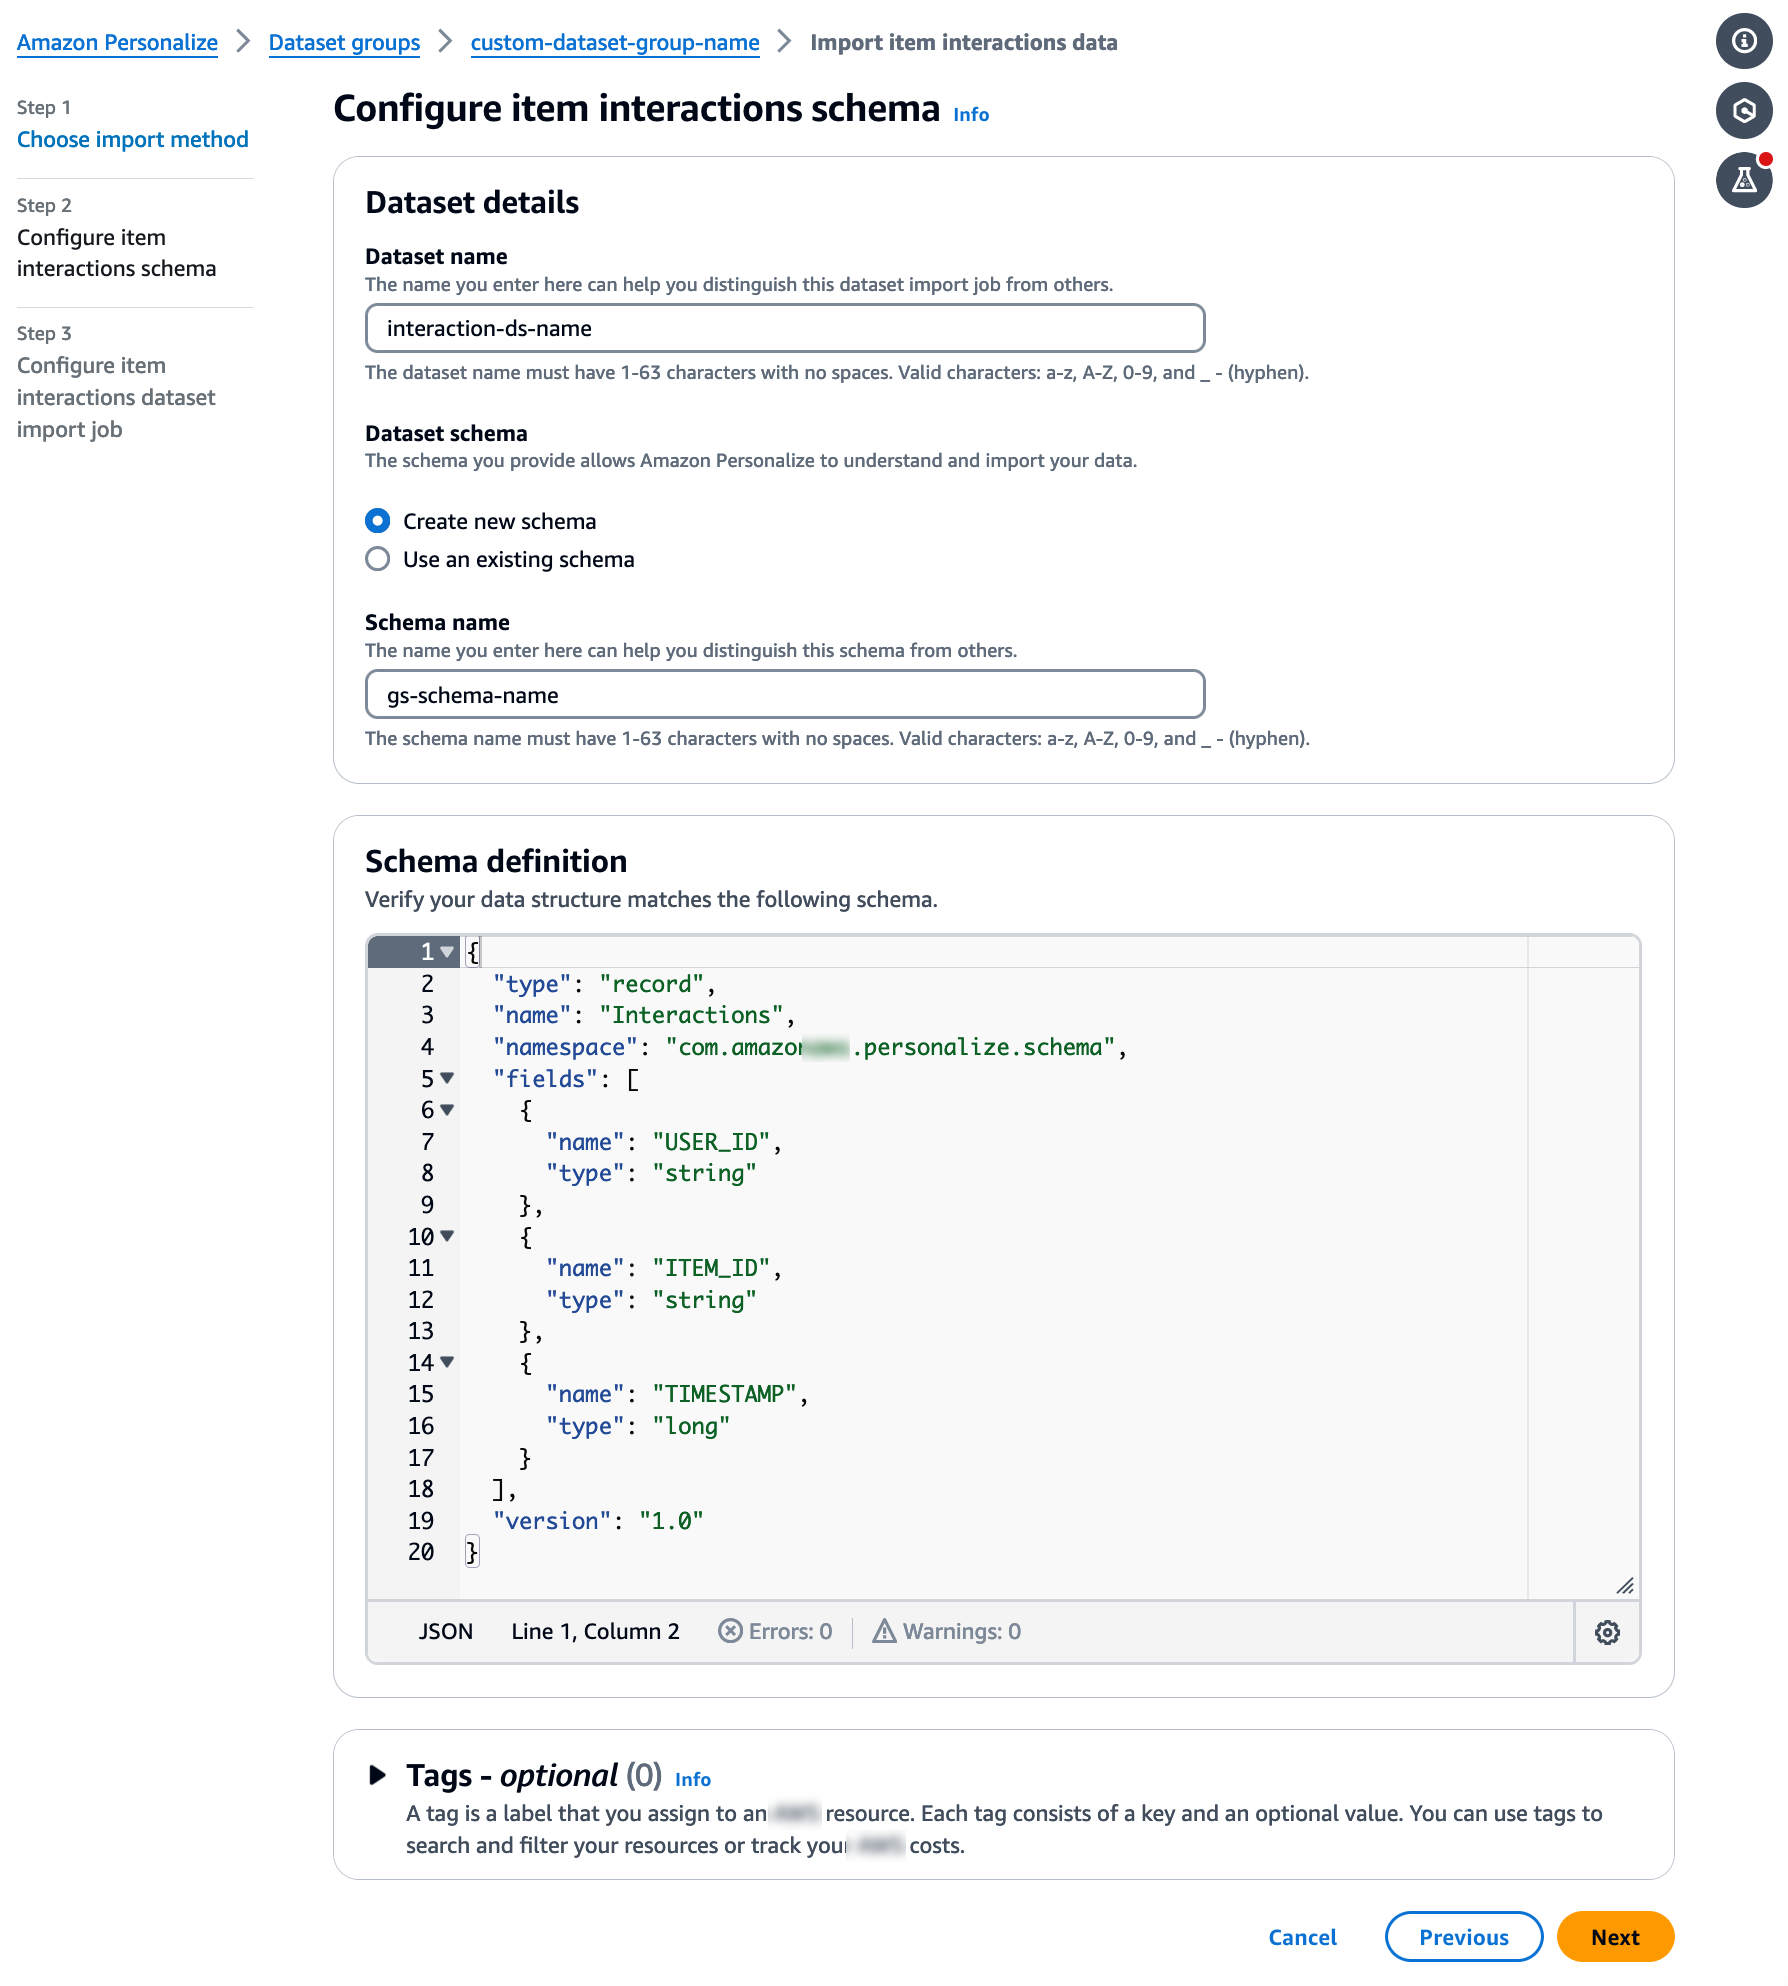
On the Configure item interactions dataset page, for Dataset name, specify a name for your dataset.
-
For Dataset schema, choose Create new schema. In the Schema definition section, a minimal Item interactions schema is displayed. The schema matches the headers you previously added to the
ratings.csvfile, so you don't need to make any changes. If you haven't created the training data, see Getting started prerequisites. -
For Schema name, specify a name for the new schema. Your screen should look similar to the following:
-
Choose Next. The Configure item interactions dataset import job page appears. Next, complete Step 2: Import item interactions data to import interactions data.
Now that you have created a dataset, it's time to import item interactions data into the dataset.
To import item interactions data
-
On the Configure item interactions dataset import job page, for Data import source choose Import data from S3.
-
For Dataset import job name, specify a name for your import job.
-
In the Additional S3 bucket policy required dialog box, if you haven't granted Amazon Personalize permissions, follow the instructions to add the required Amazon S3 bucket policy.
-
For Data location, specify where your movie data file is stored in Amazon Simple Storage Service (S3). Use the following syntax:
s3://amzn-s3-demo-bucket/<folder path>/filename.csv -
In the IAM Role section, for IAM service role, choose Enter a custom IAM role ARN.
-
For Custom IAM role ARN, specify the role that you created in Creating an IAM role for Amazon Personalize.
The Dataset import job details and IAM role sections should be similar to the following:

-
Leave the Publish event metrics to S3 and Tags sections unchanged and choose Start import. The data import job starts and the Overview page is displayed. Initially, the status is Create pending (followed by Create in progress), and the Create solution button is disabled.
When the data import job has finished, the status changes to Active and the Create solution button is enabled.
-
Now that you have imported data, you are ready to create a solution in Step 3: Create a solution.
In this tutorial, you use the dataset that you imported in Step 2: Import item interactions data to train a model. A trained model is referred to as a solution version.
Important
In this tutorial you create a solution that uses automatic training. With automatic training, you incur training costs while your solution is active. To avoid unnecessary costs, make sure to delete the solution when you are finished. For more information, see Requirements for deleting Amazon Personalize resources.
To create a solution
-
On the Overview page for your dataset group, in Step 3. Set up training and recommendation resources choose Create solutions.
-
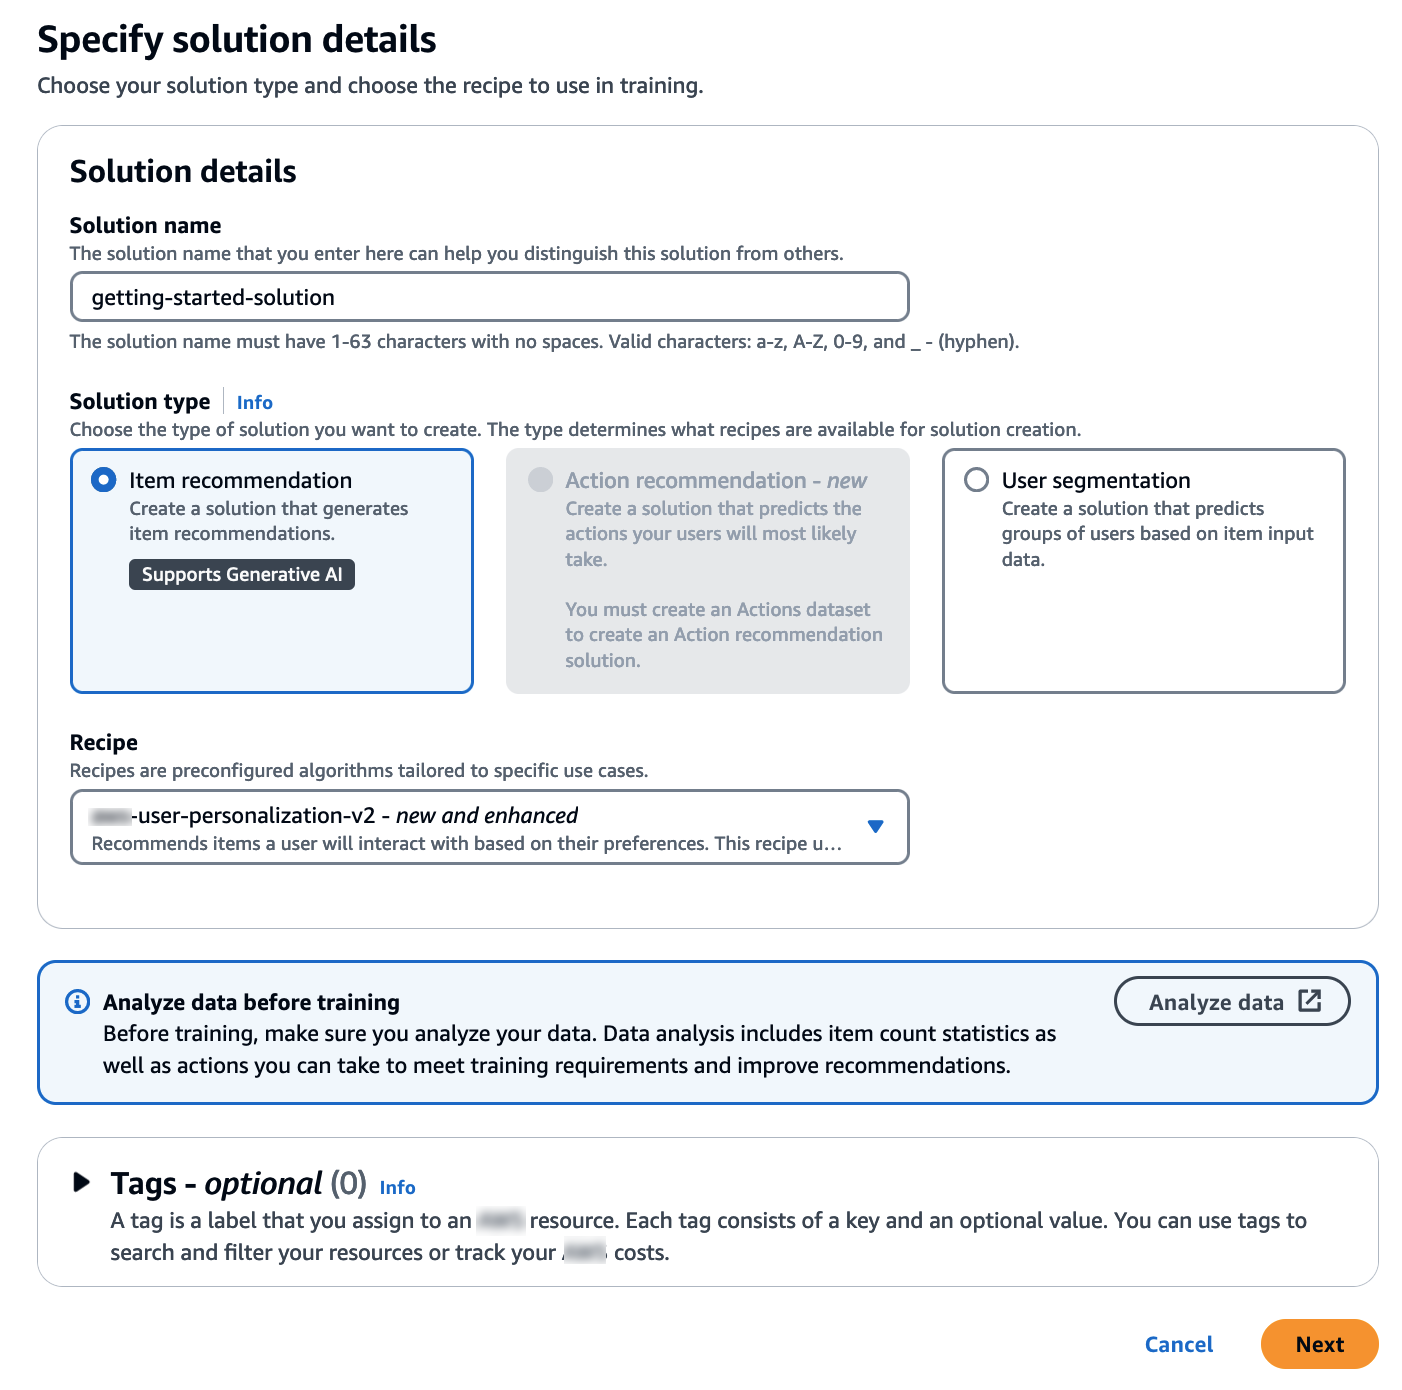
For Solution name, specify a name for your solution.
-
For Solution type choose Item recommendations.
-
For Recipe, choose
aws-user-personalization-v2.Your screen should look similar to the following:
-
Choose Next. Leave the Training configuration fields unchanged. The solution you create automatically trains new models every 7 days and gives more weight to the most recent item interaction data.
-
Choose Next and review the details for the solution.
-
Choose Create solution and the details page for the solution displays. After you create a solution, Amazon Personalize starts creating your first solution version within an hour. When training starts, it appears in the Solution versions section on the details page and you can monitor its status.
When the Solution version status is Active, you are ready to move to Step 4: Create a campaign.
In this procedure, you create a campaign, which deploys the solution version you created in the previous step.
To create a campaign
-
In the navigation pane, expand Custom resources and choose Campaigns.
-
Choose Create campaign. The Create new campaign page appears.
-
In Campaign details, for Campaign name, specify a name for your campaign.
-
For Solution, choose the solution you created in the previous step.
Choose Automatically use the latest solution version. Leave all other fields unchanged.
Your screen should look similar to the following:
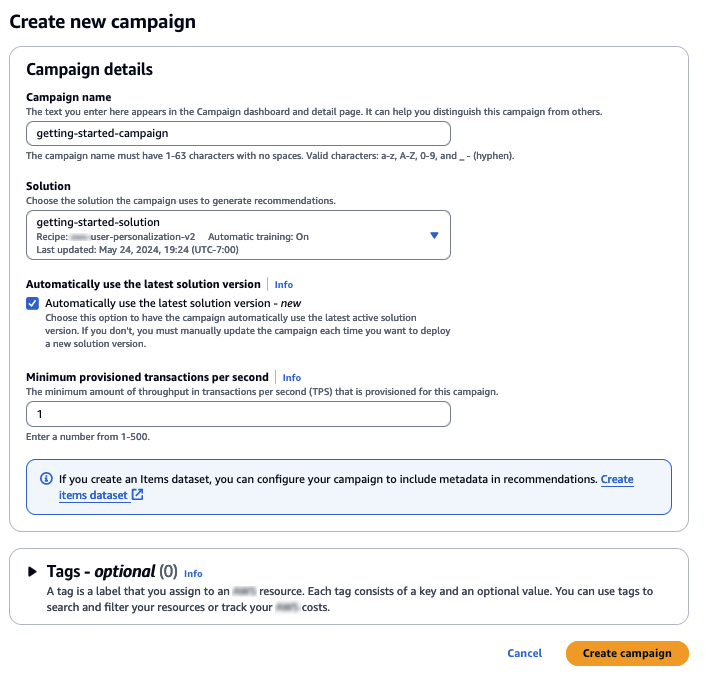
-
Choose Create campaign. Campaign creation starts and the campaign details pages with the Personalization API section displayed.
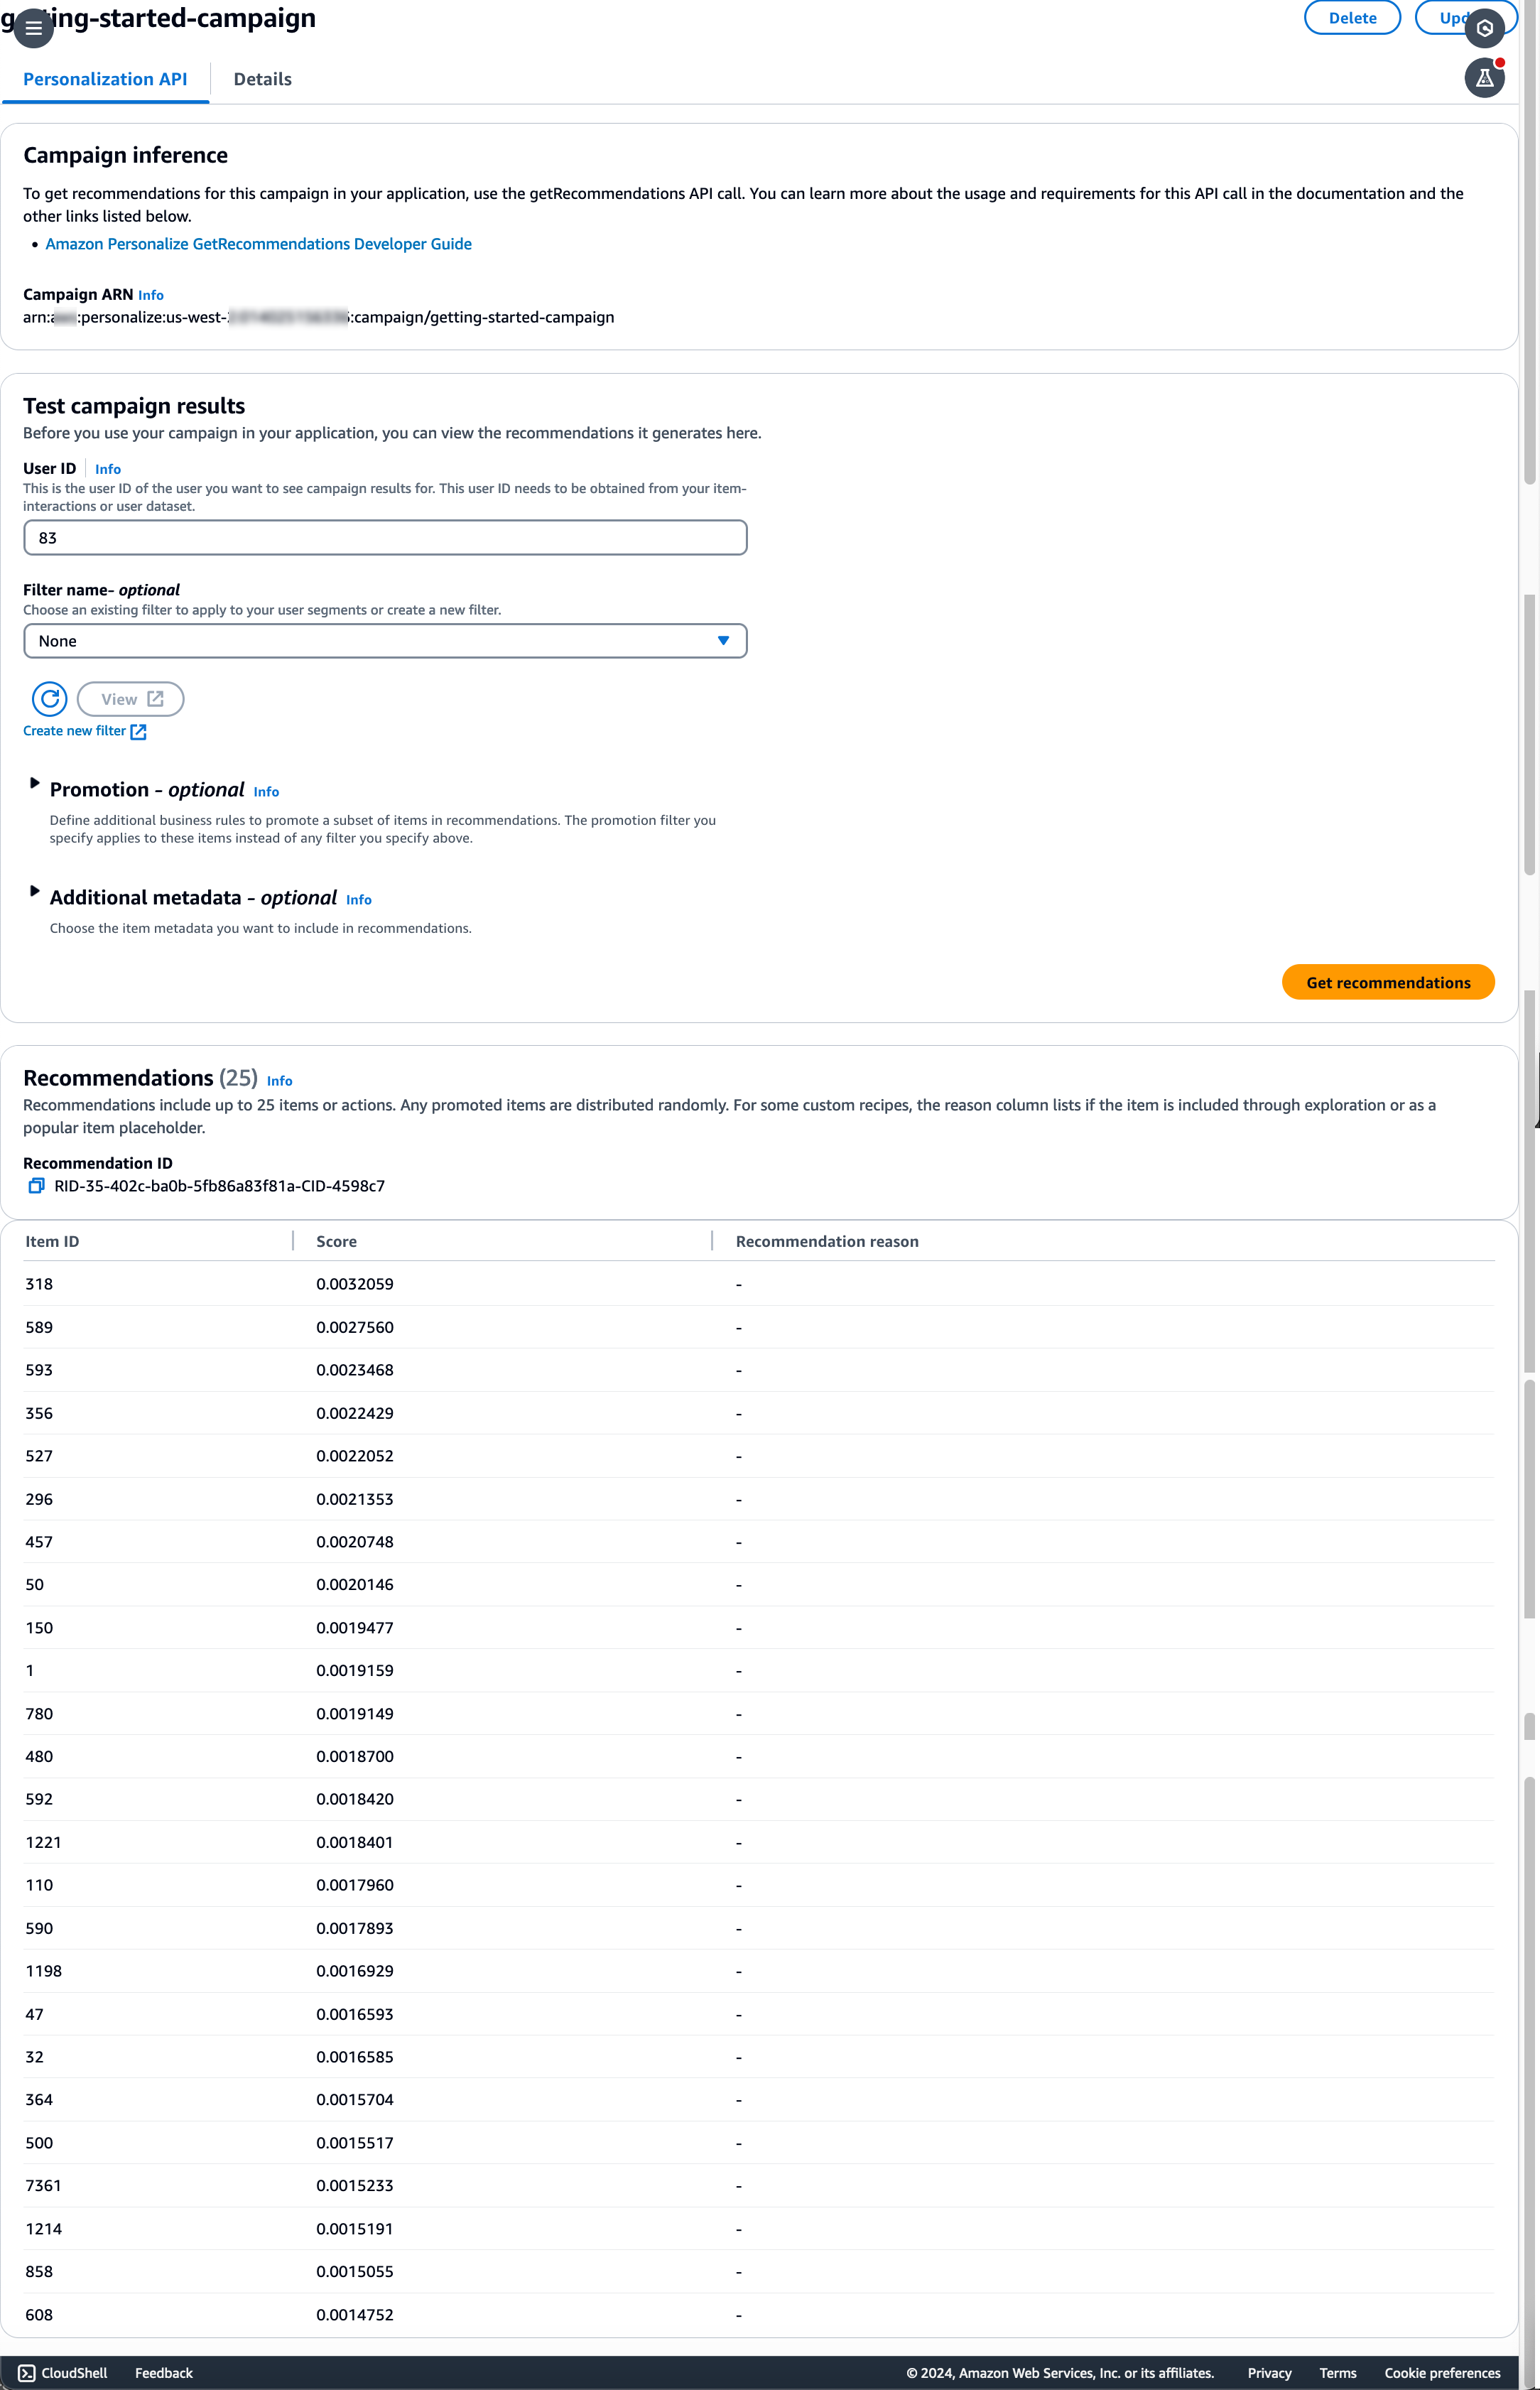
Creating a campaign can take a couple minutes. After Amazon Personalize finishes creating your campaign, the page is updated to show the Test campaign results section. Your screen should look similar to the following:

In this procedure, use the campaign that you created in the previous step to get recommendations.
To get recommendations
-
In Test campaign results, for User ID, specify a value from the ratings dataset, for example,
83. Leave all other fields unchanged. -
Choose Get recommendations. The Recommendations panel lists the item IDs and scores for the recommended items.
Your screen should look similar to the following: