Basic Amazon Lambda Project
You can create a Lambda function using Microsoft .NET Core project templates, in the Amazon Toolkit for Visual Studio.
Create a Visual Studio .NET Core Lambda Project
You can use Lambda-Visual Studio templates and blueprints to help speed up your project initialization. Lambda blueprints contain pre-written functions that simplify the creation of a flexible project foundation.
Note
The Lambda service has data limits on different package types. For detailed information about data limits, see the Lambda quotas topic in the Amazon Lambda User Guide.
To create a Lambda project in Visual Studio
-
From Visual Studio expand the File menu, expand New, then choose Project.
-
From the New Project dialog box, set the Language, Platform, and Project type drop-down boxes to "All", then type aws lambda in the Search field. Choose the Amazon Lambda Project (.NET Core - C#) template.
-
In the Name field, enter
AWSLambdaSample, specify your desired file Location, then choose Create to proceed. -
From the Select Blueprint page, select the Empty Function blueprint, then choose Finish to create the Visual Studio project.
Review the Project Files
There are two project files to review: aws-lambda-tools-defaults.json and
Function.cs.
The following example shows the aws-lambda-tools-defaults.json file, which
is automatically created as part of your project. You can set build options by using the fields in this
file.
Note
The project templates in Visual Studio contain many different fields, take note of the following:
function-handler: specifies the method that runs when the Lambda function runs
Specifying a value in the function-handler field pre-populates that value in the Publish wizard.
If you rename the function, class, or assembly then you also need to update the corresponding field in the
aws-lambda-tools-defaults.jsonfile.
{
  "Information": [
    "This file provides default values for the deployment wizard inside Visual Studio and the AWS Lambda commands added to the .NET Core CLI.",
    "To learn more about the Lambda commands with the .NET Core CLI execute the following command at the command line in the project root directory.",
    "dotnet lambda help",
    "All the command line options for the Lambda command can be specified in this file."
  ],
  "profile": "default",
  "region": "us-west-2",
  "configuration": "Release",
  "function-architecture": "x86_64",
  "function-runtime": "dotnet8",
  "function-memory-size": 512,
  "function-timeout": 30,
  "function-handler": "AWSLambdaSample::AWSLambdaSample.Function::FunctionHandler"
}
Examine the Function.cs file. Function.cs defines the c#
functions to expose as Lambda functions. This FunctionHandler is the Lambda
functionality that runs when the Lambda function runs. In this project, there is one
function defined: FunctionHandler, which calls ToUpper() on the
input text.
Your project is now ready to publish to Lambda.
Publishing to Lambda
The following procedure and image demonstrate how to upload your function to Lambda using the Amazon Toolkit for Visual Studio.
Publishing your function to Lambda
-
Navigate to the Amazon Explorer by expanding View and choosing Amazon Explorer.
-
In the Solution Explorer, open the context menu for (right-click) the project you want to publish, then choose Publish to Amazon Lambda to open the Upload Lambda Function window.
-
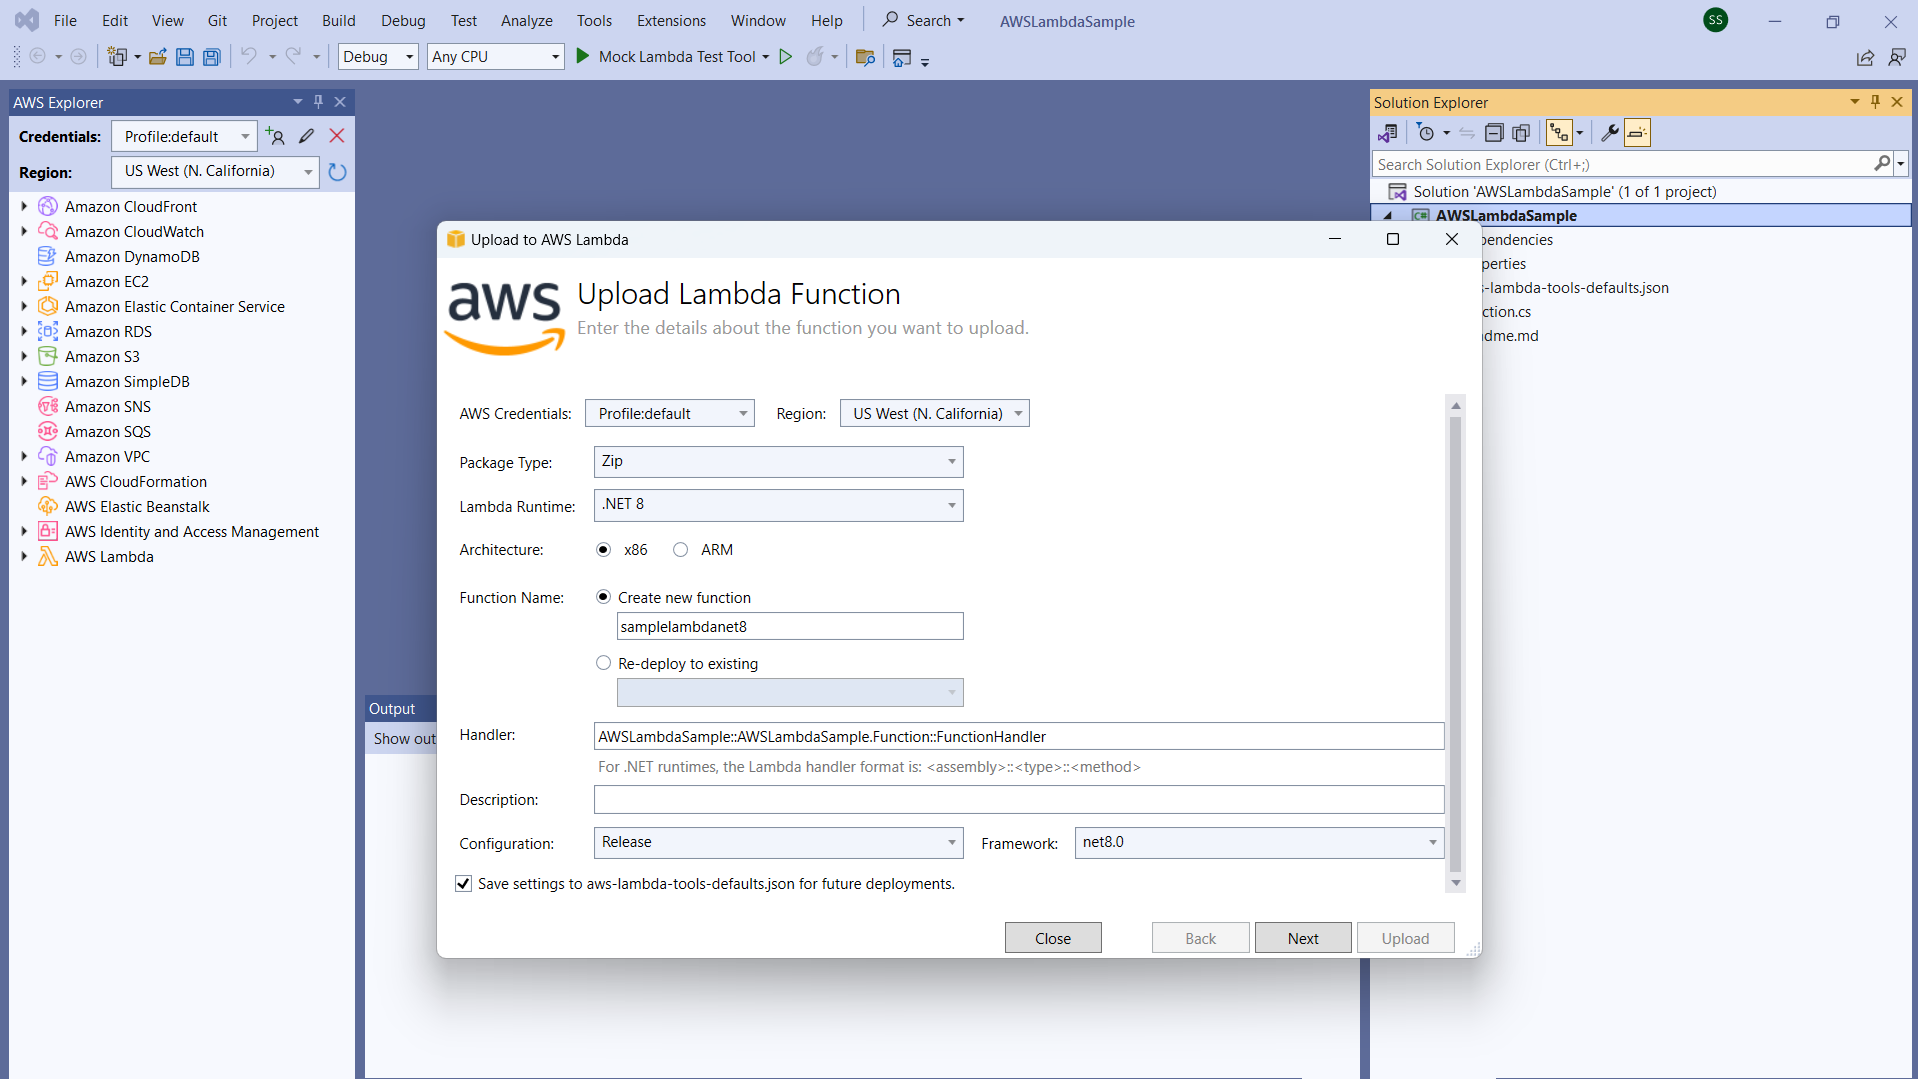
From the Upload Lambda Function window, complete the following fields:
-
Package Type: Choose
Zip. A ZIP file will be created as a result of the build process and will be uploaded to Lambda. Alternatively, you can choose Package TypeImage. The Tutorial: Basic Lambda Project Creating Docker Image describes how to publish using Package TypeImage. -
Lambda Runtime: Choose your Lambda Runtime from the drop-down menu.
-
Architecture: Select the radial for your preferred architecture.
-
Function Name: Select the radial for Create new function, then enter a display name for your Lambda instance. This name is referenced by both the Amazon Explorer and Amazon Web Services Management Console displays.
-
Handler: Use this field to specify a function handler. For example:
AWSLambdaSample::AWSLambdaSample.Function::FunctionHandler. -
(Optional) Description: Enter descriptive text to display with your instance, from within the Amazon Web Services Management Console.
-
Configuration: Choose your preferred configuration from the drop-down menu.
-
Framework: Choose your preferred framework from the drop-down menu.
-
Save settings: Select this box to save your current settings to
aws-lambda-tools-defaults.jsonas the default for future deploments. -
Choose Next to proceed to the Advanced Function Details window.
-
-
In the Advanced Function Details window, complete the following fields:
-
Role Name: Choose a role associated with your account. The role provides temporary credentials for any Amazon service calls made by the code in the function. If you do not have a role, scroll to locate New Role based on Amazon Managed Policy in the drop-down selector, then choose AWSLambdaBasicExecutionRole. This role has minimal access permissions.
Note
Your account must have permission to run the IAM ListPolicies action, or the Role Name list will be empty and you will be unable to continue.
-
(Optional) If your Lambda function accesses resources on an Amazon VPC, select the subnets and security groups.
-
(Optional) Set any environment variables that your Lambda function needs. The keys are automatically encrypted by the default service key which is free. Alternatively, you can specify an Amazon KMS key, for which there is a charge. KMS
is a managed service you can use to create and control the encryption keys used to encrypt your data. If you have an Amazon KMS key, you can select it from the list.
-
-
Choose Upload to open the Uploading Function window and begin the upload process.
Note
The Uploading Function page displays while the function is uploading to Amazon. To keep the wizard open after uploading so that you can view the report, clear Automatically close wizard on successful completion at the bottom of the form before the upload completes.
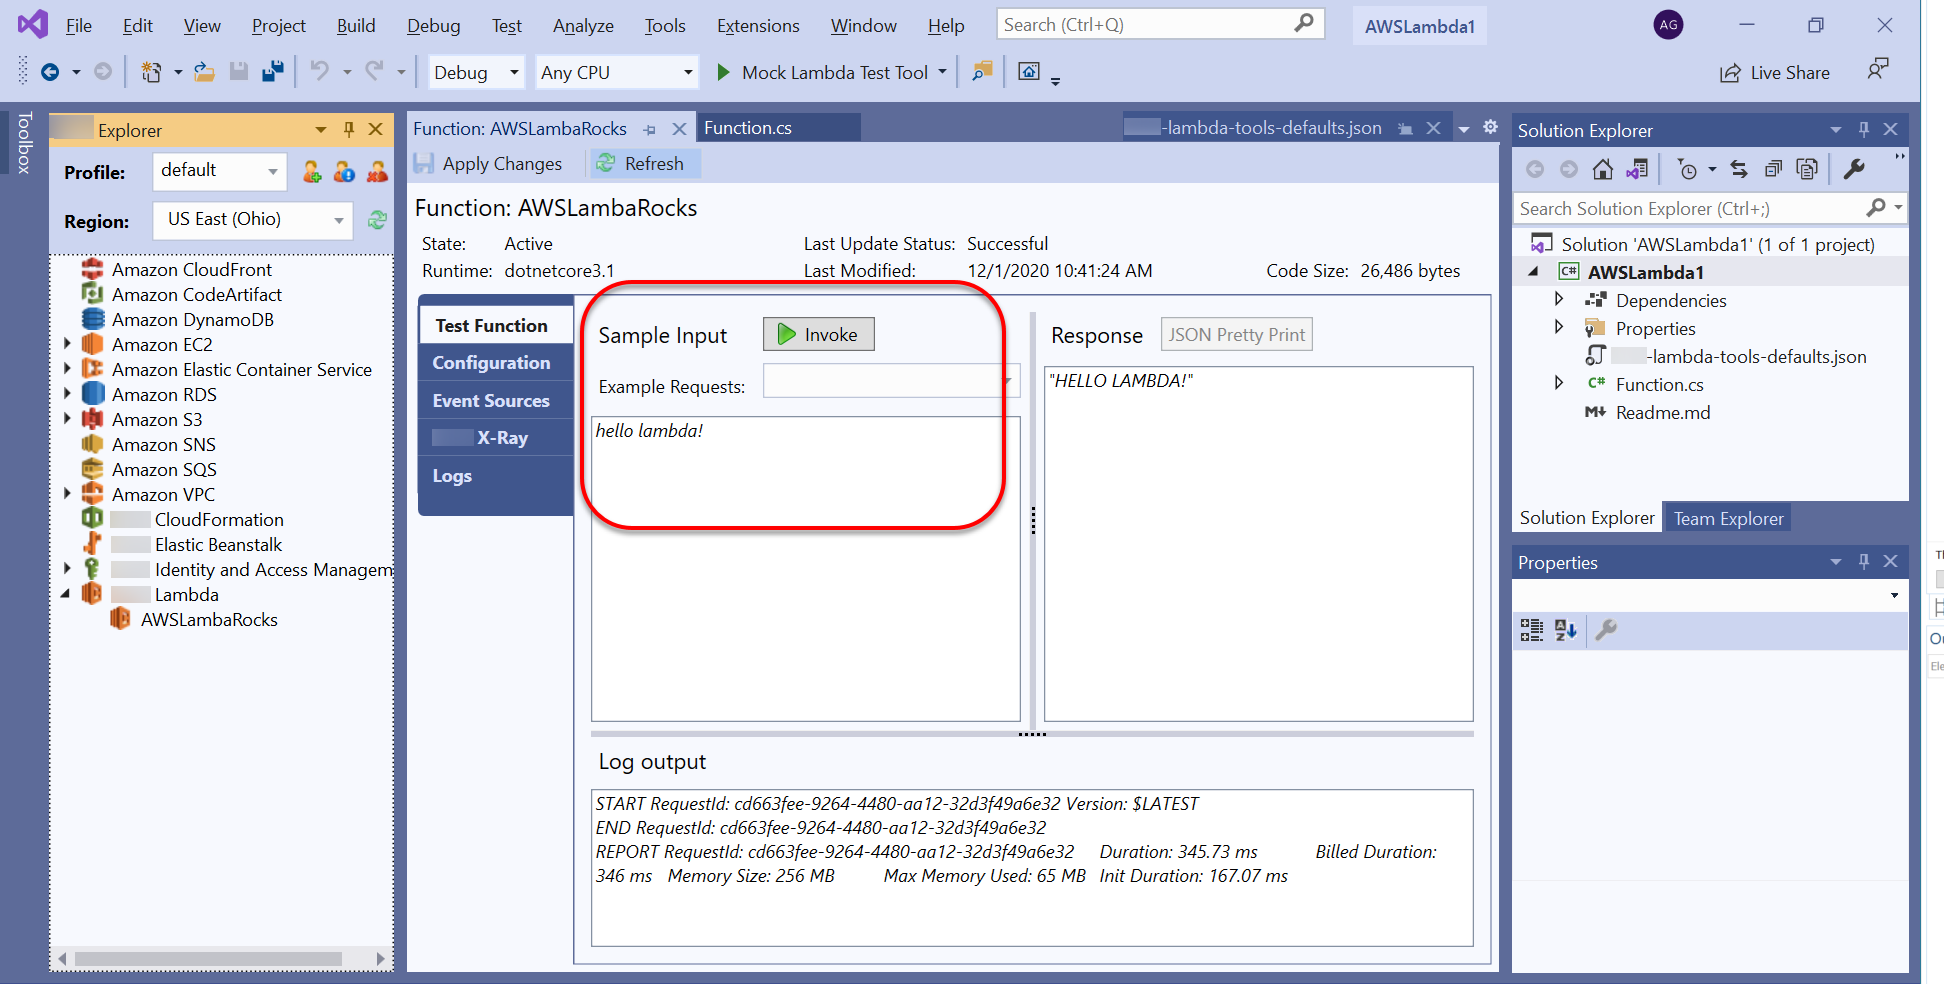
After the function uploads, your Lambda function is live. The Function: view page opens and displays your new Lambda function’s configuration.
-
From the Test Function tab, enter
hello lambda!in the text-input field and then choose Invoke to manually invoke your Lambda function. Your text appears in the Response tab, converted to uppercase.Note
You can reopen the Function: view at any time by double-clicking on your deployed instance located in the Amazon Explorer under the Amazon Lambda node.
-
(Optional) To confirm that you successfully published your Lambda function, log into the Amazon Web Services Management Console and then choose Lambda. The console displays all of your published Lambda functions, including the one you just created.
Clean-up
If you are not going to continue developing with this example, delete the function you deployed so that you do not get billed for unused resources in your account.
Note
Lambda automatically monitors Lambda functions for you, reporting metrics through Amazon CloudWatch. To monitor and troubleshoot your function, see the Troubleshooting and Monitoring Amazon Lambda Functions with Amazon CloudWatch topic in the Amazon Lambda Developer Guide.
To delete your function
-
From the Amazon Explorer expand the Amazon Lambda node.
Right click your deployed instance, then choose Delete.