本文属于机器翻译版本。若本译文内容与英语原文存在差异,则一律以英文原文为准。
在 Amazon EC2 Mac 实例上挂载文件共享
不管 Amazon EC2 Linux 实例是否加入 Active Directory 来访问 FSx for Windows File Server 文件系统,您都可以在该实例上挂载文件共享。如果实例未加入您的 Active Directory,请务必为实例所在的 Amazon Virtual Private Cloud(Amazon VPC)更新 DHCP 选项设置,以包含您的 Active Directory 域的 DNS 名称服务器。然后,重新启动实例。
-
启动 EC2 Mac 实例。为此,请从《Amazon EC2 用户指南》中选择以下过程之一:
-
使用 Virtual Network Computing(VNC)连接到 EC2 Mac 实例。有关更多信息,请参阅《Amazon EC2 用户指南》中的使用 VNC 连接到实例。
-
在 EC2 Mac 实例上,连接到 Amazon FSx 文件共享,如下所示:
-
打开查找器,选择前往,然后选择连接到服务器。
-
在连接到服务器对话框中,输入文件系统的 DNS 名称或与文件系统关联的 DNS 别名,以及共享名称。然后选择连接。
您可以通过选择 Windows File Server、网络与安全,在 Amazon FSx 控制台
上找到文件系统的 DNS 名称和任何关联的 DNS 别名。或者,您可以在 CreateFileSystem 或 DescribeFileSystems API 操作的响应中找到它们。有关使用 DNS 别名的更多信息,请参阅管理 DNS 别名。 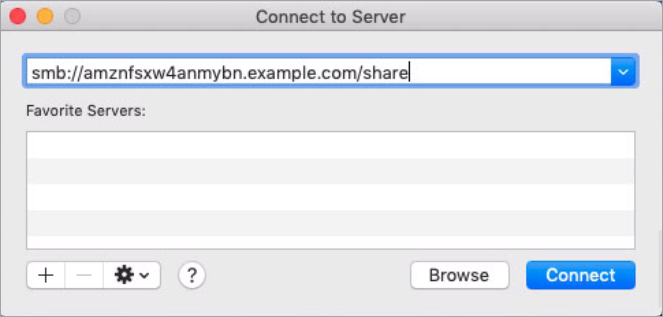
-
在下一个屏幕上,选择连接以继续。
-
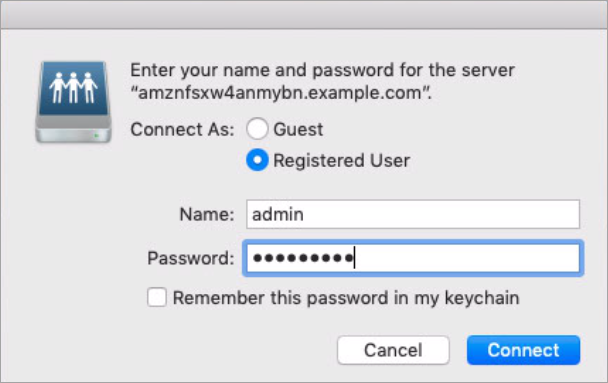
输入 Amazon FSx 服务账户的 Microsoft Active Directory(AD)凭证,如以下示例所示。然后选择连接。
-
如果连接成功,您会在 Finder 窗口的位置下方看到 Amazon FSx 共享。
-
-
启动 EC2 Mac 实例。为此,请从《Amazon EC2 用户指南》中选择以下过程之一:
-
使用 Virtual Network Computing(VNC)连接到 EC2 Mac 实例。有关更多信息,请参阅《Amazon EC2 用户指南》中的使用 VNC 连接到实例。
-
使用以下命令挂载文件共享。
mount_smbfs //file_system_dns_name/file_share mount_point您可以在 Amazon FSx 控制台
上选择 Windows File Server、网络与安全,从而找到 DNS 名称。或者,您可以在 CreateFileSystem或DescribeFileSystemsAPI 操作的响应中找到它们。对于加入 Amazon 托管 Microsoft 活动目录 Single-AZ 的文件系统,DNS 名称如下所示。
fs-0123456789abcdef0.ad-domain.com对于加入自我管理 Single-AZ 的 Active Directory 的文件系统以及任何 Multi-AZ 文件系统,DNS 名称如下所示。
amznfsxaa11bb22.ad-domain.com
此过程中使用的挂载命令会在指定点执行以下操作:
-
//– 指定要挂载的文件系统的 DNS 名称和共享。file_system_dns_name/file_share -
mount_point— 您要将文件系统挂载到的 EC2 实例上的目录。