coreMQTT mutual authentication demo
Important
This demo is hosted on the Amazon-FreeRTOS repository which is deprecated. We recommend that you start here when you create a new project. If you already have an existing FreeRTOS project based on the now deprecated Amazon-FreeRTOS repository, see the Amazon-FreeRTOS Github Repository Migration Guide.
Introduction
The coreMQTT mutual authentication demo project shows you how to establish a connection to an MQTT broker
using TLS with mutual authentication between the client and the server. This demo uses an mbedTLS-based
transport interface implementation to establish a server and client-authenticated TLS connection, and
demonstrates the subscribe-publish workflow of MQTT at
QoS 1
Note
To set up and run the FreeRTOS demos, follow the steps in Get Started with FreeRTOS.
Source code
The demo source file is named mqtt_demo_mutual_auth.c and can be found in the
freertos/demos/coreMQTT/
Functionality
The demo creates a single application task that loops through a set of examples that demonstrate how to connect to the broker, subscribe to a topic on the broker, publish to a topic on the broker, then finally, disconnect from the broker. The demo application both subscribes to and publishes to the same topic. Each time the demo publishes a message to the MQTT broker, the broker sends the same message back to the demo application.
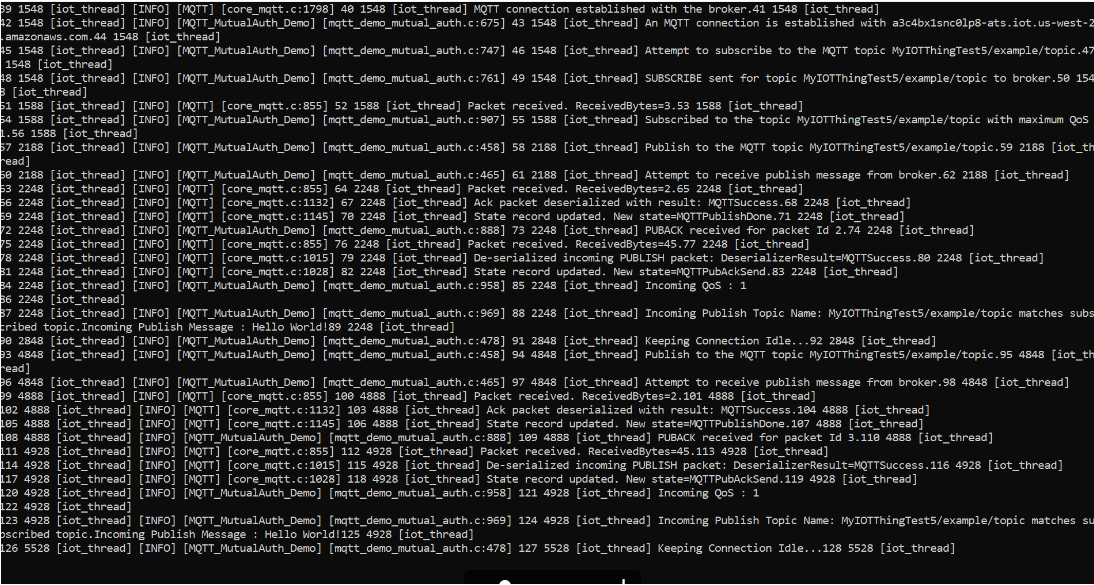
A successful completion of the demo will generate an output similar to the following image.
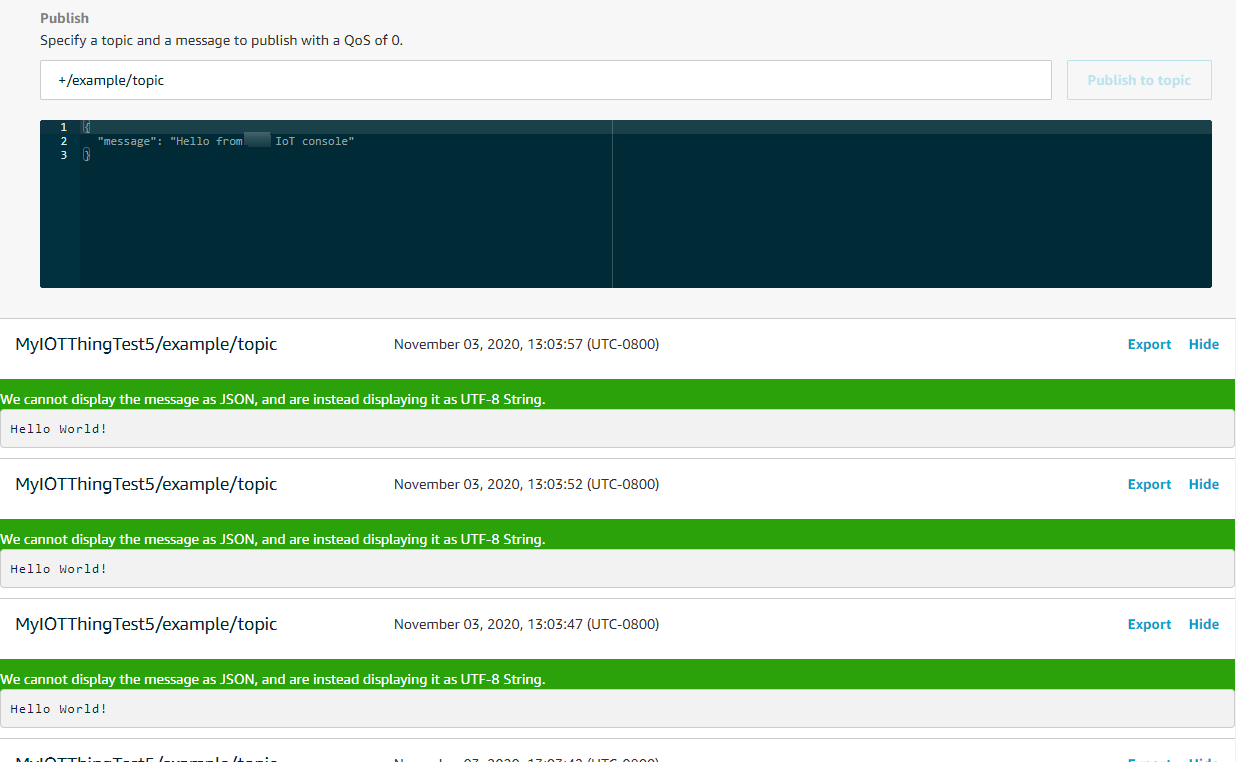
The Amazon IoT console will generate an output similar to the following image.
Retry logic with exponential backoff and jitter
The
prvBackoffForRetry
Connecting to the MQTT broker
The
prvConnectToServerWithBackoffRetriesBackoffAlgorithm_GetNextBackoff function provides an exponentially
increasing backoff value and returns RetryUtilsRetriesExhausted when the maximum number of
attempts has been reached. The prvConnectToServerWithBackoffRetries function returns a failure
status if the TLS connection to the broker can't be established after the configured number of attempts.
The
prvCreateMQTTConnectionWithBrokerFreeRTOS-Plus/Source/Application-Protocols/platform/freertos/transport/src/tls_freertos.c
file. Keep in mind that we're setting the keep-alive seconds for the broker in xConnectInfo.
The next function shows how the TLS transport interface and time function are set in an MQTT context using
the MQTT_Init function. It also shows how an event callback function pointer
(prvEventCallback) is set. This callback is used for reporting incoming messages.
Subscribing to an MQTT topic
The
prvMQTTSubscribeWithBackoffRetriesRETRY_MAX_ATTEMPTS.
Publishing to a topic
The
prvMQTTPublishToTopic
Receiving incoming messages
The application registers an event callback function before it connects to the
broker, as described earlier. The prvMQTTDemoTask function calls the
MQTT_ProcessLoop function to receive incoming messages. When an
incoming MQTT message is received, it calls the event callback function registered
by the application. The
prvEventCallbackprvEventCallback examines the incoming packet type and calls the
appropriate handler. In the example below, the function either calls
prvMQTTProcessIncomingPublish() for handling incoming publish
messages or prvMQTTProcessResponse() to handle acknowledgements (ACK).
Processing incoming MQTT publish packets
The
prvMQTTProcessIncomingPublish
Unsubscribing from a topic
The last step in the workflow is to unsubscribe from the topic so that the broker won't send any published
messages from mqttexampleTOPIC. Here is the definition of the function
prvMQTTUnsubscribeFromTopic
Changing the root CA used in the demo
By default, the FreeRTOS demos use the Amazon Root CA 1 certificate (RSA 2048 bit key) to authenticate with the Amazon IoT Core server. It is possible to use other CA certificates for server authentication, including the Amazon Root CA 3 certificate (ECC 256 bit key). To change the root CA for the coreMQTT mutual authentication demo:
-
In a text editor, open the
freertos/vendors/vendor/boards/board/aws_demos/config_files/mqtt_demo_mutual_auth_config.h -
In the file, locate the following line.
* #define democonfigROOT_CA_PEM "...insert here..."Uncomment this line and, if necessary, move it past the comment block end
*/. -
Copy the CA certificate that you want to use and then paste it in the
"...insert here..."text. The result should look like the following example.#define democonfigROOT_CA_PEM "-----BEGIN CERTIFICATE-----\n"\ "MIIBtjCCAVugAwIBAgITBmyf1XSXNmY/Owua2eiedgPySjAKBggqhkjOPQQDAjA5\n"\ "MQswCQYDVQQGEwJVUzEPMA0GA1UEChMGQW1hem9uMRkwFwYDVQQDExBBbWF6b24g\n"\ "Um9vdCBDQSAzMB4XDTE1MDUyNjAwMDAwMFoXDTQwMDUyNjAwMDAwMFowOTELMAkG\n"\ "A1UEBhMCVVMxDzANBgNVBAoTBkFtYXpvbjEZMBcGA1UEAxMQQW1hem9uIFJvb3Qg\n"\ "Q0EgMzBZMBMGByqGSM49AgEGCCqGSM49AwEHA0IABCmXp8ZBf8ANm+gBG1bG8lKl\n"\ "ui2yEujSLtf6ycXYqm0fc4E7O5hrOXwzpcVOho6AF2hiRVd9RFgdszflZwjrZt6j\n"\ "QjBAMA8GA1UdEwEB/wQFMAMBAf8wDgYDVR0PAQH/BAQDAgGGMB0GA1UdDgQWBBSr\n"\ "ttvXBp43rDCGB5Fwx5zEGbF4wDAKBggqhkjOPQQDAgNJADBGAiEA4IWSoxe3jfkr\n"\ "BqWTrBqYaGFy+uGh0PsceGCmQ5nFuMQCIQCcAu/xlJyzlvnrxir4tiz+OpAUFteM\n"\ "YyRIHN8wfdVoOw==\n"\ "-----END CERTIFICATE-----\n" -
(Optional) You can change the root CA for other demos. Repeat steps 1 through 3 for each
freertos/vendors/vendor/boards/board/aws_demos/config_files/demo-name_config.h