Managing ETL jobs with Amazon Glue Studio
You can use the simple graphical interface in Amazon Glue Studio to manage your ETL jobs. Using the navigation menu, choose Jobs to view the Jobs page. On this page, you can see all the jobs that you have created either with Amazon Glue Studio or the Amazon Glue console. You can view, manage, and run your jobs on this page.
You can also perform the following tasks on this page:
Start a job run
In Amazon Glue Studio, you can run your jobs on demand. A job can run multiple times, and each time you run the job, Amazon Glue collects information about the job activities and performance. This information is referred to as a job run and is identified by a job run ID.
You can initiate a job run in the following ways in Amazon Glue Studio:
-
On the Jobs page, choose the job you want to start, and then choose the Run job button.
-
If you're viewing a job in the visual editor and the job has been saved, you can choose the Run button to start a job run.
For more information about job runs, see Working with Jobs on the Amazon Glue Console in the Amazon Glue Developer Guide.
Schedule job runs
In Amazon Glue Studio, you can create a schedule to have your jobs run at specific times. You can
specify constraints, such as the number of times that the jobs run, which days of the week
they run, and at what time. These constraints are based on cron and have the same
limitations as cron. For example, if you choose to run your job on day 31 of each
month, keep in mind that some months don't have 31 days. For more information about
cron, see Cron Expressions in the Amazon Glue Developer Guide.
To run jobs according to a schedule
-
Create a job schedule using one of the following methods:
-
On the Jobs page, choose the job you want to create a schedule for, choose Actions, and then choose Schedule job.
-
If you're viewing a job in the visual editor and the job has been saved, choose the Schedules tab. Then choose Create Schedule.
-
-
On the Schedule job run page, enter the following information:
-
Name: Enter a name for your job schedule.
-
Frequency: Enter the frequency for the job schedule. You can choose the following:
-
Hourly: The job will run every hour, starting at a specific minute. You can specify the Minute of the hour that the job should run. By default, when you choose hourly, the job runs at the beginning of the hour (minute 0).
-
Daily: The job will run every day, starting at a time. You can specify the Minute of the hour that the job should run and the Start hour for the job. Hours are specified using a 23-hour clock, where you use the numbers 13 to 23 for the afternoon hours. The default values for minute and hour are 0, which means that if you select Daily, the job by default will run at midnight.
-
Weekly: The job will run every week on one or more days. In addition to the same settings described previous for Daily, you can choose the days of the week on which the job will run. You can choose one or more days.
-
Monthly: The job will run every month on a specific day. In addition to the same settings described previous for Daily, you can choose the day of the month on which the job will run. Specify the day as a numeric value from 1 to 31. If you select a day that does not exist in a month, for example the 30th day of February, then the job does not run that month.
-
Custom: Enter an expression for your job schedule using the
cronsyntax. Cron expressions allow you to create more complicated schedules, such as the last day of the month (instead of a specific day of the month) or every third month on the 7th and 21st days of the month.See Cron Expressions in the Amazon Glue Developer Guide
-
-
Description: You can optionally enter a description for your job schedule. If you plan to use the same schedule for multiple jobs, having a description makes it easier to determine what the job schedule does.
-
-
Choose Create schedule to save the job schedule.
-
After you create the schedule, a success message appears at the top of the console page. You can choose Job details in this banner to view the job details. This opens the visual job editor page, with the Schedules tab selected.
Manage job schedules
After you have created schedules for a job, you can open the job in the visual editor and choose the Schedules tab to manage the schedules.
On the Schedules tab of the visual editor, you can perform the following tasks:
-
Create a new schedule.
Choose Create schedule, then enter the information for your schedule as described in Schedule job runs.
-
Edit an existing schedule.
Choose the schedule you want to edit, then choose Action followed by Edit schedule. When you choose to edit an existing schedule, the Frequency shows as Custom, and the schedule is displayed as a
cronexpression. You can either modify thecronexpression, or specify a new schedule using the Frequency button. When you finish with your changes, choose Update schedule. -
Pause an active schedule.
Choose an active schedule, and then choose Action followed by Pause schedule. The schedule is instantly deactivated. Choose the refresh (reload) button to see the updated job schedule status.
-
Resume a paused schedule.
Choose a deactivated schedule, and then choose Action followed by Resume schedule. The schedule is instantly activated. Choose the refresh (reload) button to see the updated job schedule status.
-
Delete a schedule.
Choose the schedule you want to remove, and then choose Action followed by Delete schedule. The schedule is instantly deleted. Choose the refresh (reload) button to see the updated job schedule list. The schedule will show a status of Deleting until it has been completely removed.
Stop job runs
You can stop a job before it has completed its job run. You might choose this option if you know that the job isn't configured correctly, or if the job is taking too long to complete.
On the Monitoring page, in the Job runs list, choose the job that you want to stop, choose Actions, and then choose Stop run.
View your jobs
You can view all your jobs on the Jobs page. You can access this page by choosing Jobs in the navigation pane.
On the Jobs page, you can see all the jobs that were created in your account. The Your jobs list shows the job name, its type, the status of the last run of that job, and the dates on which the job was created and last modified. You can choose the name of a job to see detailed information for that job.
You can also use the Monitoring dashboard to view all your jobs. You can access the dashboard by choosing Monitoring in the navigation pane.
Customize the job display
You can customize how the jobs are displayed in the Your jobs section of the Jobs page. Also, you can enter text in the search text field to display only jobs with a name that contains that text.
If you choose the settings icon
![]() in the Your jobs section, you can customize how
Amazon Glue Studio displays the information in the table. You can choose to wrap the lines of text in
the display, change the number of jobs displayed on the page, and specify which columns to
display.
in the Your jobs section, you can customize how
Amazon Glue Studio displays the information in the table. You can choose to wrap the lines of text in
the display, change the number of jobs displayed on the page, and specify which columns to
display.
View information for recent job runs
A job can run multiple times as new data is added at the source location. Each time a job runs, the job run is assigned a unique ID, and information about that job run is collected. You can view this information by using the following methods:
-
Choose the Runs tab of the visual editor to view the job run information for the currently displayed job.
On the Runs tab (the Recent job runs page), there is a card for each job run. The information displayed on the Runs tab includes:
-
Job run ID
-
Number of attempts to run this job
-
Status of the job run
-
Start and end time for the job run
-
The runtime for the job run
-
A link to the job log files
-
A link to the job error log files
-
The error returned for failed jobs
-
You can select a job run to view additional information about the job, including the following:
Input arguments
Continuous logs
Metrics – You can see visualizations of basic metrics. For more information on included metrics, see Viewing Amazon CloudWatch metrics for a Spark job run.
Spark UI – You can visualize Spark logs for your job in the Spark UI. For more information about using the Spark Web UI, see Monitoring jobs using the Apache Spark web UI. Enable this feature by following the procedure in Enabling the Apache Spark web UI for Amazon Glue jobs.
You can select View details to view similar information on the job run details page. Alternatively, you can navigate to the job run details page through the Monitoring page. In the navigation pane, choose Monitoring. Scroll down to the Job runs list. Choose the job and then choose View run details. The contents are described in Viewing the details of a job run.
For more information about the job logs, see Viewing the job run logs.
View the job script
After you provide information for all the nodes in the job, Amazon Glue Studio generates a script that is used by the job to read the data from the source, transform the data, and write the data in the target location. If you save the job, you can view this script at any time.
To view the generated script for your job
-
Choose Jobs in the navigation pane.
-
On the Jobs page, in the Your Jobs list, choose the name of the job you want to review. Alternatively, you can select a job in the list, choose the Actions menu, and then choose Edit job.
-
On the visual editor page, choose the Script tab at the top to view the job script.
If you want to edit the job script, see Amazon Glue programming guide.
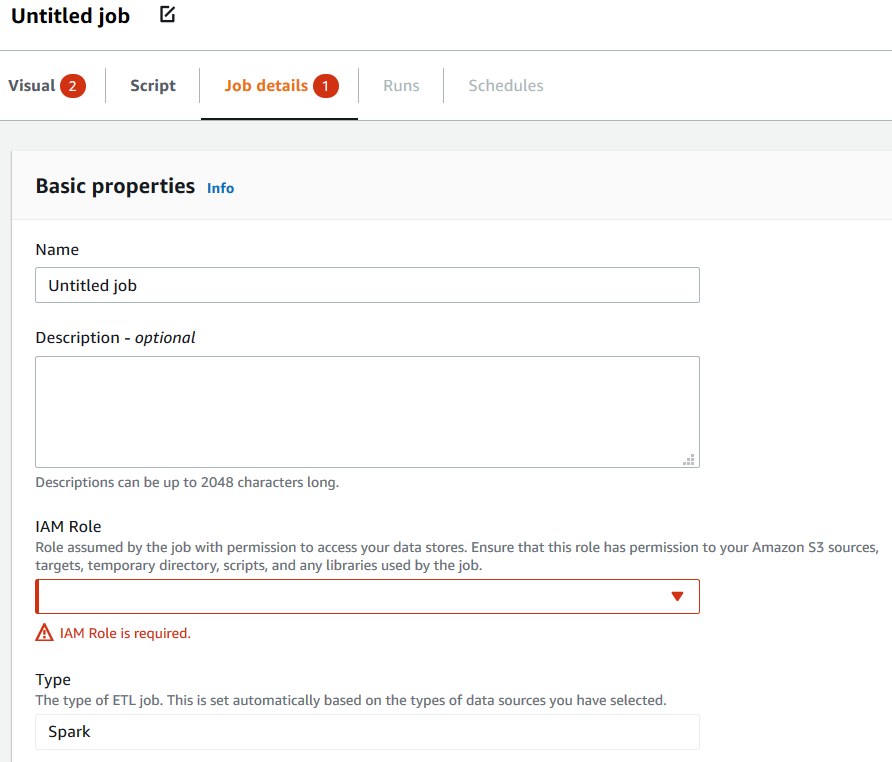
Modify the job properties
The nodes in the job diagram define the actions performed by the job, but there are several properties that you can configure for the job as well. These properties determine the environment that the job runs in, the resources it uses, the threshold settings, the security settings, and more.
To customize the job run environment
-
Choose Jobs in the navigation pane.
-
On the Jobs page, in the Your Jobs list, choose the name of the job you want to review.
-
On the visual editor page, choose the Job details tab at the top of the job editing pane.
-
Modify the job properties, as needed.
For more information about the job properties, see Defining Job Properties in the Amazon Glue Developer Guide.
-
Expand the Advanced properties section if you need to specify these additional job properties:
-
Script filename – The name of the file that stores the job script in Amazon S3.
-
Script path – The Amazon S3 location where the job script is stored.
-
Job metrics – (Not available for Python shell jobs) Turns on the creation of Amazon CloudWatch metrics when this job runs.
-
Continuous logging – (Not available for Python shell jobs) Turns on continuous logging to CloudWatch, so the logs are available for viewing before the job completes.
-
Spark UI and Spark UI logs path – (Not available for Python shell jobs) Turns on the use of Spark UI for monitoring this job and specifies the location for the Spark UI logs.
-
Maximum concurrency – Sets the maximum number of concurrent runs that are allowed for this job.
-
Temporary path – The location of a working directory in Amazon S3 where temporary intermediate results are written when Amazon Glue runs the job script.
-
Delay notification threshold (minutes) – Specify a delay threshold for the job. If the job runs for a longer time than that specified by the threshold, then Amazon Glue sends a delay notification for the job to CloudWatch.
-
Security configuration and Server-side encryption – Use these fields to choose the encryption options for the job.
-
Use Glue Data Catalog as the Hive metastore – Choose this option if you want to use the Amazon Glue Data Catalog as an alternative to Apache Hive Metastore.
-
Additional network connection – For a data source in a VPC, you can specify a connection of type
Networkto ensure your job accesses your data through the VPC. -
Python library path, Dependent jars path (Not available for Python shell jobs), or Referenced files path – Use these fields to specify the location of additional files used by the job when it runs the script.
-
Job Parameters – You can add a set of key-value pairs that are passed as named parameters to the job script. In Python calls to Amazon Glue APIs, it's best to pass parameters explicitly by name. For more information about using parameters in a job script, see Passing and Accessing Python Parameters in Amazon Glue in the Amazon Glue Developer Guide.
-
Tags – You can add tags to the job to help you organize and identify them.
-
-
After you have modified the job properties, save the job.
Store Spark shuffle files on Amazon S3
Some ETL jobs require reading and combining information from multiple partitions, for
example, when using a join transform. This operation is referred to as
shuffling. During a shuffle, data is written to disk and transferred
across the network. With Amazon Glue version 3.0, you can configure Amazon S3 as a storage
location for these files. Amazon Glue provides a shuffle manager which writes and reads shuffle
files to and from Amazon S3. Writing and reading shuffle files from Amazon S3 is
slower (by 5%-20%) compared to local disk (or Amazon EBS which is heavily optimized for Amazon EC2).
However, Amazon S3 provides unlimited storage capacity, so you don't have to worry
about "No space left on device" errors when running your job.
To configure your job to use Amazon S3 for shuffle files
-
On the Jobs page, in the Your Jobs list, choose the name of the job you want to modify.
-
On the visual editor page, choose the Job details tab at the top of the job editing pane.
Scroll down to the Job parameters section.
-
Specify the following key-value pairs.
-
--write-shuffle-files-to-s3—trueThis is the main parameter that configures the shuffle manager in Amazon Glue to use Amazon S3 buckets for writing and reading shuffle data. By default, this parameter has a value of
false. -
(Optional)
--write-shuffle-spills-to-s3—trueThis parameter allows you to offload spill files to Amazon S3 buckets, which provides additional resiliency to your Spark job in Amazon Glue. This is only required for large workloads that spill a lot of data to disk. By default, this parameter has a value of
false. -
(Optional)
--conf spark.shuffle.glue.s3ShuffleBucket—S3://<shuffle-bucket>This parameter specifies the Amazon S3 bucket to use when writing the shuffle files. If you do not set this parameter, the location is the
shuffle-datafolder in the location specified for Temporary path (--TempDir).Note
Make sure the location of the shuffle bucket is in the same Amazon Web Services Region in which the job runs.
Also, the shuffle service does not clean the files after the job finishes running, so you should configure the Amazon S3 storage life cycle policies on the shuffle bucket location. For more information, see Managing your storage lifecycle in the Amazon S3 User Guide.
-
Save the job
A red Job has not been saved callout is displayed to the left of the Save button until you save the job.

To save your job
-
Provide all the required information in the Visual and Job details tabs.
-
Choose the Save button.
After you save the job, the 'not saved' callout changes to display the time and date that the job was last saved.
If you exit Amazon Glue Studio before saving your job, the next time you sign in to Amazon Glue Studio, a notification appears. The notification indicates that there is an unsaved job, and asks if you want to restore it. If you choose to restore the job, you can continue to edit it.
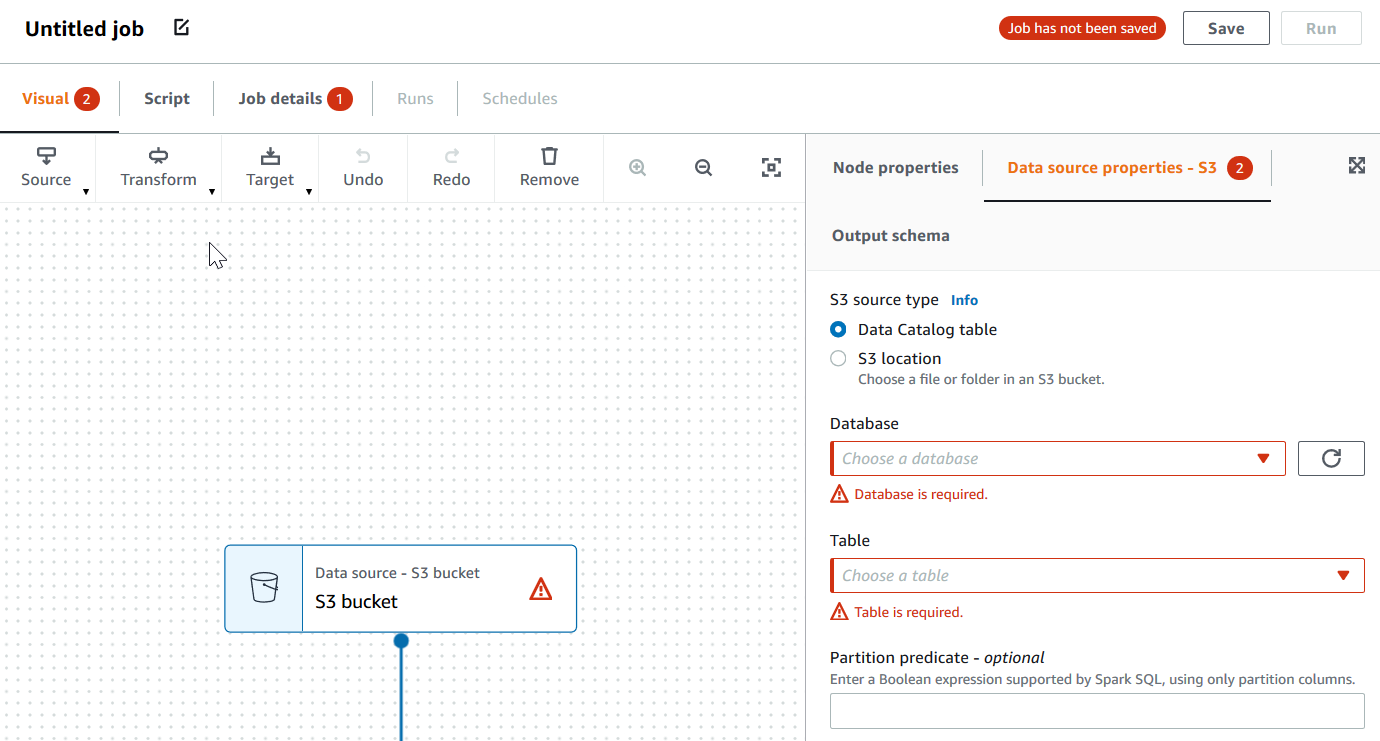
Troubleshooting errors when saving a job
If you choose the Save button, but your job is missing some required information, then a red callout appears on the tab where the information is missing. The number in the callout indicates how many missing fields were detected.
-
If a node in the visual editor isn't configured correctly, the Visual tab shows a red callout, and the node with the error displays a warning symbol
 .
.-
Choose the node. In the node details panel, a red callout appears on the tab where the missing or incorrect information is located.
-
Choose the tab in the node details panel that shows a red callout, and then locate the problem fields, which are highlighted. An error message below the fields provides additional information about the problem.
-
-
If there is a problem with the job properties, the Job details tab shows a red callout. Choose that tab and locate the problem fields, which are highlighted. The error messages below the fields provide additional information about the problem.
Clone a job
You can use the Clone job action to copy an existing job into a new job.
To create a new job by copying an existing job
-
On the Jobs page, in the Your jobs list, choose the job that you want to duplicate.
-
From the Actions menu, choose Clone job.
-
Enter a name for the new job. You can then save or edit the job.
Delete jobs
You can remove jobs that are no longer needed. You can delete one or more jobs in a single operation.
To remove jobs from Amazon Glue Studio
-
On the Jobs page, in the Your jobs list, choose the jobs that you want to delete.
From the Actions menu, choose Delete job.
Verify that you want to delete the job by entering
delete.
You can also delete a saved job when you're viewing the Job details tab for that job in the visual editor.