Tutorial: Writing an Amazon Glue for Spark script
This tutorial introduces you to the process of writing Amazon Glue scripts. You can run scripts on a schedule with jobs, or interactively with interactive sessions. For more information about jobs, see Building visual ETL jobs. For more information about interactive sessions, see Overview of Amazon Glue interactive sessions.
The Amazon Glue Studio visual editor offers a graphical, no-code interface for building Amazon Glue jobs. Amazon Glue scripts back visual jobs. They give you access to the expanded set of tools available to work with Apache Spark programs. You can access native Spark APIs, as well as Amazon Glue libraries that facilitate extract, transform, and load (ETL) workflows from within an Amazon Glue script.
In this tutorial, you extract, transform, and load a dataset of parking tickets. The script that does this
work is identical in form and function to the one generated in Making ETL easier with
Amazon Glue Studio
You use the Python language and libraries in this tutorial. Similar functionality is available in Scala. After going through this tutorial, you should be able to generate and inspect a sample Scala script to understand how to perform the Scala Amazon Glue ETL script writing process.
Prerequisites
This tutorial has the following prerequisites:
-
The same prerequisites as the Amazon Glue Studio blog post, which instructs you to run a Amazon CloudFormation template.
This template uses the Amazon Glue Data Catalog to manage the parking ticket dataset available in
s3://aws-bigdata-blog/artifacts/gluestudio/. It creates the following resources which will be referenced: -
Amazon Glue StudioRole – IAM role to run Amazon Gluejobs
-
Amazon Glue StudioAmazon S3Bucket – Name of the Amazon S3 bucket to store blog-related files
-
Amazon Glue StudioTicketsYYZDB – Amazon Glue Data Catalog database
-
Amazon Glue StudioTableTickets – Data Catalog table to use as a source
-
Amazon Glue StudioTableTrials – Data Catalog table to use as a source
-
Amazon Glue StudioParkingTicketCount – Data Catalog table to use as the destination
-
The script generated in the Amazon Glue Studio blog post. If the blog post changes, the script is also available in the following text.
Generate a sample script
You can use the Amazon Glue Studio visual editor as a powerful code generation tool to create a scaffold for the script you want to write. You will use this tool to create a sample script.
If you want to skip these steps, the script is provided.
import sys
from awsglue.transforms import *
from awsglue.utils import getResolvedOptions
from pyspark.context import SparkContext
from awsglue.context import GlueContext
from awsglue.job import Job

args = getResolvedOptions(sys.argv, ["JOB_NAME"])
sc = SparkContext()
glueContext = GlueContext(sc)
spark = glueContext.spark_session
job = Job(glueContext)
job.init(args["JOB_NAME"], args)

# Script generated for node S3 bucket
S3bucket_node1 = glueContext.create_dynamic_frame.from_catalog(
    database="yyz-tickets", table_name="tickets", transformation_ctx="S3bucket_node1"
)

# Script generated for node ApplyMapping
ApplyMapping_node2 = ApplyMapping.apply(
    frame=S3bucket_node1,
    mappings=[
        ("tag_number_masked", "string", "tag_number_masked", "string"),
        ("date_of_infraction", "string", "date_of_infraction", "string"),
        ("ticket_date", "string", "ticket_date", "string"),
        ("ticket_number", "decimal", "ticket_number", "float"),
        ("officer", "decimal", "officer_name", "decimal"),
        ("infraction_code", "decimal", "infraction_code", "decimal"),
        ("infraction_description", "string", "infraction_description", "string"),
        ("set_fine_amount", "decimal", "set_fine_amount", "float"),
        ("time_of_infraction", "decimal", "time_of_infraction", "decimal"),
    ],
    transformation_ctx="ApplyMapping_node2",
)

# Script generated for node S3 bucket
S3bucket_node3 = glueContext.write_dynamic_frame.from_options(
    frame=ApplyMapping_node2,
    connection_type="s3",
    format="glueparquet",
    connection_options={"path": "s3://DOC-EXAMPLE-BUCKET", "partitionKeys": []},
    format_options={"compression": "gzip"},
    transformation_ctx="S3bucket_node3",
)

job.commit()
To generate a sample script
-
Complete the Amazon Glue Studio tutorial. To complete this tutorial, see Creating a job in Amazon Glue Studio from an example job.
-
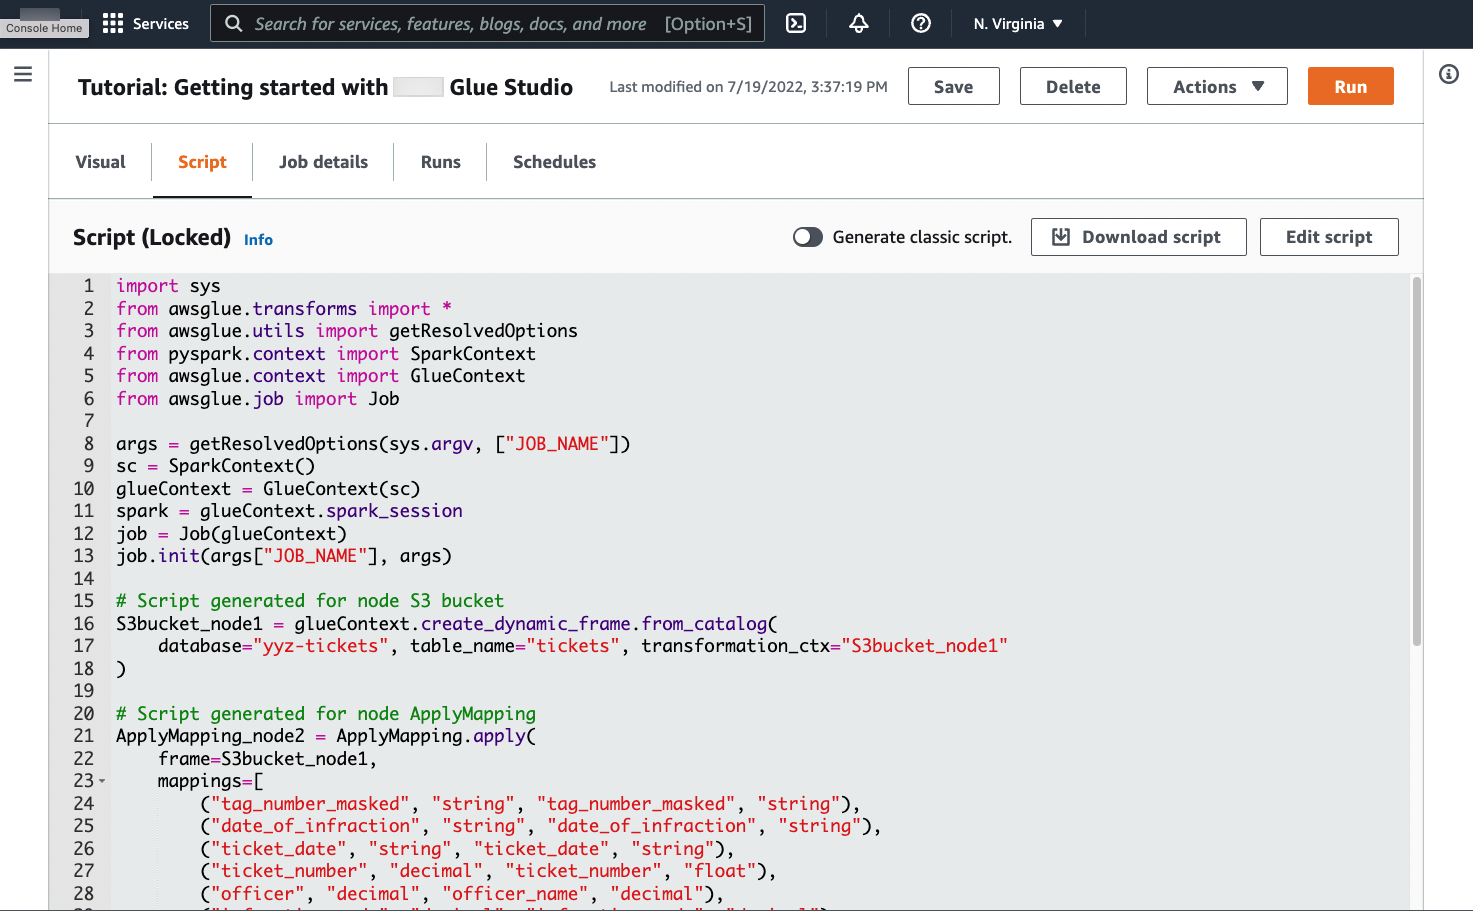
Navigate to the Script tab on the job page, as shown in the following screenshot:
-
Copy the complete contents of the Script tab. By setting the script language in Job details, you can switch back and forth between generating Python or Scala code.
Step 1. Create a job and paste your script
In this step, you create an Amazon Glue job in the Amazon Web Services Management Console. This sets up a configuration that allows Amazon Glue to run your script. It also creates a place for you to store and edit your script.
To create a job
-
In the Amazon Web Services Management Console, navigate to the Amazon Glue landing page.
-
In the side navigation pane, choose Jobs.
-
Choose Spark script editor in Create job, and then choose Create.
-
Optional - Paste the full text of your script into the Script pane. Alternatively, you can follow along with the tutorial.
Step 2. Import Amazon Glue libraries
You need to set your script up to interact with code and configuration that are defined outside of the script. This work is done behind the scenes in Amazon Glue Studio.
In this step, you perform the following actions.
-
Import and initialize a
GlueContextobject. This is the most important import, from the script writing perspective. This exposes standard methods for defining source and target datasets, which is the starting point for any ETL script. To learn more about theGlueContextclass, see GlueContext class. -
Initialize a
SparkContextandSparkSession. These allow you to configure the Spark engine available inside the Amazon Glue job. You won't need to use them directly within introductory Amazon Glue scripts. -
Call
getResolvedOptionsto prepare your job arguments for use within the script. For more information about resolving job parameters, see Accessing parameters using getResolvedOptions. -
Initialize a
Job. TheJobobject sets configuration and tracks the state of various optional Amazon Glue features. Your script can run without aJobobject, but the best practice is to initialize it so that you don't encounter confusion if those features are later integrated.One of these features is job bookmarks, which you can optionally configure in this tutorial. You can learn about job bookmarks in the following section, Optional - Enable job bookmarks.
In this procedure, you write the following code. This code is a portion of the generated sample script.
from awsglue.transforms import *
from awsglue.utils import getResolvedOptions
from pyspark.context import SparkContext
from awsglue.context import GlueContext
from awsglue.job import Job

args = getResolvedOptions(sys.argv, ["JOB_NAME"])
sc = SparkContext()
glueContext = GlueContext(sc)
spark = glueContext.spark_session
job = Job(glueContext)
job.init(args["JOB_NAME"], args)
To import Amazon Glue libraries
-
Copy this section of code and paste it into the Script editor.
Note
You might consider copying code to be a bad engineering practice. In this tutorial, we suggest this to encourage you to consistently name your core variables across all Amazon Glue ETL scripts.
Step 3. Extract data from a source
In any ETL process, you first need to define a source dataset that you want to change. In the Amazon Glue Studio visual editor, you provide this information by creating a Source node.
In this step, you provide the create_dynamic_frame.from_catalog method a
database and table_name to extract data from a source configured in the
Amazon Glue Data Catalog.
In the previous step, you initialized a GlueContext object. You use this object to find
methods that are used to configure sources, such as create_dynamic_frame.from_catalog.
In this procedure, you write the following code using create_dynamic_frame.from_catalog. This
code is a portion of the generated sample script.
S3bucket_node1 = glueContext.create_dynamic_frame.from_catalog(
    database="yyz-tickets", table_name="tickets", transformation_ctx="S3bucket_node1"
    )
To extract data from a source
-
Examine the documentation to find a method on
GlueContextto extract data from a source defined in the Amazon Glue Data Catalog. These methods are documented in GlueContext class. Choose the create_dynamic_frame.from_catalog method. Call this method onglueContext. -
Examine the documentation for
create_dynamic_frame.from_catalog. This method requiresdatabaseandtable_nameparameters. Provide the necessary parameters tocreate_dynamic_frame.from_catalog.The Amazon Glue Data Catalog stores information about the location and format of your source data, and was set up in the prerequisite section. You don't have to directly provide your script with that information.
-
Optional – Provide the
transformation_ctxparameter to the method in order to support job bookmarks. You can learn about job bookmarks in the following section, Optional - Enable job bookmarks.
Note
Common methods for extracting data
create_dynamic_frame_from_catalog is used to connect to tables in the Amazon Glue Data Catalog.
If you need to directly provide your job with configuration that describes the structure and location
of your source, see the create_dynamic_frame_from_options
method. You will need to provide more detailed parameters describing your data than when using
create_dynamic_frame.from_catalog.
Refer to the supplemental documentation about format_options and
connection_parameters to identify your required parameters. For an explanation of how to
provide your script information about your source data format, see Data format options for inputs and outputs in Amazon Glue for Spark. For an explanation of how to provide your script
information about your source data location, see Connection types and options for ETL in Amazon Glue for Spark.
If you're reading information from a streaming source, you provide your job with source information
through the create_data_frame_from_catalog or create_data_frame_from_options methods.
Note that these methods return Apache Spark DataFrames.
Our generated code calls create_dynamic_frame.from_catalog while the reference
documentation refers to create_dynamic_frame_from_catalog. These methods ultimately call
the same code, and are included so you can write cleaner code. You can verify this by viewing the source
for our Python wrapper, available at aws-glue-libs
Step 4. Transform data with Amazon Glue
After extracting source data in an ETL process, you need to describe how you want to change your data. You provide this information by creating a Transform node in the Amazon Glue Studio visual editor.
In this step, you provide the ApplyMapping method with a map of current and desired field
names and types to transform your DynamicFrame.
You perform the following transformations.
-
Drop the four
locationandprovincekeys. -
Change the name of
officertoofficer_name. -
Change the type of
ticket_numberandset_fine_amounttofloat.
create_dynamic_frame.from_catalog provides you with a DynamicFrame object. A
DynamicFrame represents a dataset in Amazon Glue. Amazon Glue transforms are operations that change
DynamicFrames.
Note
What is a DynamicFrame?
A DynamicFrame is an abstraction that allows you to connect a dataset with a description
of the names and types of entries in the data. In Apache Spark, a similar abstraction exists called a
DataFrame. For an explanation of DataFrames, see Spark SQL Guide
With DynamicFrames, you can describe dataset schemas dynamically. Consider a dataset with
a price column, where some entries store price as a string, and others store price as a double. Amazon Glue
computes a schema on-the-fly—it creates a self-describing record for each row.
Inconsistent fields (like price) are explicitly represented with a type (ChoiceType) in
the schema for the frame. You can address your inconsistent fields by dropping them with
DropFields or resolving them with ResolveChoice. These are transforms that are
available on the DynamicFrame. You can then write your data back to your data lake with
writeDynamicFrame.
You can call many of the same transforms from methods on the DynamicFrame class, which
can lead to more readable scripts. For more information about DynamicFrame, see DynamicFrame class.
In this procedure, you write the following code using ApplyMapping. This code is a portion
of the generated sample script.
ApplyMapping_node2 = ApplyMapping.apply(
    frame=S3bucket_node1,
    mappings=[
        ("tag_number_masked", "string", "tag_number_masked", "string"),
        ("date_of_infraction", "string", "date_of_infraction", "string"),
        ("ticket_date", "string", "ticket_date", "string"),
        ("ticket_number", "decimal", "ticket_number", "float"),
        ("officer", "decimal", "officer_name", "decimal"),
        ("infraction_code", "decimal", "infraction_code", "decimal"),
        ("infraction_description", "string", "infraction_description", "string"),
        ("set_fine_amount", "decimal", "set_fine_amount", "float"),
        ("time_of_infraction", "decimal", "time_of_infraction", "decimal"),
    ],
    transformation_ctx="ApplyMapping_node2",
)
To transform data with Amazon Glue
-
Examine the documentation to identify a transform to change and drop fields. For details, see GlueTransform base class. Choose the
ApplyMappingtransform. For more information aboutApplyMapping, see ApplyMapping class. Callapplyon theApplyMappingtransform object.Note
What is
ApplyMapping?ApplyMappingtakes aDynamicFrameand transforms it. It takes a list of tuples that represent transformations on fields—a "mapping". The first two tuple elements, a field name and type, are used to identify a field in the frame. The second two parameters are also a field name and type.ApplyMapping converts the source field to the target name and type in a new
DynamicFrame, which it returns. Fields that aren't provided are dropped in the return value.Rather than calling
apply, you can call the same transform with theapply_mappingmethod on theDynamicFrameto create more fluent, readable code. For more information, see apply_mapping. -
Examine the documentation for
ApplyMappingto identify required parameters. See ApplyMapping class. You will find that this method requiresframeandmappingsparameters. Provide the necessary parameters toApplyMapping. -
Optional – Provide
transformation_ctxto the method to support job bookmarks. You can learn about job bookmarks in the following section, Optional - Enable job bookmarks.
Note
Apache Spark functionality
We provide transforms to streamline ETL workflows within your job. You also have access to the
libraries that are available in a Spark program in your job, built for more general purposes. In order
to use them, you convert between DynamicFrame and DataFrame.
You can create a DataFrame with toDF. Then, you can use methods
available on the DataFrame to transform your dataset. For more information on these methods, see DataFrame
Step 5. Load data into a target
After you transform your data, you typically store the transformed data in a different place from the source. You perform this operation by creating a target node in the Amazon Glue Studio visual editor.
In this step, you provide the write_dynamic_frame.from_options method a
connection_type, connection_options, format, and
format_options to load data into a target bucket in Amazon S3.
In Step 1, you initialized a GlueContext object. In Amazon Glue, this is where you will find
methods that are used to configure targets, much like sources.
In this procedure, you write the following code using write_dynamic_frame.from_options. This
code is a portion of the generated sample script.
S3bucket_node3 = glueContext.write_dynamic_frame.from_options(
    frame=ApplyMapping_node2,
    connection_type="s3",
    format="glueparquet",
    connection_options={"path": "s3://amzn-s3-demo-bucket", "partitionKeys": []},
    format_options={"compression": "gzip"},
    transformation_ctx="S3bucket_node3",
    )
To load data into a target
-
Examine the documentation to find a method to load data into a target Amazon S3 bucket. These methods are documented in GlueContext class. Choose the write_dynamic_frame_from_options method. Call this method on
glueContext.Note
Common methods for loading data
write_dynamic_frame.from_optionsis the most common method used to load data. It supports all targets that are available in Amazon Glue.If you're writing to a JDBC target defined in an Amazon Glue connection, use the write_dynamic_frame_from_jdbc_conf method. Amazon Glue connections store information about how to connect to a data source. This removes the need to provide that information in
connection_options. However, you still need to useconnection_optionsto providedbtable.write_dynamic_frame.from_catalogis not a common method for loading data. This method updates the Amazon Glue Data Catalog without updating the underlying dataset, and is used in combination with other processes that change the underlying dataset. For more information, see Updating the schema, and adding new partitions in the Data Catalog using Amazon Glue ETL jobs. -
Examine the documentation for write_dynamic_frame_from_options. This method requires
frame,connection_type,format,connection_options, andformat_options. Call this method onglueContext.-
Refer to the supplemental documentation about
format_optionsandformatto identify the parameters you need. For an explanation of data formats, see Data format options for inputs and outputs in Amazon Glue for Spark. -
Refer to the supplemental documentation about
connection_typeandconnection_optionsto identify the parameters you need. For an explanation of connections, see Connection types and options for ETL in Amazon Glue for Spark. -
Provide the necessary parameters to
write_dynamic_frame.from_options. This method has a similar configuration tocreate_dynamic_frame.from_options.
-
-
Optional – Provide
transformation_ctxtowrite_dynamic_frame.from_optionsto support job bookmarks. You can learn about job bookmarks in the following section, Optional - Enable job bookmarks.
Step 6. Commit the Job object
You initialized a Job object in Step 1. You may need to manually conclude its lifecycle at the
end of your script if certain optional features need this to function properly, such as when using Job Bookmarks. This work is done behind the
scenes in Amazon Glue Studio.
In this step, call the commit method on the Job object.
In this procedure, you write the following code. This code is a portion of the generated sample script.
job.commit()
To commit the Job object
-
If you have not yet done this, perform the optional steps outlined in previous sections to include
transformation_ctx. -
Call
commit.
Optional - Enable job bookmarks
In every prior step, you have been instructed to set transformation_ctx parameters. This is
related to a feature called job bookmarks.
With job bookmarks, you can save time and money with jobs that run on a recurring basis, against datasets where previous work can easily be tracked. Job bookmarks track the progress of an Amazon Glue transform across a dataset from previous runs. By tracking where previous runs ended, Amazon Glue can limit its work to rows it hasn't processed before. For more information about job bookmarks, see Tracking processed data using job bookmarks.
To enable job bookmarks, first add the transformation_ctx statements into our provided
functions, as described in the previous examples. Job bookmark state is persisted across runs.
transformation_ctx parameters are keys used to access that state. On their own, these
statements will do nothing. You also need to activate the feature in the configuration for your job.
In this procedure, you enable job bookmarks using the Amazon Web Services Management Console.
To enable job bookmarks
-
Navigate to the Job details section of your corresponding job.
-
Set Job bookmark to Enable.
Step 7. Run your code as a job
In this step, you run your job to verify that you successfully completed this tutorial. This is done with the click of a button, as in the Amazon Glue Studio visual editor.
To run your code as a job
-
Choose Untitled job on the title bar to edit and set your job name.
-
Navigate to the Job details tab. Assign your job an IAM Role. You can use the one created by the Amazon CloudFormation template in the prerequisites for the Amazon Glue Studio tutorial. If you have completed that tutorial, it should be available as
AWS Glue
                    StudioRole
. -
Choose Save to save your script.
-
Choose Run to run your job.
-
Navigate to the Runs tab to verify that your job completes.
-
Navigate to
amzn-s3-demo-bucket, the target forwrite_dynamic_frame.from_options. Confirm that the output matches your expectations.
For more information about configuring and managing jobs, see Providing your own custom scripts.
More information
Apache Spark libraries and methods are available in Amazon Glue scripts. You can look at the Spark
documentation to understand what you can do with those included libraries. For more information, see the
examples section of the
Spark source repository
Amazon Glue 2.0+ includes several common Python libraries by default. There are also mechanisms for loading your own dependencies into an Amazon Glue job in a Scala or Python environment. For information about Python dependencies, see Using Python libraries with Amazon Glue.
For more examples of how to use Amazon Glue features in Python, see Amazon Glue Python code samples. Scala and Python jobs have feature parity, so our Python examples should give you some thoughts about how to perform similar work in Scala.