Amazon Snowball Edge is no longer available to new customers. New customers should explore Amazon DataSync
Managing the NFS interface with Amazon OpsHub
Use the Network File System (NFS) interface to upload files to the Snowball Edge as if the device is local storage to your operating system. This allows for a more user-friendly approach to transferring data because you can use features of your operating system, like copying files, dragging and dropping them, or other graphical user interface features. Each S3 bucket on the device is available as an NFS interface endpoint and can be mounted to copy data to. The NFS interface is available for import jobs.
You can use the NFS interface if the Snowball Edge device was configured to include it when the job to order the device was created. If the device is not configured to include the NFS interface, use the S3 adapter or Amazon S3 compatible storage on Snowball Edge to transfer data. For more information about the S3 adapter, see Managing Amazon S3 adapter storage with Amazon OpsHub. For more information about Amazon S3 compatible storage on Snowball Edge, see Set up Amazon S3 compatible storage on Snowball Edge with Amazon OpsHub.
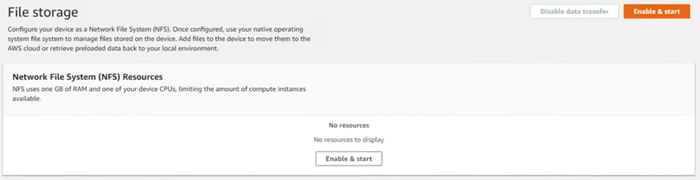
When started, the NFS interface uses 1 GB of memory and 1 CPU. This may limit the number of other services running on the Snowball Edge or the number of EC2-compatible instances that can run.
Data transferred through the NFS interface is not encrypted in transit. When configuring the NFS interface, you can provide CIDR blocks and the Snowball Edge will restrict access to the NFS interface from client computers with addresses in those blocks.
Files on the device will be transferred to Amazon S3 when it is returned to Amazon. For more information, see Importing Jobs into Amazon S3.
For more information about using NFS with your computer operating system, see the documentation for your operating system.
Keep the following details in mind when using the NFS interface.
The NFS interface provides a local bucket for data storage on the device. For import jobs, no data from the local bucket will be imported to Amazon S3.
File names are object keys in your local S3 bucket on the Snowball Edge. The key name is a sequence of Unicode characters whose UTF-8 encoding is at most 1,024 bytes long. We recommend using NFSv4.1 where possible and encode file names with Unicode UTF-8 to ensure a successful data import. File names that are not encoded with UTF-8 might not be uploaded to S3 or might be uploaded to S3 with a different file name depending on the NFS encoding you use.
Ensure that the maximum length of your file path is less than 1024 characters. Snowball Edge do not support file paths that are greater that 1024 characters. Exceeding this file path length will result in file import errors.
For more information, see Object keys in the Amazon Simple Storage Service User Guide.
-
For NFS based transfers, standard POSIX style metadata will be added to your objects as they get imported to Amazon S3 from Snowball Edge. In addition, you will see meta-data "x-amz-meta-user-agent aws-datasync" as we currently use Amazon DataSync as part of the internal import mechanism to Amazon S3 for Snowball Edge import with NFS option.
You can transfer up to 40M files using a single Snowball Edge device. If you require to transfer more than 40M files in a single job, please batch the files in order to reduce the file numbers per each transfer. Individual files can be of any size with a maximum file size of 5 TB for Snowball Edge devices with the enhanced NFS interface or the S3 interface.
You can also configure and manage the NFS interface with the Snowball Edge client, a command line interface (CLI) tool. For more information, see Managing the NFS interface.
Topics
Starting the NFS service on a Windows operating system
If your client computer is using the Windows 10 Enterprise or Windows 7 Enterprise operating system, start the NFS service on the client computer before configuring NFS in the Amazon OpsHub application.
On your client computer, open Start, choose Control Panel and choose Programs.
Choose Turn Windows features on or off.
Note
To turn Windows features on, you may need to provide an admin user name and password for your computer.
-
Under Services for NFS, choose Client for NFS and choose OK.
Configuring the NFS interface automatically with Amazon OpsHub
The NFS interface is not running on the Snowball Edge device by default, so you need to start it to enable data transfer on the device. With a few clicks, your Snowball Edge can quickly and automatically configure the NFS interface for you. You can also configure the NFS interface yourself. For more information, see Configuring the NFS interface manually with Amazon OpsHub.
In the Transfer data section on the dashboard, choose Enable & start. This could take a minute or two to complete.
-
When the NFS service is started, the IP address of the NFS interface is shown on the dashboard and the Transfer data section indicates that the service is active.
-
Choose Open in Explorer (if using a Windows or a Linux operating system) to open the file share in your operating system's file browser and start transferring files to the Snowball Edge. You can copy and paste or drag and drop files from your client computer into the file share. In Windows operating system, your file share looks like the following
buckets(\\12.123.45.679)(Z:).Note
In Linux operating systems, mounting NFS endpoints requires root permissions.
Configuring the NFS interface manually with Amazon OpsHub
The NFS interface is not running on the Snowball Edge device by default, so you need to start it to enable data transfer on the device. You can manually configure the NFS interface by providing the IP address of a Virtual Network Interface (VNI) running on the Snowball Edge device and restricting access to your file share, if required. Before configuring the NFS interface manually, set up a virtual network interface (VNI) on your Snowball Edge device. For more information, see Network Configuration for Compute Instances.
You can also have the Snowball Edge device configure the NFS interface automatically. For more information, see Configuring the NFS interface automatically with Amazon OpsHub.
-
At the bottom of Transfer data section, on the dashboard, choose Configure manually.
-
Choose Enable & start to open the Start NFS wizard. The Physical network interface field is populated.

-
Choose Create IP address (VNI) or choose Use existing IP address.
-
If you choose Create IP address (VNI), then choose DHCP or Static IP in the IP Address assignment list box.
Important
If you use a DHCP network, it is possible that the NFS interface's IP address could be reassigned by the DCHP server. This can happen after the device has been disconnected and the IP addresses are recycled. If you set an allowed host range and the address of the client changes, another client can pick up that address. In this case, the new client will have access to the share. To prevent this, use DHCP reservations or static IP addresses.
If you choose Use existing IP address, then choose a virtual network interface from the Virtual network interface list box.
-
Choose to restrict access to the NFS interface and provide a block of allowed network addresses, or allow any devices on the network to access the NFS interface on the Snowball Edge.
To restrict access to the NFS interface on the Snowball Edge, choose Restrict NFS to allowed hosts. In Allowed hosts enter a set of CIDR blocks. If you want to allow access to more than one CIDR block, enter another set of blocks. To remove a set of blocks, choose X next to the field containing the blocks. Choose Add allowed hosts.
Note
If you choose Restrict NFS to allowed hosts and do not provide allowed CIDR blocks, the Snowball Edge will deny all requests to mount the NFS interface.
To allow any device on the network to access the NFS interface, choose Allow all hosts.
To allow EC2-compatible instances running on the Snowball Edge to access the NFS adapter, choose Enable.
-
Choose Start NFS. It could take about a minute or two to start.
Important
Don't turn off the Snowball Edge while the NFS interface is starting.
From the Network File System (NFS) Resources section, the State of the NFS interface shows as Active. You will need the IP address listed to mount the interface as local storage on client computers.
Managing NFS endpoints on the Snowball Edge with Amazon OpsHub
Each S3 bucket on the Snowball Edge is represented as an endpoint and listed in Mount paths. After the NFS interface is started, mount an endpoint to transfer files to or from that endpoint. Only one endpoint can be mounted at a time. To mount a different endpoint, unmount the current endpoint first.
To mount an endpoint
In the Mount paths section, do one of the following to select an endpoint:
In the Filter endpoints field, enter all or part a bucket name to filter the list of available endpoints on your entry, then choose the endpoint.
Choose the endpoint to mount in the Mount paths list.
Choose Mount NFS endpoint. The Snowball Edge mounts the endpoint for use.
To unmount an endpoint
In the Mount paths section, choose the endpoint to unmount.
Choose Unmount endpoint. The Snowball Edge unmounts the endpoint and it is no longer available for use.
Note
Before unmounting an endpoint, ensure no data is being copied from or to it.
Mounting NFS endpoints on client computers
After the NFS interface is started and an endpoint mounted, mount the endpoint as local storage on client computers.
-
In Mount paths, choose the copy icon of the endpoint to mount. Paste it in your operating system when mounting the endpoint.
-
The following are the default mount commands for Windows, Linux, and macOS operating systems.
-
Windows:
mount -o nolock rsize=128 wsize=128 mtype=hardnfs-interface-ip-address:/buckets/BucketName*
-
Linux:
mount -t nfsnfs-interface-ip-address:/buckets/BucketNamemount_point
-
macOS:
mount -t nfs -o vers=3,rsize=131072,wsize=131072,nolocks,hard,retrans=2nfs-interface-ip-address:/buckets/$bucketnamemount_point
-
Stopping the NFS interface with Amazon OpsHub
Stop the NFS interface on the Snowball Edge device when you are done transferring files to or from it.
From the dashboard, choose Services and then choose File Storage.
-
On the File Storage page, choose Disable data transfer. It usually takes up to 2 minutes for the NFS endpoints to disappear from the dashboard.