本文属于机器翻译版本。若本译文内容与英语原文存在差异,则一律以英文原文为准。
调整你自己的推理容器以适应 Amazon AI SageMaker
如果您无法将 Pre-built SageMaker AI Docker 镜像 Amazon A SageMaker I 中列出的任何图像用于您的用例,则可以构建自己的 Docker 容器,然后在 SageMaker AI 中使用它进行训练和推理。为了与 SageMaker AI 兼容,您的容器必须具有以下特征:
-
您的容器必须在
8080端口列出网络服务器。 -
您的容器必须接受向
/invocations和/ping实时端点发出的POST请求。您向这些端点发送的请求对于常规响应必须在 60 秒内返回,对于流式响应则必须在 8 分钟内返回,且最大大小为 25 MB。
要了解更多信息以及如何构建自己的 Docker 容器以便使用 SageMaker AI 进行训练和推理的示例,请参阅构建自己的算法
以下指南向您展示了如何在 Amazon SageMaker Studio Classic 中使用JupyterLab空间来调整推理容器以使用 SageMaker AI 托管。此示例使用 NGINX 网络服务器、Gunicorn 作为 Python 网络服务器网关接口,以及 Flask 作为网络应用程序框架。您只要符合前面列出的要求,就可以使用不同的应用程序来调整您的容器。有关使用自己的推理代码的更多信息,请参阅 自定义托管服务的推理代码。
调整您的推理容器
使用以下步骤调整您自己的推理容器以使用 SageMaker AI 托管。以下步骤中的示例使用了预先训练好的命名实体识别 (NER) 模型Python 和以下操作:
-
Dockerfile 用于构建包含 NER 模型的容器。
-
为 NER 模型提供服务的推理脚本。
如果您根据自己的使用场景调整此示例,则必须使用部署和提供模型所需的 Dockerfile 和推理脚本。
-
使用 Amazon SageMaker Studio Classic(可选)创建 JupyterLab 空间。
您可以使用任何笔记本来运行脚本,以便通过 SageMaker AI 托管来调整您的推理容器。此示例向您展示如何使用 Amazon SageMaker Studio Classic 中的JupyterLab空间来启动带有 A SageMaker I 分发映像的JupyterLab应用程序。有关更多信息,请参阅 SageMaker JupyterLab。
-
上传 Docker 文件和推理脚本。
-
在您的主目录中创建一个新文件夹。如果您使用的是 JupyterLab,请在左上角选择新建文件夹图标,然后输入包含 Dockerfile 的文件夹名称。在此示例中,文件夹名为
docker_test_folder。 -
将 Dockerfile 文本文件上传到新文件夹。以下示例 Dockerfile 使用来自 spaCy
预训练的命名实体识别 (NER) 模型 、运行示例所需的应用程序和环境变量来创建 Docker 容器: FROM python:3.8 RUN apt-get -y update && apt-get install -y --no-install-recommends \ wget \ python3 \ nginx \ ca-certificates \ && rm -rf /var/lib/apt/lists/* RUN wget https://bootstrap.pypa.io/get-pip.py && python3 get-pip.py && \ pip install flask gevent gunicorn && \ rm -rf /root/.cache #pre-trained model package installation RUN pip install spacy RUN python -m spacy download en # Set environment variables ENV PYTHONUNBUFFERED=TRUE ENV PYTHONDONTWRITEBYTECODE=TRUE ENV PATH="/opt/program:${PATH}" COPY NER /opt/program WORKDIR /opt/program在前面的代码示例中,环境变量
PYTHONUNBUFFERED使 Python 不再缓冲标准输出流,从而可以更快地向用户发送日志。环境变量PYTHONDONTWRITEBYTECODE可防止 Python 写入编译字节码.pyc文件,而这种情况下不需要这些文件。环境变量PATH用于在调用容器时标识train和serve程序的位置。 -
在新文件夹内创建一个新目录,其中包含为模型提供服务的脚本。本示例使用名为
NER的目录,其中包含运行本示例所需的以下脚本:-
predictor.py:包含用于加载模型并对模型执行推理逻辑的 Python 脚本。 -
nginx.conf:用于配置网络服务器的脚本。 -
serve:启动推理服务器的脚本。 -
wsgi.py:用于为模型提供服务的辅助脚本。
重要
如果您将推理脚本复制到以
.ipynb结尾的笔记本中并重新命名,则脚本中可能会包含格式化字符,从而导致端点无法部署。而是创建一个文本文件并对其进行重命名。 -
-
上传脚本,使您的模型可用于推理。以下是一个名为
predictor.py的脚本示例,它使用 Flask 提供/ping和/invocations端点:from flask import Flask import flask import spacy import os import json import logging #Load in model nlp = spacy.load('en_core_web_sm') #If you plan to use a your own model artifacts, #your model artifacts should be stored in /opt/ml/model/ # The flask app for serving predictions app = Flask(__name__) @app.route('/ping', methods=['GET']) def ping(): # Check if the classifier was loaded correctly health = nlp is not None status = 200 if health else 404 return flask.Response(response= '\n', status=status, mimetype='application/json') @app.route('/invocations', methods=['POST']) def transformation(): #Process input input_json = flask.request.get_json() resp = input_json['input'] #NER doc = nlp(resp) entities = [(X.text, X.label_) for X in doc.ents] # Transform predictions to JSON result = { 'output': entities } resultjson = json.dumps(result) return flask.Response(response=resultjson, status=200, mimetype='application/json')如果模型加载正确,前面的脚本示例中的
/ping端点会返回状态代码200;如果模型加载错误,则返回状态代码404。/invocations端点处理以 JSON 为格式的请求,提取输入字段,并使用 NER 模型识别和存储变量实体中的实体。Flask 应用程序会返回包含这些实体的响应。有关这些必要运行状况正常要求的更多信息,请参阅 容器应如何响应运行状况检查 (Ping) 请求。 -
上传脚本以启动推理服务器。下面的脚本示例使用 Gunicorn 作为应用服务器和 Nginx 作为网络服务器调用
serve:#!/usr/bin/env python # This file implements the scoring service shell. You don't necessarily need to modify it for various # algorithms. It starts nginx and gunicorn with the correct configurations and then simply waits until # gunicorn exits. # # The flask server is specified to be the app object in wsgi.py # # We set the following parameters: # # Parameter Environment Variable Default Value # --------- -------------------- ------------- # number of workers MODEL_SERVER_WORKERS the number of CPU cores # timeout MODEL_SERVER_TIMEOUT 60 seconds import multiprocessing import os import signal import subprocess import sys cpu_count = multiprocessing.cpu_count() model_server_timeout = os.environ.get('MODEL_SERVER_TIMEOUT', 60) model_server_workers = int(os.environ.get('MODEL_SERVER_WORKERS', cpu_count)) def sigterm_handler(nginx_pid, gunicorn_pid): try: os.kill(nginx_pid, signal.SIGQUIT) except OSError: pass try: os.kill(gunicorn_pid, signal.SIGTERM) except OSError: pass sys.exit(0) def start_server(): print('Starting the inference server with {} workers.'.format(model_server_workers)) # link the log streams to stdout/err so they will be logged to the container logs subprocess.check_call(['ln', '-sf', '/dev/stdout', '/var/log/nginx/access.log']) subprocess.check_call(['ln', '-sf', '/dev/stderr', '/var/log/nginx/error.log']) nginx = subprocess.Popen(['nginx', '-c', '/opt/program/nginx.conf']) gunicorn = subprocess.Popen(['gunicorn', '--timeout', str(model_server_timeout), '-k', 'sync', '-b', 'unix:/tmp/gunicorn.sock', '-w', str(model_server_workers), 'wsgi:app']) signal.signal(signal.SIGTERM, lambda a, b: sigterm_handler(nginx.pid, gunicorn.pid)) # Exit the inference server upon exit of either subprocess pids = set([nginx.pid, gunicorn.pid]) while True: pid, _ = os.wait() if pid in pids: break sigterm_handler(nginx.pid, gunicorn.pid) print('Inference server exiting') # The main routine to invoke the start function. if __name__ == '__main__': start_server()前面的脚本示例定义了一个信号处理函数
sigterm_handler,此函数在收到SIGTERM信号时会关闭 Nginx 和 Gunicorn 子进程。start_server函数启动信号处理器,启动和监控 Nginx 和 Gunicorn 子进程,并捕获日志流。 -
上传脚本以配置您的网络服务器。下面名为
nginx.conf的脚本示例配置了一个 Nginx 网络服务器,将 Gunicorn 作为应用服务器,为您的推理模型提供服务:worker_processes 1; daemon off; # Prevent forking pid /tmp/nginx.pid; error_log /var/log/nginx/error.log; events { # defaults } http { include /etc/nginx/mime.types; default_type application/octet-stream; access_log /var/log/nginx/access.log combined; upstream gunicorn { server unix:/tmp/gunicorn.sock; } server { listen 8080 deferred; client_max_body_size 5m; keepalive_timeout 5; proxy_read_timeout 1200s; location ~ ^/(ping|invocations) { proxy_set_header X-Forwarded-For $proxy_add_x_forwarded_for; proxy_set_header Host $http_host; proxy_redirect off; proxy_pass http://gunicorn; } location / { return 404 "{}"; } } }前面的脚本示例将 Nginx 配置为在前台运行,设置了捕获
error_log的位置,并将upstream定义为 Gunicorn 服务器的套接字。服务器会配置服务器块以监听8080端口,并设置客户端请求正文大小和超时值的限制。服务器块会将包含/ping或/invocations路径的请求转发给 Gunicornserver http://gunicorn,对于其他路径则返回404错误。 -
上传为模型提供服务所需的任何其他脚本。此示例需要以下名为
wsgi.py的示例脚本来帮助 Gunicorn 找到您的应用程序:import predictor as myapp # This is just a simple wrapper for gunicorn to find your app. # If you want to change the algorithm file, simply change "predictor" above to the # new file. app = myapp.app
从文件夹
docker_test_folder开始,您的目录结构应包含 Dockerfile 和文件夹 NER。NER 文件夹应包含以下文件nginx.conf、predictor.py、serve和wsgi.py: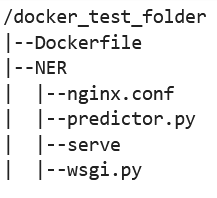
-
-
构建自己的容器。
在
docker_test_folder文件夹中,创建 Docker 容器。下面的示例命令将构建在 Dockerfile 中配置的 Docker 容器:! docker build -t byo-container-test .前面的命令将在当前工作目录下创建一个名为
byo-container-test的容器。有关 Docker 构建参数的更多信息,请参阅构建参数。 注意
如果您收到以下错误消息,提示 Docker 找不到 Dockerfile,请确保 Dockerfile 的名称正确并已保存到目录中。
unable to prepare context: unable to evaluate symlinks in Dockerfile path:
lstat /home/ec2-user/SageMaker/docker_test_folder/Dockerfile: no such file or directory
Docker 在当前目录中查找名为 Dockerfile 的文件,没有任何扩展名。如果您将其改为其他名称,可以使用 -f 标记手动传入文件名。例如,如果您将 Dockerfile 命名为 Dockerfile-text.txt,使用
-f标记构建 Docker 容器,并在后面添加您的文件,如下所示:! docker build -t byo-container-test -f Dockerfile-text.txt . -
将 Docker 映像推送到 Amazon Elastic Container Registry (Amazon ECR)
在笔记本单元中,将 Docker 映像推送到 ECR。下面的代码示例显示了如何在本地构建容器、登录并将其推送到 ECR:
%%sh
# Name of algo -> ECR
algorithm_name=sm-pretrained-spacy

#make serve executable
chmod +x NER/serve
account=$(aws sts get-caller-identity --query Account --output text)
# Region, defaults to us-west-2
region=$(aws configure get region)
region=${region:-us-east-1}
fullname="${account}.dkr.ecr.${region}.amazonaws.com/${algorithm_name}:latest"
# If the repository doesn't exist in ECR, create it.
aws ecr describe-repositories --repository-names "${algorithm_name}" > /dev/null 2>&1
if [ $? -ne 0 ]
then
    aws ecr create-repository --repository-name "${algorithm_name}" > /dev/nullfi
# Get the login command from ECR and execute it directly
aws ecr get-login-password --region ${region}|docker login --username AWS --password-stdin ${fullname}
# Build the docker image locally with the image name and then push it to ECR
# with the full name.

docker build  -t ${algorithm_name} .
docker tag ${algorithm_name} ${fullname}

docker push ${fullname}
前面的示例显示了如何执行以下必要步骤,将示例 Docker 容器推送到 ECR:
-
将算法名称定义为
sm-pretrained-spacy。 -
将 NER 文件夹中的
serve文件设为可执行文件。 -
设置 Amazon Web Services 区域.
-
如果 ECR 还不存在,则创建 ECR。
-
登录 ECR。
-
在本地构建 Docker 容器。
-
将 Docker 映像推送到 ECR。
-
-
设置 SageMaker AI 客户端
如果要使用 SageMaker AI 托管服务进行推理,则必须创建模型、创建
终端节点配置并创建终端 节 点。为了从您的终端节点获取推论,您可以使用 SageMaker AI boto3 Runtime 客户端来调用您的终端节点。以下代码向您展示了如何使用 SageMaker AI boto3 客户端设置 A SageMaker I 客户端和 SageMaker 运行时客户端: import boto3 from sagemaker import get_execution_role sm_client = boto3.client(service_name='sagemaker') runtime_sm_client = boto3.client(service_name='sagemaker-runtime') account_id = boto3.client('sts').get_caller_identity()['Account'] region = boto3.Session().region_name #used to store model artifacts which SageMaker AI will extract to /opt/ml/model in the container, #in this example case we will not be making use of S3 to store the model artifacts #s3_bucket = '<S3Bucket>' role = get_execution_role()在前面的代码示例中,未使用 Amazon S3 存储桶,而是作为注释插入,以显示如何存储模型构件。
如果您在运行前面的代码示例后出现权限错误,则可能需要为 IAM 角色添加权限。有关 IAM 角色的更多信息,请参阅 Amazon SageMaker 角色管理器。有关为当前角色添加权限的更多信息,请参阅 Amazon 亚马逊 A SageMaker I 的托管策略。
-
创建模型。
如果要使用 SageMaker AI 托管服务进行推理,则必须在 SageMaker AI 中创建模型。以下代码示例向您展示了如何在 SageMaker AI 中创建spaCyNER模型:
from time import gmtime, strftime

model_name = 'spacy-nermodel-' + strftime("%Y-%m-%d-%H-%M-%S", gmtime())
# MODEL S3 URL containing model atrifacts as either model.tar.gz or extracted artifacts.
# Here we are not
#model_url = 's3://{}/spacy/'.format(s3_bucket)

container = '{}.dkr.ecr.{}.amazonaws.com/sm-pretrained-spacy:latest'.format(account_id, region)
instance_type = 'ml.c5d.18xlarge'

print('Model name: ' + model_name)
#print('Model data Url: ' + model_url)
print('Container image: ' + container)

container = {
'Image': container
}

create_model_response = sm_client.create_model(
    ModelName = model_name,
    ExecutionRoleArn = role,
    Containers = [container])

print("Model Arn: " + create_model_response['ModelArn'])
前面的代码示例说明了如果您要使用步骤 5 中注释中的 Amazon S3 存储桶,如何使用
s3_bucket定义model_url,并定义容器映像的 ECR URI。前面的代码示例将ml.c5d.18xlarge定义为实例类型。您还可以选择不同的实例类型。有关可用实例类型的更多信息,请参阅 Amazon EC2 实例类型。 在前面的代码示例中,
Image键指向容器映像 URI。create_model_response定义使用create_model method创建模型,并返回模型名称、角色和包含容器信息的列表。前面脚本的输出示例如下:
Model name: spacy-nermodel-YYYY-MM-DD-HH-MM-SS Model data Url: s3://spacy-sagemaker-us-east-1-bucket/spacy/ Container image: 123456789012.dkr.ecr.us-east-2.amazonaws.com/sm-pretrained-spacy:latest Model Arn: arn:aws:sagemaker:us-east-2:123456789012:model/spacy-nermodel-YYYY-MM-DD-HH-MM-SS -
-
配置和创建端点
要使用 SageMaker AI 托管进行推理,您还必须配置和创建终端节点。 SageMaker AI 将使用此端点进行推理。下面的配置示例说明了如何使用您之前定义的实例类型和模型名称生成和配置端点:
endpoint_config_name = 'spacy-ner-config' + strftime("%Y-%m-%d-%H-%M-%S", gmtime())
print('Endpoint config name: ' + endpoint_config_name)

create_endpoint_config_response = sm_client.create_endpoint_config(
    EndpointConfigName = endpoint_config_name,
    ProductionVariants=[{
        'InstanceType': instance_type,
        'InitialInstanceCount': 1,
        'InitialVariantWeight': 1,
        'ModelName': model_name,
        'VariantName': 'AllTraffic'}])

print("Endpoint config Arn: " + create_endpoint_config_response['EndpointConfigArn'])
在前面的配置示例中,
create_endpoint_config_response将model_name与使用时间戳创建的唯一的端点配置名称endpoint_config_name关联。前面脚本的输出示例如下:
Endpoint config name: spacy-ner-configYYYY-MM-DD-HH-MM-SS Endpoint config Arn: arn:aws:sagemaker:us-east-2:123456789012:endpoint-config/spacy-ner-config-MM-DD-HH-MM-SS有关终端节点错误的更多信息,请参阅创建或更新终端节点时,为什么我的 SageMaker Amazon AI 终端节点会进入故障状态?
-
创建端点并等待端点投入使用。
下面的代码示例使用前面的配置示例中的配置创建了端点,并部署了模型:
%%time

import time

endpoint_name = 'spacy-ner-endpoint' + strftime("%Y-%m-%d-%H-%M-%S", gmtime())
print('Endpoint name: ' + endpoint_name)

create_endpoint_response = sm_client.create_endpoint(
    EndpointName=endpoint_name,
    EndpointConfigName=endpoint_config_name)
print('Endpoint Arn: ' + create_endpoint_response['EndpointArn'])

resp = sm_client.describe_endpoint(EndpointName=endpoint_name)
status = resp['EndpointStatus']
print("Endpoint Status: " + status)

print('Waiting for {} endpoint to be in service...'.format(endpoint_name))
waiter = sm_client.get_waiter('endpoint_in_service')
waiter.wait(EndpointName=endpoint_name)
在前面的代码示例中,
create_endpoint方法使用前面的代码示例中生成的端点名称创建端点,并打印端点的 Amazon 资源名称。describe_endpoint方法返回有关端点及其状态的信息。A SageMaker I 服务员等待端点投入使用。
-
-
测试端点。
端点投入使用后,向端点发送调用请求
。下面的代码示例说明了如何向端点发送测试请求: import json content_type = "application/json" request_body = {"input": "This is a test with NER in America with \ Amazon and Microsoft in Seattle, writing random stuff."} #Serialize data for endpoint #data = json.loads(json.dumps(request_body)) payload = json.dumps(request_body) #Endpoint invocation response = runtime_sm_client.invoke_endpoint( EndpointName=endpoint_name, ContentType=content_type, Body=payload) #Parse results result = json.loads(response['Body'].read().decode())['output'] result在前面的代码示例中,方法
json.dumps将request_body序列化为 JSON 格式的字符串,并将其保存到有效载荷变量中。然后, SageMaker AI Runtime 客户端使用调用端点方法向您的终端节点发送有效负载。结果包含端点提取输出字段后的响应。 前面的代码示例应返回以下输出结果:
[['NER', 'ORG'], ['America', 'GPE'], ['Amazon', 'ORG'], ['Microsoft', 'ORG'], ['Seattle', 'GPE']] -
删除端点
完成调用后,请删除端点以节省资源。下面的代码示例说明了如何删除端点:
sm_client.delete_endpoint(EndpointName=endpoint_name) sm_client.delete_endpoint_config(EndpointConfigName=endpoint_config_name) sm_client.delete_model(ModelName=model_name)有关包含此示例中代码的完整笔记本,请参阅BYOC-Single-Model
。